In the previous tutorial, I showed you how to implement the Timeout Pattern with the Resilience4j TimeLimiter library. For Spring Boot applications, there is currently no official Spring Boot starter supporting the Resilience4j library, but there is a starter of the Resilience4j library supporting this, named resilience4j-spring-boot3. In this tutorial, I will show you how to implement the Timeout Pattern with the Resilience4j TimeLimiter library in the Spring Boot application using resilience4j-spring-boot3 starter!
First, I will create a new Spring Boot project with Web starter dependency as follows:
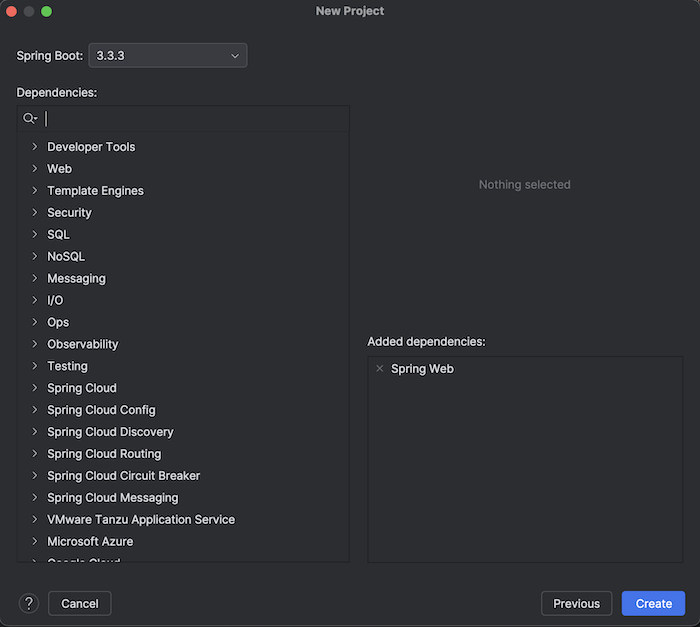
Result:
To use resilience4j-spring-boot3 starter, you need to declare the use of Spring Boot’s AOP starter dependency as follows:
|
1 2 3 4 5 6 7 8 9 10 |
<dependency> <groupId>org.springframework.boot</groupId> <artifactId>spring-boot-starter-aop</artifactId> </dependency> <dependency> <groupId>io.github.resilience4j</groupId> <artifactId>resilience4j-spring-boot3</artifactId> <version>2.2.0</version> </dependency> |
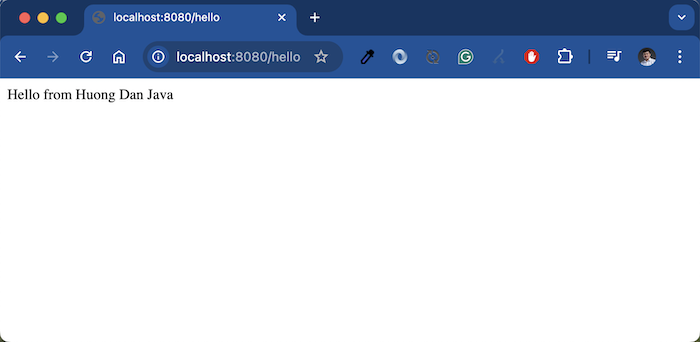
Now, I will implement a simple RESTful API application with the request “/hello” returning the text “Hello from Huong Dan Java” as follows:
|
1 2 3 4 5 6 7 8 9 10 11 12 13 14 |
package com.huongdanjava.springboot.resilience4j; import org.springframework.web.bind.annotation.GetMapping; import org.springframework.web.bind.annotation.RestController; @RestController public class HelloController { @GetMapping("/hello") public String hello() { return "Hello from Huong Dan Java"; } } |
The result when I run the application and request to the address “http://localhost:8080/hello” is as follows:
To simulate that sometimes, when calling this request, the response time will be slow, I will refactor the code a bit. I will move the code that returns the text “Hello from Huong Dan Java” to a separate method and use the RandomGenerator class to generate random boolean values true or false. If this random value is true, this method will sleep for 10s before returning this text to the object that called it, as follows:
|
1 2 3 4 5 6 7 8 9 10 11 12 13 14 15 16 17 18 19 20 21 22 |
package com.huongdanjava.springboot.resilience4j; import java.util.random.RandomGenerator; import org.springframework.web.bind.annotation.GetMapping; import org.springframework.web.bind.annotation.RestController; @RestController public class HelloController { @GetMapping("/hello") public String hello() throws InterruptedException { return response(); } private String response() throws InterruptedException { if (RandomGenerator.getDefault().nextBoolean()) { Thread.sleep(10000); } return "Hello from Huong Dan Java"; } } |
Now we will use the Resilience4j TimeLimiter library to implement the Timeout Pattern for this application. If the request handling time is more than 3s, we will return a timeout error to the user!
With the resilience4j-spring-boot3 starter, you do not need to declare the TimeLimiterRegistry object manually anymore, this starter will do it for us. What we need to do is use some properties that this starter provides to configure the TimeLimiter objects.
To configure all TimeLimiter objects, you can use the properties starting with “resilience4j.timelimiter.configs.default” as follows:
|
1 2 |
resilience4j.timelimiter.configs.default.timeout-duration=3s resilience4j.timelimiter.configs.default.cancel-running-future=true |
As you can see, it’s similar to when we use the TimeLimiterConfig class!
To configure each TimeLimiter object, you use properties starting with “resilience4j.timelimiter.instances” for example as follows:
|
1 |
resilience4j.timelimiter.instances.hello.base-config=default |
Or:
|
1 2 |
resilience4j.timelimiter.instances.hello.timeout-duration=3s resilience4j.timelimiter.instances.hello.cancel-running-future=false |
With “hello” is the name of the TimeLimiter object.
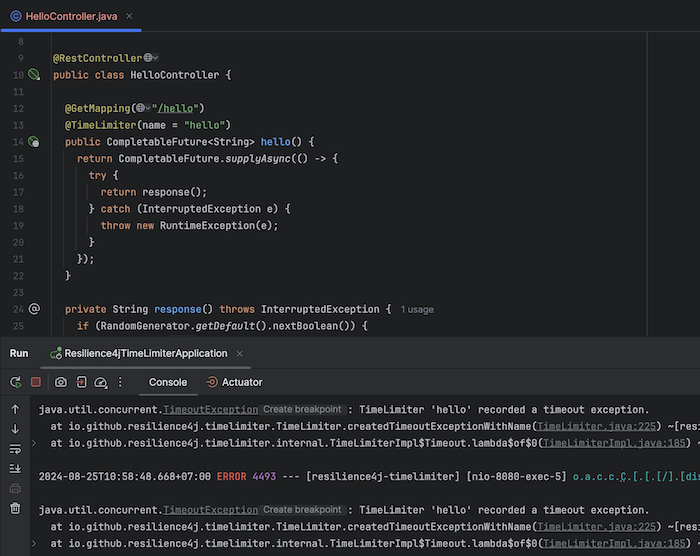
We apply these configurations to the “/hello” endpoint by declaring the @TimeLimiter annotation in the HelloController class as follows:
|
1 2 3 4 5 6 7 8 9 10 11 12 13 14 15 16 17 18 19 20 21 22 23 24 25 26 27 28 29 30 31 |
package com.huongdanjava.springboot.resilience4j; import io.github.resilience4j.timelimiter.annotation.TimeLimiter; import java.util.concurrent.CompletableFuture; import java.util.random.RandomGenerator; import org.springframework.web.bind.annotation.GetMapping; import org.springframework.web.bind.annotation.RestController; @RestController public class HelloController { @GetMapping("/hello") @TimeLimiter(name = "hello") public CompletableFuture<String> hello() { return CompletableFuture.supplyAsync(() -> { try { return response(); } catch (InterruptedException e) { throw new RuntimeException(e); } }); } private String response() throws InterruptedException { if (RandomGenerator.getDefault().nextBoolean()) { Thread.sleep(10000); } return "Hello from Huong Dan Java"; } } |
As you can see, I also changed the content of the hello() method to use the CompletableFuture interface.
Now, if you run the application and request to the address “http://localhost:8080/hello”, if the request processing time is more than 3s, you will see the following timeout error:
To handle this error, you can either define a Global Exception Handler, for example as follows:
|
1 2 3 4 5 6 7 8 9 10 11 12 13 14 15 16 17 |
package com.huongdanjava.springboot.resilience4j; import java.util.concurrent.TimeoutException; import org.springframework.http.HttpStatus; import org.springframework.web.bind.annotation.ControllerAdvice; import org.springframework.web.bind.annotation.ExceptionHandler; import org.springframework.web.bind.annotation.ResponseStatus; @ControllerAdvice public class GlobalErrorHandler { @ExceptionHandler(TimeoutException.class) @ResponseStatus(HttpStatus.REQUEST_TIMEOUT) public void handleTimeoutException() { System.out.println("Request timed out"); } } |
to return to the consumer HTTP status code 408 and the error response message of your choice!
Or you can also define a fallback method:
|
1 2 3 |
private CompletableFuture<String> fallback(Throwable throwable) { return CompletableFuture.supplyAsync(() -> "Hello World"); } |
then declare the fallback method in the @TimeLimiter annotation as follows:
|
1 2 3 4 5 6 7 8 9 10 11 12 13 14 15 16 17 18 19 20 21 22 23 24 25 26 27 28 29 30 31 32 33 34 35 |
package com.huongdanjava.springboot.resilience4j; import io.github.resilience4j.timelimiter.annotation.TimeLimiter; import java.util.concurrent.CompletableFuture; import java.util.random.RandomGenerator; import org.springframework.web.bind.annotation.GetMapping; import org.springframework.web.bind.annotation.RestController; @RestController public class HelloController { @GetMapping("/hello") @TimeLimiter(name = "hello", fallbackMethod = "fallback") public CompletableFuture<String> hello() { return CompletableFuture.supplyAsync(() -> { try { return response(); } catch (InterruptedException e) { throw new RuntimeException(e); } }); } private String response() throws InterruptedException { if (RandomGenerator.getDefault().nextBoolean()) { Thread.sleep(10000); } return "Hello from Huong Dan Java"; } private CompletableFuture<String> fallback(Throwable throwable) { return CompletableFuture.supplyAsync(() -> "Hello World"); } } |
so that in case of an error, the fallback method will be called to return the result to the consumer.
Remember that the fallback method needs to declare the Throwable parameter!
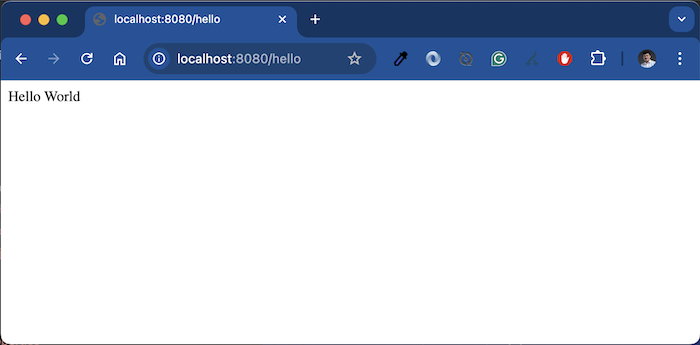
For my example, you will see the result in case of a timeout error as follows:
In case, you define a Global Exception Handler for TimeoutException and also declare a fallback method, the fallback method will still be used!
And, as I said in the tutorial Implement Timeout Pattern with Resilience4j TimeLimiter library, the task used with CompletableFuture will not be canceled when TimeoutException occurs!