Log4j is a logging framework used to track what information we want when our application is run. In this tutorial, we will look at the overview of Log4j 1.x and its components.
Create project
For you to imagine, I will create a Maven project using Log4j, the structure of the project as follows:
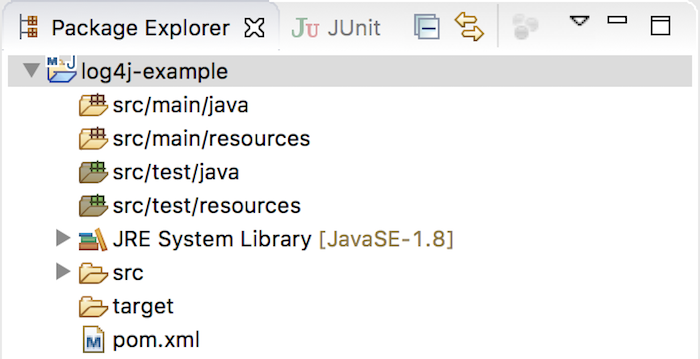
Next, I will add the dependency of Log4j to our project by editing the Maven pom.xml file as follows:
|
1 2 3 4 5 6 7 |
<dependencies> <dependency> <groupId>log4j</groupId> <artifactId>log4j</artifactId> <version>1.2.17</version> </dependency> </dependencies> |
After adding, our project will have the following dependencies:
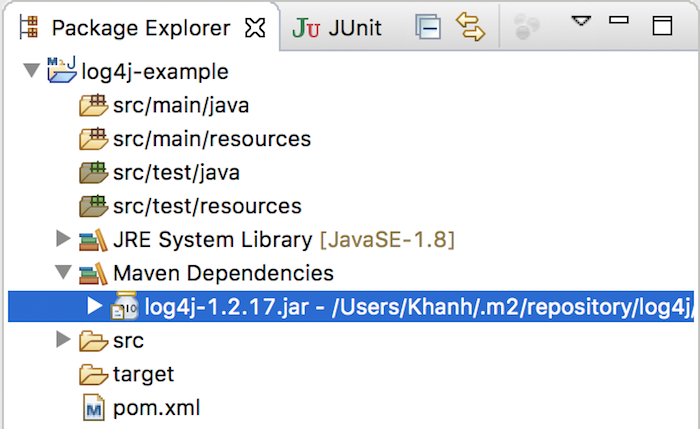
To work with Log4j version 1.x, we need a configuration file for it with the default name of log4j.xml located in the /src/main/resources directory. Now, I will create this file:
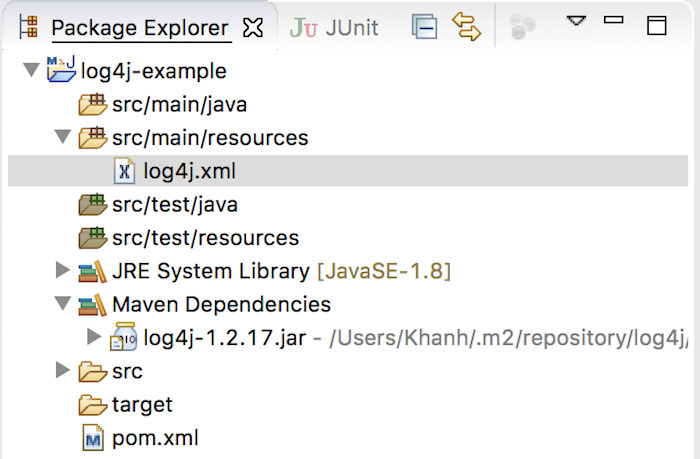
And add an example of the configuration needed for Log4j so that it can work. The contents of my log4j.xml file are as follows:
|
1 2 3 4 5 6 7 8 9 10 11 12 13 14 15 16 17 18 19 20 |
<?xml version="1.0" encoding="UTF-8"?> <!DOCTYPE log4j:configuration PUBLIC "-//APACHE//DTD LOG4J 1.2//EN" "log4j.dtd"> <log4j:configuration xmlns:log4j="http://jakarta.apache.org/log4j/"> <!-- Appenders --> <appender name="console" class="org.apache.log4j.ConsoleAppender"> <param name="Target" value="System.out" /> <layout class="org.apache.log4j.PatternLayout"> <param name="ConversionPattern" value="%-5p: %c - %m%n" /> </layout> </appender> <!-- Root Logger --> <root> <priority value="info" /> <appender-ref ref="console" /> </root> </log4j:configuration> |
Now, I’m going to create a Log4jExample class so that when I run, this class will use Log4j and print to the console the message “Welcome to Log4j!”.
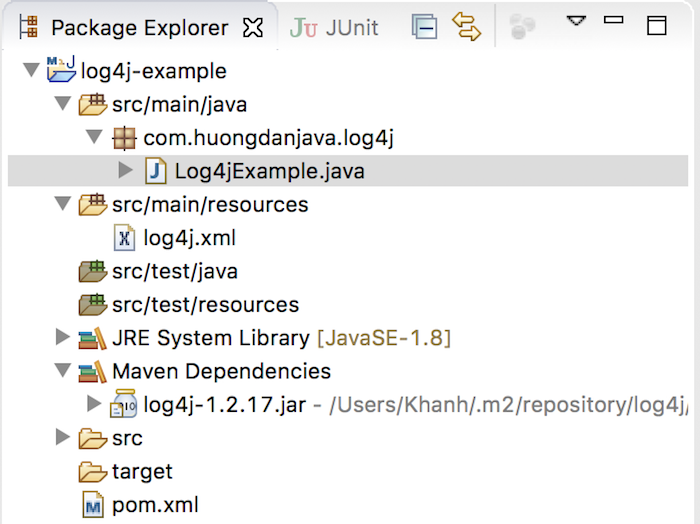
The contents of the Log4jExample class are as follows:
|
1 2 3 4 5 6 7 8 9 10 11 12 |
package com.huongdanjava.log4j; import org.apache.log4j.Logger; public class Log4jExample { private static Logger logger = Logger.getLogger(Log4jExample.class); public static void main(String[] args) { logger.info("Welcome to Log4j!"); } } |
Result:
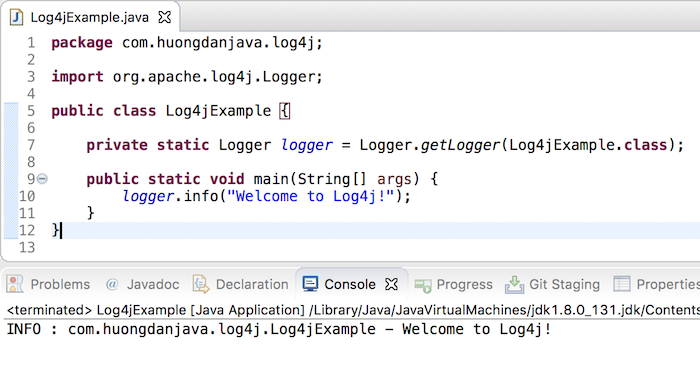
As you can see, with just as many steps as above, we were able to work with Log4j. In the next section, we will look at the overview of the components of Log4j corresponding to the example we just made!
Log4j components
Log4j has three main components for it to work:
Logger object: takes care of defining what information to log.
In our example, the Logger object is used in the Log4jExample class to log “Welcome to Log4j!”.
In addition, we have an object called Root Logger that defines the common configuration for all Logger objects in our application. In the log4j.xml file, you see that we have a <root> tag, which is the tag that defines the configuration for the Root Logger.
Appender object: take care of where information is logged.
In the log4j.xml file of the example above, I have defined an Appender object, ConsoleAppender, to write log information to the console.
Layout object: takes care of defining the format of the log information.
In the ConsoleAppender object in the example above, I used the PatternLayout object to format the log information.
And support components, including:
- Level object: defines the priority of the log information. This object defines 7 levels of log information: OFF, DEBUG, INFO, ERROR, WARN, FATAL and ALL.
- Filter object: This object is used to analyze the information and decide whether or not the information needs to be logged.
- ObjectRenderer object: is used to define a Java object that is logged as a string.
- LogManager object: This object is used to manage the logging framework.


