Google Pub/Sub is one of the cloud messaging services that we can use if your application has features that require using messaging technology. In this article, I will show you how to publish a message to Google Pub/Sub topic using the Pub/Sub Java client library!
First, I will create a new Maven project:
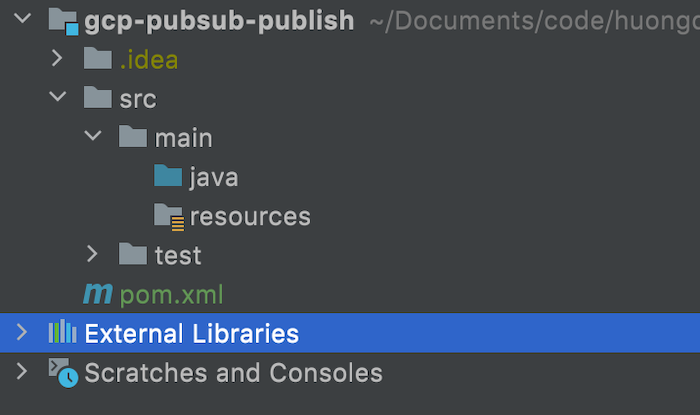
for example.
The Google Pub/Sub client dependency is as follows:
|
1 2 3 4 5 6 7 |
<dependencies> <dependency> <groupId>com.google.cloud</groupId> <artifactId>google-cloud-pubsub</artifactId> <version>1.116.0</version> </dependency> </dependencies> |
I will create a new class with main() method as an example:
|
1 2 3 4 5 6 7 |
package com.huongdanjava.gcppubsub; public class Application { public static void main(String[] args) { } } |
As an example, I will also create a new topic on Google Pub/Sub with the following information about the project ID and topic ID:
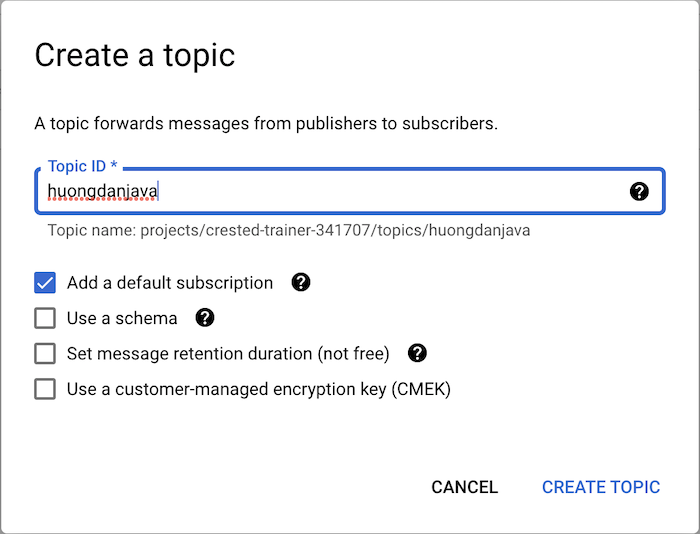
To start, we will declare this information in the code as follows:
|
1 2 |
String projectId = "crested-trainer-341707"; String topicId = "huongdanjava"; |
To publish a message to a topic, we need the TopicName object of the Google Pub/Sub client library. You initialize this object from the project ID and topic ID as follows:
|
1 |
TopicName topicName = TopicName.of(projectId, topicId); |
After we have the TopicName, we will initialize the Publisher object to prepare to publish the message:
|
1 |
Publisher publisher = Publisher.newBuilder(topicName).build(); |
The publish() method of the Publisher object will help us to publish the message. The parameter of this method is a PubsubMessage object, created from the message we want to publish as follows:
|
1 2 3 4 5 6 7 |
String message = "Hello"; ByteString data = ByteString.copyFromUtf8(message); // @formatter:off PubsubMessage pubsubMessage = PubsubMessage.newBuilder() .setData(data) .build(); // @formatter:on |
Now you can publish messages:
|
1 |
publisher.publish(pubsubMessage); |
The entire code is as follows:
|
1 2 3 4 5 6 7 8 9 10 11 12 13 14 15 16 17 18 19 20 21 22 23 24 25 26 27 28 29 30 31 32 33 34 35 |
package com.huongdanjava.gcppubsub; import com.google.api.core.ApiFuture; import com.google.cloud.pubsub.v1.Publisher; import com.google.protobuf.ByteString; import com.google.pubsub.v1.PubsubMessage; import com.google.pubsub.v1.TopicName; import java.io.IOException; import java.util.concurrent.ExecutionException; public class Application { public static void main(String[] args) throws IOException, ExecutionException, InterruptedException { String projectId = "crested-trainer-341707"; String topicId = "huongdanjava"; TopicName topicName = TopicName.of(projectId, topicId); Publisher publisher = Publisher.newBuilder(topicName).build(); String message = "Hello"; ByteString data = ByteString.copyFromUtf8(message); // @formatter:off PubsubMessage pubsubMessage = PubsubMessage.newBuilder() .setData(data) .build(); // @formatter:on ApiFuture<String> publish = publisher.publish(pubsubMessage); String messageId = publish.get(); System.out.println("Published message ID: " + messageId); } } |
Here, as you can see, I also added code to get the result of whether the message publishing was successful or not? Using Google Pub/Sub’s ApiFuture interface extends from Java’s Future interface.
Before running this example, we need to do one more step to configure the authentication for the application with Google Pub/Sub.
Google Pub/Sub supports us with 2 types of authentication: using Service Account or Access Control with IAM. Usually, we will use Service Account to do this.
You can use a Service Account with Role Pub/Sub Admin to publish messages to Pub/Sub topic as follows:
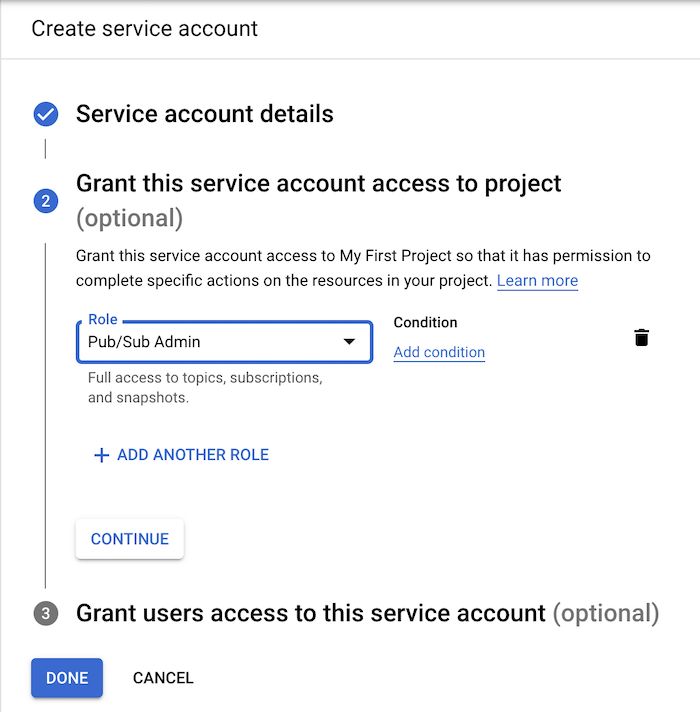
There is another Role, Pub/Sub Publisher, just to publish messages, but I don’t understand why it doesn’t work, can’t send messages with this Role. If you know the reason, please share!
After adding the key for this Service Account with type JSON or P12, this private key file will be saved to your computer.
You just need to set an environment variable in your machine or in the application configuration section of the IDE with the name GOOGLE_APPLICATION_CREDENTIALS. The value of this environment variable points to the path of the above private key file.
My example is as follows:
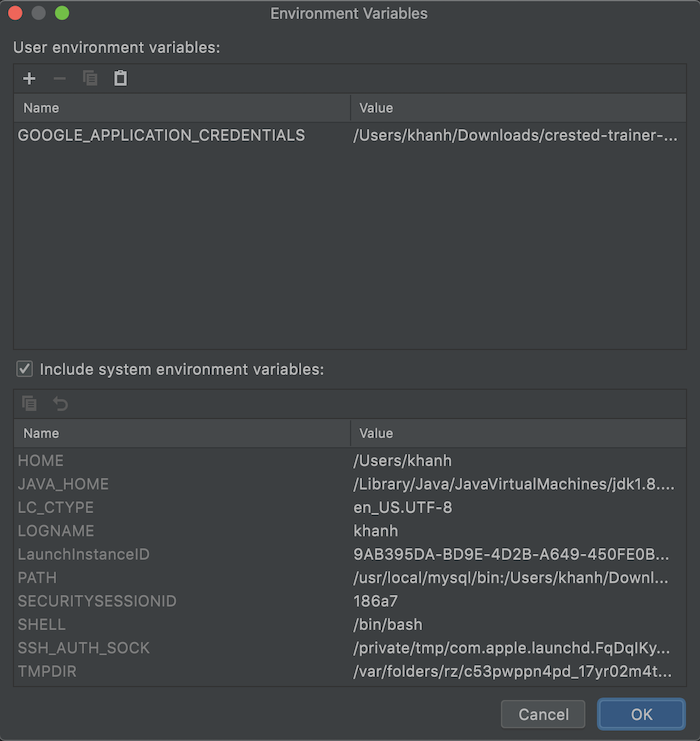
Now if you run the application and check the topic, you will see the following results:
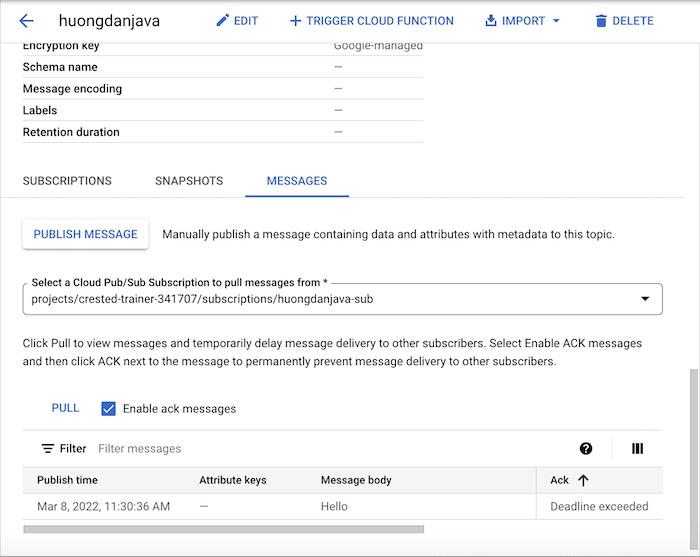
As you can see, a message has been published to our topic!


