I introduced you to MuleSoft, a low code platform that helps us implement Enterprise Service Bus applications with multiple Enterprise Integration Patterns easily. The problem is that MuleSoft is not free although it also has a community version so we need less expensive solutions. One of the solutions that I want to introduce to you in this tutorial is Spring Integration. How is it in detail? Let’s find out together in this tutorial!
Spring Integration basics
The first thing you need to know is that, similar to MuleSoft, Spring Integration helps us to implement middleware applications, integrating applications in a system together. It uses a messaging strategy to hold and communicate information between components in middleware applications or between applications.
The main concepts in Spring Integration that you need to know are Message, Message Channel and Message Endpoint. A message will be sent to a Message Endpoint, Message Endpoints will be connected to each other through Message Channels, and a Message Endpoint can receive Messages from a Message Channel.

Message
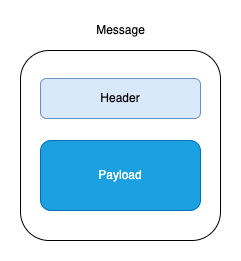
A Message in Spring Integration will contain information that through each Endpoint, that information may be changed. The structure of a Message including Header and Payload is as follows:

Interface Message of Spring Integration defines this Message information!
|
1 2 3 4 5 6 7 8 |
package org.springframework.messaging; public interface Message<T> { T getPayload(); MessageHeaders getHeaders(); } |
The main implementation of this Message interface is the GenericMessage class.
Usually, the Message Header will contain the overview information about the message. As you can see, the MessageHeaders class will contain this overview information. In essence, this MessageHeaders class implements the Map interface with information as key and value pairs. Please note that the MessageHeaders class is an immutable class, we cannot change the information in the Header once the Message has been initialized.
The payload will contain the main information of the Message, defined using any Java data type you want.
Message Channel
Message Channel is used to connect Message Endpoints together, Message Endpoints will use Message Channel to transmit Messages to each other.
A Message Channel can have one (Point-to-Point Message Channel) or multiple Message Endpoints subscribed to, to receive Messages.
A Message Endpoint will typically have an Inbound Message Channel and an Outbound Message Channel. If a Message Endpoint does not have an Outbound Message Channel, Spring Integration will automatically create a temporary Message Channel to return the results.
Message Endpoint
Every time a Message gets a Message Endpoint handle, depending on the business requirement, the Message will be enriched, transformed and changed the information it holds.
For example, if your Message contains the ID of the student, which needs to get information in the database, then when going through the Message Endpoint to get information from the database, the Message in the Outbound Message Channel of the Message Endpoint which gets information from this database, will contain the Student information, no longer contains the student ID.
Message Endpoints can be:
- Channel adapter: connects the application to an external system in one direction, only sending out Messages, not receiving response Messages.
- Gateway: connects the application to an external system in two ways, sending out Messages and receiving response Messages.
- Service Activator: used to call a method of a Java object.
- Transformer: transforms the content of a Message.
- Filter: determine whether to continue processing the Message or not?
- Router: decides which Message Channel the Message should be sent to.
- Splitter: split the Message into several parts.
- Aggregator: combine several Messages into a single Message.
Example application
To have a glimpse of how Spring Integration works, I will do a basic application, every 5 seconds, it will send a Message with the payload being my name from one Message Endpoint to another for that other Message Endpoint to print “Hello Khanh from Huong Dan Java”!
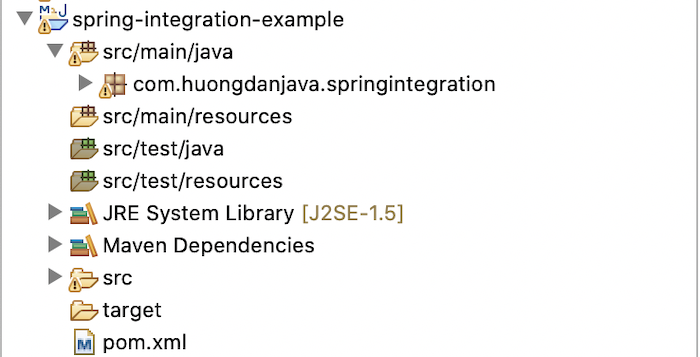
I will create a Maven project

with Spring Integration dependency for example:
|
1 2 3 4 5 |
<dependency> <groupId>org.springframework.integration</groupId> <artifactId>spring-integration-core</artifactId> <version>5.5.15</version> </dependency> |
There are 2 ways to configure Spring Integration: using an XML file and using Java code. In this tutorial, we will use XML file.
I will create a new file spring-integration.xml in the src/main/resources directory to configure Spring Integration, with the initial content as follows:
|
1 2 3 4 5 6 7 8 |
<?xml version="1.0" encoding="UTF-8"?> <beans xmlns="http://www.springframework.org/schema/beans" xmlns:xsi="http://www.w3.org/2001/XMLSchema-instance" xmlns:int="http://www.springframework.org/schema/integration" xsi:schemaLocation="http://www.springframework.org/schema/beans http://www.springframework.org/schema/beans/spring-beans.xsd http://www.springframework.org/schema/integration http://www.springframework.org/schema/integration/spring-integration-5.2.xsd"> </beans> |
Different from Spring framework schema, http://www.springframework.org/schema/beans/spring-beans.xsd is always updated to the latest version of Spring, for the Spring Integration schema, you need to use the latest version, currently 5.2 http://www.springframework.org/schema/integration/spring-integration-5.2.xsd!
First, I will define a Message Channel in Spring container that is responsible for transmitting a Message from Message Endpoint creating a payload via Message Endpoint printing “Hello Khanh from Huong Dan Java “!
You use the <int:channel> tag to define a Message Channel:
|
1 2 3 4 5 6 7 8 9 10 |
<?xml version="1.0" encoding="UTF-8"?> <beans xmlns="http://www.springframework.org/schema/beans" xmlns:xsi="http://www.w3.org/2001/XMLSchema-instance" xmlns:int="http://www.springframework.org/schema/integration" xsi:schemaLocation="http://www.springframework.org/schema/beans http://www.springframework.org/schema/beans/spring-beans.xsd http://www.springframework.org/schema/integration http://www.springframework.org/schema/integration/spring-integration-5.2.xsd"> <int:channel id="channel" /> </beans> |
Message Channels identify each other by the bean IDs of those Message Channels. In this example, I only need to create one Message Channel, you can create many if you want!
In order for our application to send a Message every 5 seconds, we will define a Message Endpoint using Spring Integration’s Polling Channel Adapter with the <int:inbound-channel-adapter/> tag as follows:
|
1 2 3 |
<int:inbound-channel-adapter channel="channel" expression="{'Khanh'}"> <int:poller fixed-delay="5000" /> </int:inbound-channel-adapter> |
The expression property will help us define the data that will be generated when the Poller is triggered. The value of this expression property supports Spring Expression Language, so you can have any value, as long as it meets Spring Expression Language.
The channel property is used to define the Message Channel to which the generated data will be transferred. The value of this channel property is the bean ID of the Message Channel!
Inside the <int:inbound-channel-adapter/> tag, we define the <int:poller/> tag with the fixed-deplay attribute with the value of 5s so that after 5s our Poller will be triggered!
Now we will use the Logging Channel Adapter with the <int:logging-channel-adapter/> tag to consume the Message from the Polling Channel Adapter and print “Hello Khanh from Huong Dan Java”, as follows:
|
1 2 3 |
<int:logging-channel-adapter channel="channel" logger-name="com.huongdanjava.springintegration" expression="'Hello '.concat(payload).concat(' from Huong Dan Java')" /> |
The Logging Channel Adapter will consume the Message from the channel with the bean ID of “channel”, the data to be logged will be obtained from the expression attribute of the <int:logging-channel-adapter/> tag. You need to add the configuration file of Logging Framework to log messages as you like!
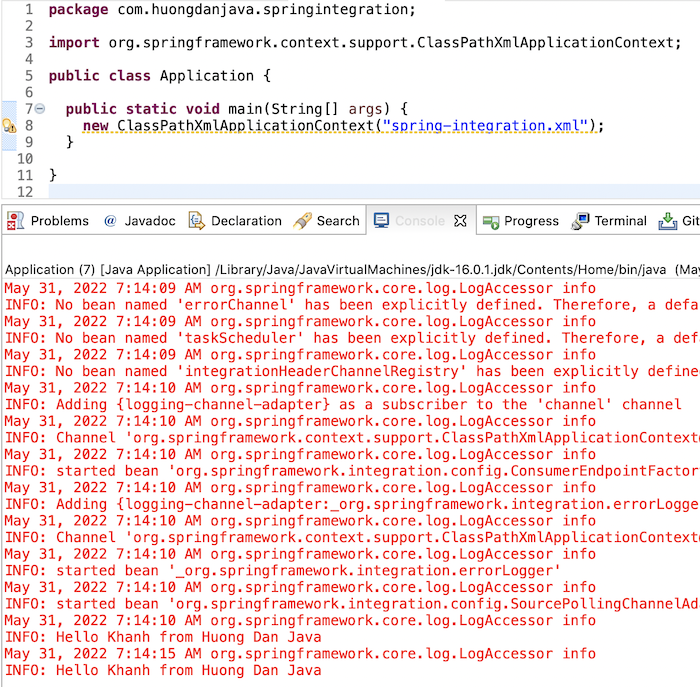
To run this application, I will create a class with a main() method with the following content:
|
1 2 3 4 5 6 7 8 9 10 11 |
package com.huongdanjava.springintegration; import org.springframework.context.support.ClassPathXmlApplicationContext; public class Application { public static void main(String[] args) { new ClassPathXmlApplicationContext("spring-integration.xml"); } } |
The output when running the above application is as follows:


