RPC stands for Remote Procedure Call, which is a mechanism that allows you to call a function or method of a program on one machine from another machine. It’s similar to RMI, Remote Method Invocation, in Java! gRPC is an open-source, high-performance framework implemented by Google for RPC. In this tutorial, I will introduce you to some basic knowledge about gRPC and implement an example to see how gRPC works!
The first thing I need to tell you is that gRPC supports many different languages. For Java, we will use gRPC Java here https://grpc.io/docs/languages/java/
With gRPC, the message sent will be in binary form using the protocol buffer (protobuf). Simply put, the protocol buffer is a protocol that does not depend on programming language or platform, used to serialize structured data. Thanks to that, different languages can serialize or deserialize gRPC messages easily.
And gRPC uses HTTP/2 to establish communication between parties!
Now, I will try to make an example of creating a new gRPC server with Java and using Postman to call a method inside this gRPC server to see how gRPC works!
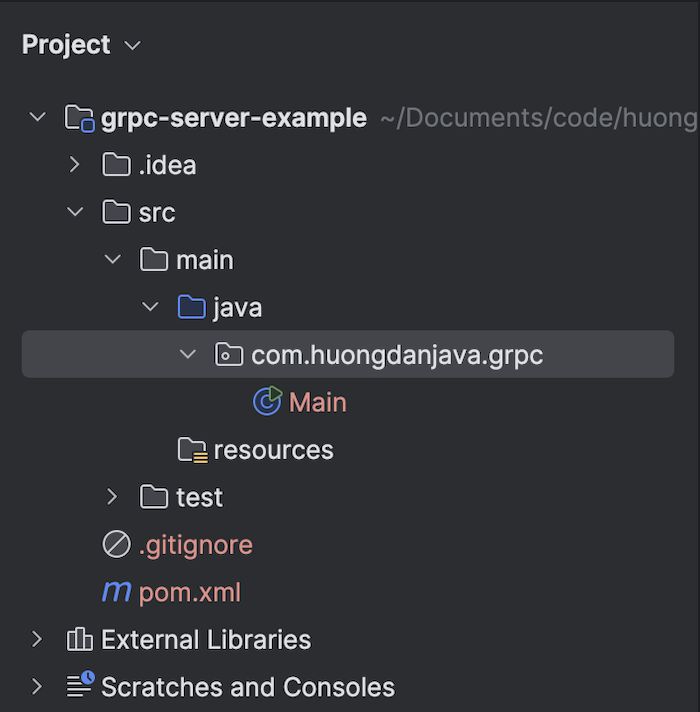
I will create a new Maven project as an example:

We need to declare gRPC dependencies as follows:
|
1 2 3 4 5 6 7 8 9 10 11 12 13 14 15 16 17 18 19 20 21 22 23 24 25 26 |
<dependencyManagement> <dependencies> <dependency> <groupId>io.grpc</groupId> <artifactId>grpc-bom</artifactId> <version>${grpc.version}</version> <type>pom</type> <scope>import</scope> </dependency> </dependencies> </dependencyManagement> <dependencies> <dependency> <groupId>io.grpc</groupId> <artifactId>grpc-netty</artifactId> </dependency> <dependency> <groupId>io.grpc</groupId> <artifactId>grpc-stub</artifactId> </dependency> <dependency> <groupId>io.grpc</groupId> <artifactId>grpc-protobuf</artifactId> </dependency> </dependencies> |
with “grpc.version” having the following value:
|
1 2 3 4 5 |
<properties> ... <grpc.version>1.73.0</grpc.version> </properties> |
We will start building the gRPC server by defining the services that the gRPC server provides using a .proto file.
Define service contract
The content of this .proto file will define the protocol and service contract in the format of Google Protocol Buffer!
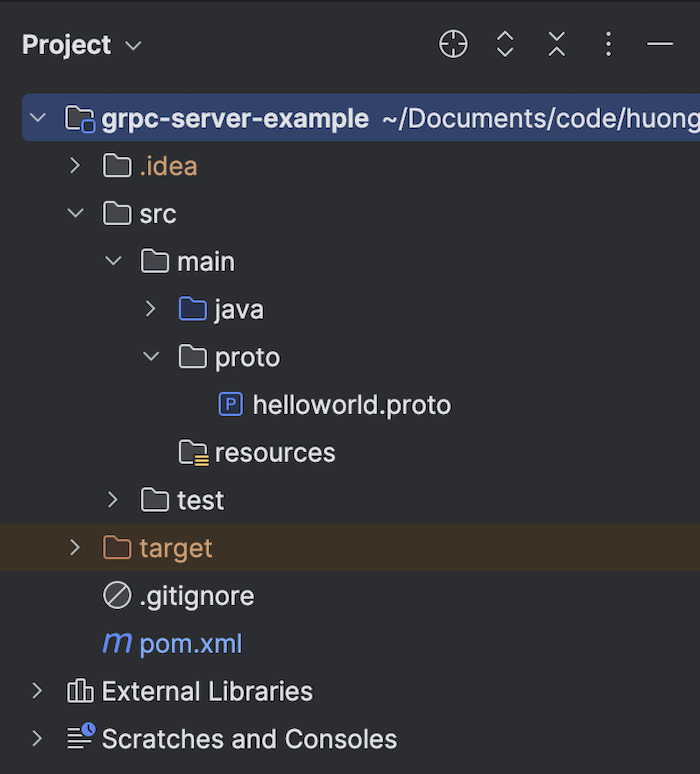
I will create a new helloworld.proto file in the /src/main/proto folder:

to define a simple service that returns the text “Hello <name> from Huong Dan Java” when called.
The contents of this .proto file are as follows:
|
1 2 3 4 5 6 7 8 9 10 11 12 13 14 15 16 17 |
syntax = "proto3"; option java_multiple_files = true; package com.huongdanjava.grpc; message HelloRequest { string name = 1; } message HelloResponse { string message = 1; } service HelloService { rpc hello(HelloRequest) returns (HelloResponse); } |
Protocol Buffer currently has 2 versions: 2 and 3. I will use version 3 as you can see in the syntax = “proto3” line above.
After defining the service contract using the .proto file, we will use gRPC’s Protocol Buffer Compiler tool to generate source code. By default, this tool will generate Java code into a .java file. We use the java_multiple_files = true option to change this default configuration. Then, the Protocol Buffer Compiler will generate separate .java files!
We define the package using the package keyword like in Java!
To define the messages that will be used to exchange between systems with gRPC, we use the message keyword along with defining the content of that message. As in the example above, I am defining 2 different messages: HelloRequest and Hello Response. Each message will contain attributes along with the data type and order of these attributes in the message.
The service keyword is used to define the services that gRPC will expose to the outside. Each service will contain many operations and we will use the rpc keyword to define these operations. As you can see, we will use messages as input and output for the operations.
So we have a simple gRPC service contract. Now it’s time for us to use Protocol Buffer Compiler to generate Java code to implement this service.
You can refer to this article to generate Java code!
After generating Java code, we need to implement the hello() method of the HelloServiceImplBase class in the HelloServiceGrpc file to complete our gRPC service.
Implement gRPC service
You can create a new class that extends the HelloServiceImplBase class and implement the hello() method as follows:
|
1 2 3 4 5 6 7 8 9 10 11 12 13 14 15 16 17 18 |
package com.huongdanjava.grpc; import io.grpc.stub.StreamObserver; public class HelloServiceImpl extends HelloServiceGrpc.HelloServiceImplBase { @Override public void hello(HelloRequest request, StreamObserver<HelloResponse> responseObserver) { String greeting = "Hello " + request.getName() + " from Huong Dan Java"; HelloResponse response = HelloResponse.newBuilder() .setMessage(greeting) .build(); responseObserver.onNext(response); responseObserver.onCompleted(); } } |
We will use the StreamObserver class object to return the result to the client every time there is a request, after building the HelloResponse object!
Now, we will add code to implement the gRPC server in the main() method of the application as follows:
|
1 2 3 4 5 6 7 8 9 10 11 12 13 14 15 16 17 |
package com.huongdanjava.grpc; import io.grpc.Server; import io.grpc.ServerBuilder; import java.io.IOException; public class Main { public static void main(String[] args) throws IOException, InterruptedException { Server server = ServerBuilder .forPort(8080) .addService(new HelloServiceImpl()).build(); server.start(); server.awaitTermination(); } } |
We will run the gRPC server using port 8080 with the service pointing to the service we implemented above. As you can see, I used the Server class of gRPC Java to do this.
We need to call the awaitTermination() method to keep the gRPC server running until we terminate the application!
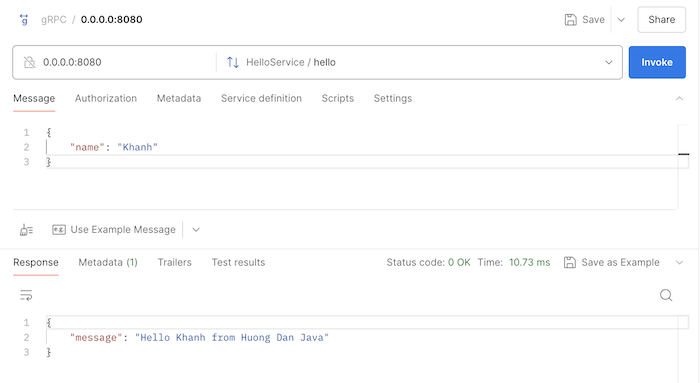
Now, if you run the application and use Postman to call the hello operation of the gRPC server with the message:
|
1 2 3 |
{ "name": "Khanh" } |
you will see the following results:

So we have implemented a basic gRPC server!


