Spring AI is a module of Spring that helps us easily work with applications that use AI, integrating with AI providers such as OpenAI, Azure OpenAI, Google Gemini, … In this tutorial, I will introduce you to all the basic knowledge about Spring AI so you can use it in applications that integrate with the AI providers!
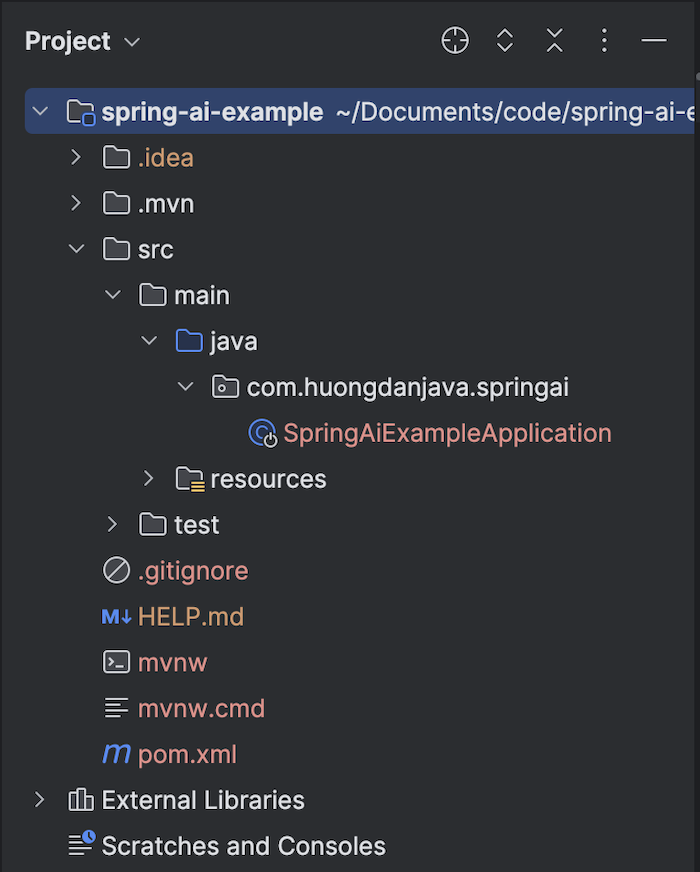
First, I will create a new Maven project as an example:
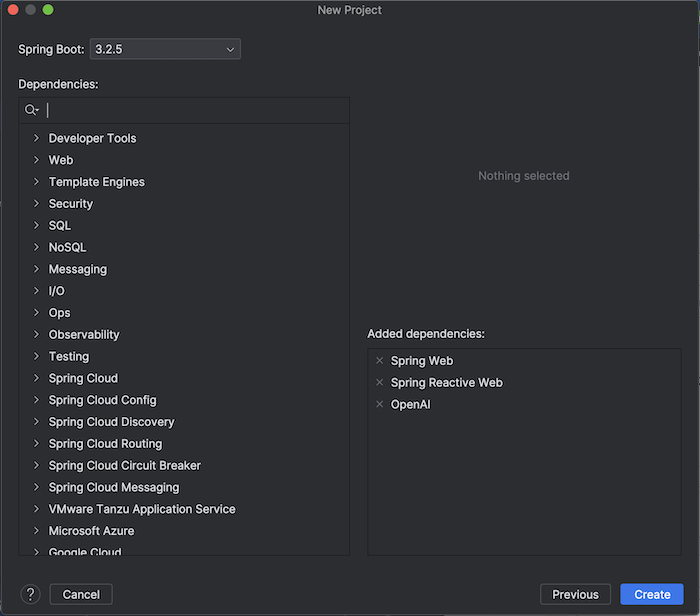
I will make a small application that integrates with OpenAI to query information, so I have declared to use the OpenAI dependency as follows:
|
1 2 3 4 5 |
<dependency> <groupId>org.springframework.ai</groupId> <artifactId>spring-ai-openai</artifactId> <version>2.0.0</version> </dependency> |
Basic AI concepts
Before going into implementing the example, there are some concepts about AI that you need to understand, as follows:
- Models are algorithms to process user request information and generate output appropriate to the request. These algorithms will use a large amount of input data to produce predictions, text, images, and other outputs.
- Prompts can be roughly said as input requests from users, usually text input, for the AI model to rely on to generate output.
- Prompt Templates are templates used to create prompts. We will need to replace the placeholders defined in the template with the values we want to create a prompt from these values.
- Embeddings are objects that will transform user prompts into vector objects in the form of numbers that AI models can use to process requests.
- Tokens are the basic linguistic units that the AI model uses to process prompts. At input, the AI model will convert words to tokens, and at output, the AI model will convert tokens to words.
Understanding the basic concepts above, you will imagine at a high level how an AI application works!
Basic Spring AI
To integrate with AI providers, Spring AI defines an interface Model with ModelRequest and ModelResponse:
|
1 2 3 |
public interface Model<TReq extends ModelRequest<?>, TRes extends ModelResponse<?>> { TRes call(TReq request); } |
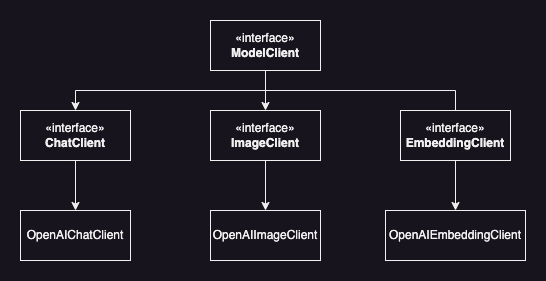
There are 7 sub-interfaces from the ModelClient interface:
- ChatModel
- ImageModel
- DocumentEmbeddingModel
- TextToSpeechModel
- TranscriptionModel
- ModerationModel
- và EmbeddingModel
Corresponding to each AI provider, there will be its own implementation!
For OpenAI, the implementations for the 6 interfaces ChatModel, ImageModel, TextToSpeechModel, TranscriptionModel, ModerationModel and EmbeddingModel are OpenAiChatModel, OpenAiImageModel, OpenAiAudioSpeechModel, OpenAiAudioTranscriptionModel, OpenAiModerationModel, OpenAiEmbeddingModel respectively.
For my example in this tutorial, I will use the ChatModel class to work with OpenAI!
Implement the example
To integrate with OpenAI, first, you need to create a new API key in the OpenAI platform by going to https://platform.openai.com/api-keys and clicking on the “Create new secret key” button as follows:
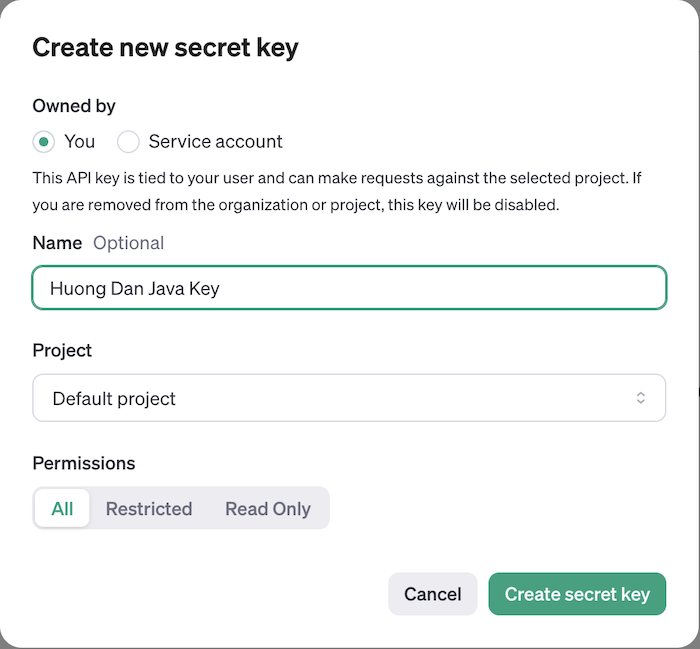
This API key is used to authenticate with the OpenAI API! Please save this API key somewhere so you can use it again later!
You will also need to add Credit:
to use the OpenAI API without any limitations!
To configure OpenAI information with Spring AI, you can use the OpenAiChatOptions class.
|
1 2 3 4 5 6 7 |
@Bean OpenAiChatOptions chatOptions() { return OpenAiChatOptions.builder() .apiKey("<YOUR_API_KEY_HERE>") .model(com.openai.models.ChatModel.GPT_5_NANO.asString()) .build(); } |
Here, we’ll use Spring AI’s default configurations for the OpenAI API; only the API key and the model that we want to use, need to be configured separately!
You can choose the OpenAI Model you want to use. Here, I’m declaring the use of the “gpt-5-nano” model with a low cost to save money.
Now, we’ll initialize the ChatModel bean from the OpenAiChatOptions object as follows:
|
1 2 3 4 |
@Bean ChatModel chatModel(OpenAiChatOptions chatOptions) { return OpenAiChatModel.builder().options(chatOptions).build(); } |
With the above declaration, Spring will automatically initialize the OpenAiChatOptions object, and then the ChatModel interface object, OpenAiChatModel, in the Spring container. We just need to ingest and use it.
|
1 2 3 4 |
AnnotationConfigApplicationContext context = new AnnotationConfigApplicationContext( AppConfiguration.class); ChatModel chatModel = context.getBean(ChatModel.class); |
Now we can use the ChatModel class to query information from OpenAI.
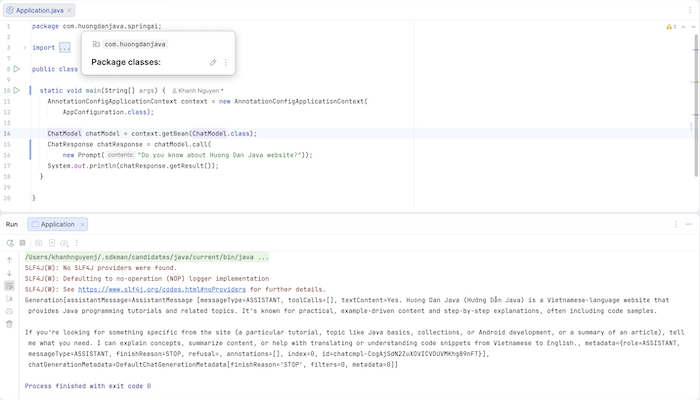
Here’s my example:
|
1 2 3 4 5 6 7 8 9 10 11 12 13 14 15 16 17 18 19 20 |
package com.huongdanjava.springai; import org.springframework.ai.chat.model.ChatModel; import org.springframework.ai.chat.model.ChatResponse; import org.springframework.ai.chat.prompt.Prompt; import org.springframework.context.annotation.AnnotationConfigApplicationContext; public class Application { static void main(String[] args) { AnnotationConfigApplicationContext context = new AnnotationConfigApplicationContext( AppConfiguration.class); ChatModel chatModel = context.getBean(ChatModel.class); ChatResponse chatResponse = chatModel.call( new Prompt("Do you know about Huong Dan Java website?")); System.out.println(chatResponse.getResult()); } } |
Please check the results yourselves!
My results are as follows: