When working with RESTful APIs, for a data object, we often have to expose many different request URLs. For example, if you are working with a student information management application, to provide student information through RESTful APIs, we may have to expose some of the following request URLs:
- Full list of students with full school information
- List of names of all students
- List of students of a certain class
- …
For every need to get different information about this student information, we have to expose a new request URL. In addition, for a URL request, eg request URL to get all student information with all fields, not all student information fields are used, we may only need the student’s name and age information to display, other information such as the address or the class of student is not needed. Returning this information is redundant and unnecessary.
How do we solve the limitations of the RESTful API above? You can use GraphQL.
GraphQL is a language for manipulating and querying data for APIs, providing clients with an easy way to request exactly what they need, making API development easier. With GraphQL, we only need to expose an API for student information, the client can use this API to query the right information. How is it in detail? In this tutorial, I will introduce you to GraphQL, and how it works to solve the limitations of RESTful API.
To clearly see the difference between RESTful API and GraphQL, I will create a new Spring Boot project and implement both RESTful API and GraphQL to manipulate the student information I mentioned above:
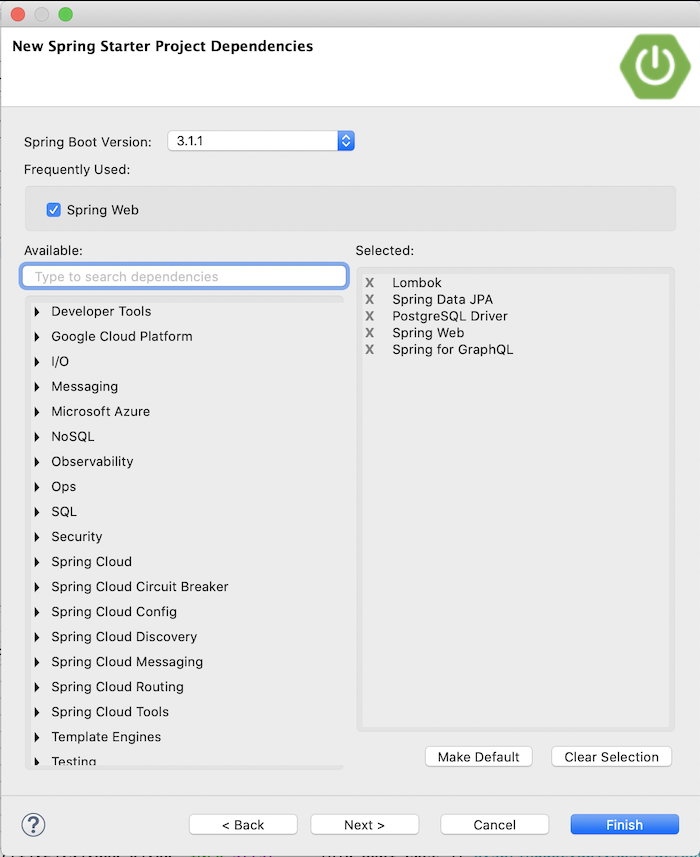
Result:
I will implement RESTful API first.
I will define the above URL requests using OpenAPI and use OpenAPI’s Maven plugin to generate the API contract. The content of the student.yaml file in the src/main/resources/api directory is as follows:
|
1 2 3 4 5 6 7 8 9 10 11 12 13 14 15 16 17 18 19 20 21 22 23 24 25 26 27 28 29 30 31 32 33 34 35 36 37 38 39 40 41 42 43 44 45 46 47 48 49 50 51 52 53 54 55 56 57 58 59 60 61 62 63 64 65 66 67 68 69 70 71 72 73 |
openapi: 3.0.3 info: title: Student Information Management System version: 1.0.0 servers: - url: https://localhost:8081/api paths: /students: get: operationId: getStudents summary: Get all students information, can be filtered by clazz name parameters: - name: clazz in: query description: Class of students required: false schema: type: string responses: 200: description: Get all students information content: application/json: schema: type: array items: $ref: '#/components/schemas/Student' example: - id: 1 code: '001' name: Khanh age: 30 address: 'Binh Dinh' clazz: A - id: 2 code: '002' name: Quan age: 25 address: 'Ho Chi Minh' clazz: B /students/names: get: operationId: getStudentNames summary: Get student names responses: 200: description: Get student information content: application/json: schema: type: array items: type: string components: schemas: Student: type: object properties: id: type: integer format: int64 code: type: string name: type: string age: type: integer format: int64 address: type: string clazz: type: string |
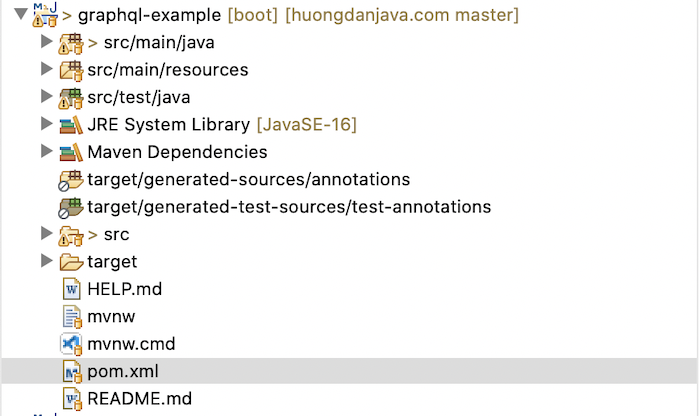
Please follow the steps that I have instructed in the tutorial Generate API contract using OpenAPI Generator Maven plugin to generate source code!
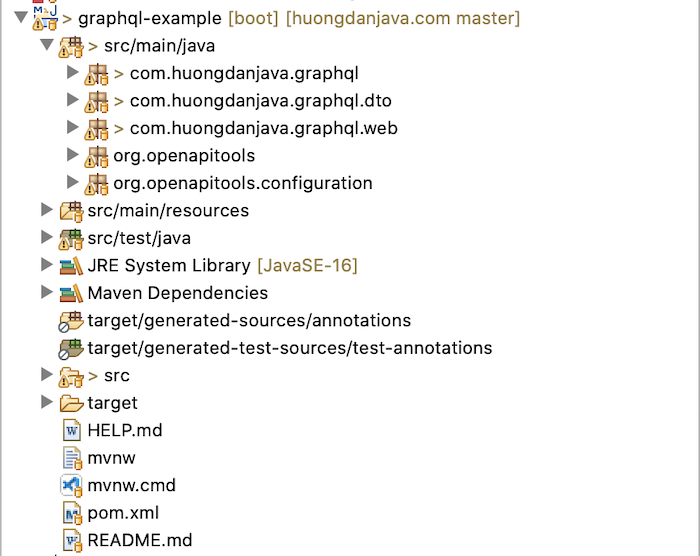
My results are as follows:
To manipulate the Student table in the database with the following structure:
|
1 2 3 4 5 6 7 8 9 |
CREATE TABLE student ( id bigint NOT NULL, code varchar(10) NOT NULL, name varchar(50) NOT NULL, age bigint NOT NULL, address varchar(100) DEFAULT NULL, class varchar(20) NOT NULL, PRIMARY KEY (id) ) |
I will configure the database information in the application.properties file as follows:
|
1 2 3 |
spring.datasource.url=jdbc:postgresql://localhost:5432/example spring.datasource.username=khanh spring.datasource.password=1 |
Along with that, I will also create a StudentRepository class:
|
1 2 3 4 5 6 7 8 9 10 11 12 13 14 15 16 |
package com.huongdanjava.graphql.repository; import java.util.List; import org.springframework.data.jpa.repository.JpaRepository; import com.huongdanjava.graphql.repository.model.StudentModel; public interface StudentRepository extends JpaRepository<StudentModel, Long> { List<StudentModel> findByClazz(String clazz); List<NamesOnly> findBy(); interface NamesOnly { String getName(); } } |
with the StudentModel class with the following content:
|
1 2 3 4 5 6 7 8 9 10 11 12 13 14 15 16 17 18 19 20 21 22 23 24 25 26 27 28 29 30 31 32 33 |
package com.huongdanjava.graphql.repository.model; import jakarta.persistence.Column; import jakarta.persistence.Entity; import jakarta.persistence.Id; import jakarta.persistence.Table; import lombok.Data; @Data @Entity @Table(name = "student") public class StudentModel { @Column @Id private Long id; @Column private String code; @Column private String name; @Column private Long age; @Column private String address; @Column(name = "class") private String clazz; } |
Now, I will create a new class StudentsApiDelegateImpl implementing the generated interface StudentsApiDelegate as follows:
|
1 2 3 4 5 6 7 8 9 10 11 12 13 14 15 16 17 18 19 20 21 22 23 24 25 26 27 28 29 30 31 32 33 34 35 36 37 38 39 40 41 42 43 44 45 46 47 48 49 50 51 52 53 54 55 56 57 58 59 |
package com.huongdanjava.graphql.web.impl; import java.util.ArrayList; import java.util.List; import org.springframework.beans.BeanUtils; import org.springframework.beans.factory.annotation.Autowired; import org.springframework.http.ResponseEntity; import org.springframework.stereotype.Service; import com.huongdanjava.graphql.dto.Student; import com.huongdanjava.graphql.repository.StudentRepository; import com.huongdanjava.graphql.repository.StudentRepository.NamesOnly; import com.huongdanjava.graphql.repository.model.StudentModel; import com.huongdanjava.graphql.web.StudentsApiDelegate; @Service public class StudentsApiDelegateImpl implements StudentsApiDelegate { @Autowired private StudentRepository studentRepository; @Override public ResponseEntity<List<Student>> getStudents(String clazz) { List<Student> students = new ArrayList<>(); List<StudentModel> studentModels = findStudentModels(clazz); for (StudentModel sm : studentModels) { Student student = toStudent(sm); students.add(student); } return ResponseEntity.ok(students); } private Student toStudent(StudentModel sm) { Student student = new Student(); BeanUtils.copyProperties(sm, student); return student; } private List<StudentModel> findStudentModels(String clazz) { if (clazz == null) { return studentRepository.findAll(); } return studentRepository.findByClazz(clazz); } @Override public ResponseEntity<List<String>> getStudentNames() { List<String> studentNames = new ArrayList<>(); List<NamesOnly> studentNamesOnly = studentRepository.findBy(); studentNamesOnly.forEach(n -> studentNames.add(n.getName())); return ResponseEntity.ok(studentNames); } } |
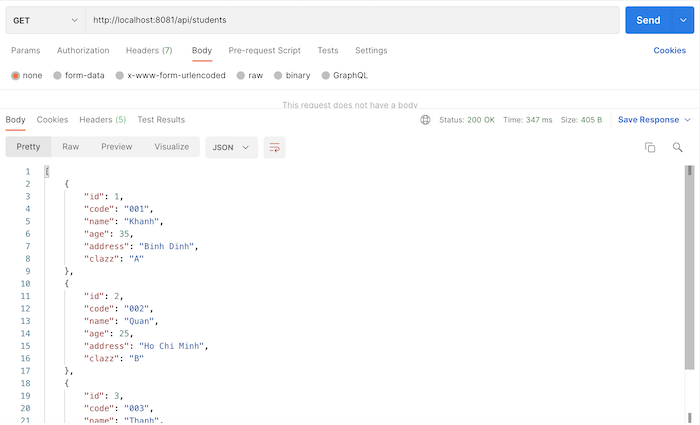
Suppose now in the database, I have the following data:

then when taking information from all students, the result will be as follows:
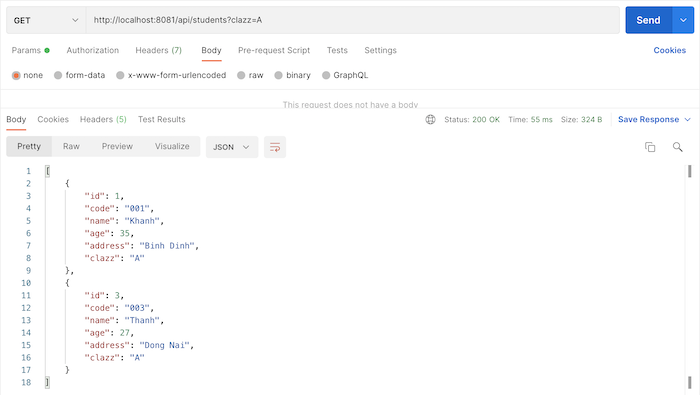
Only the list of students in class A will return the following results:
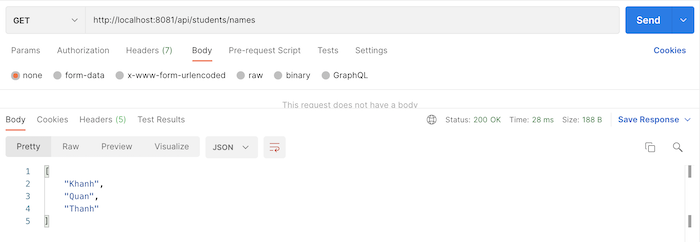
The list of names of all students will return the following result:
Now, we will fulfill all the above needs with just 1 request URL using GraphQL.
To work with GraphQL, the first thing we need to do is define a schema. In a nutshell, this schema file defines what information the GraphQL server can provide to the client querying data. It’s like we define API specs using .yaml file in OpenAPI!
With the Spring Boot application, you can define a schema.graphqls file located in the src/main/resources/graphql directory. For the example of this tutorial, I will define this schema file with the following content:
|
1 2 3 4 5 6 7 8 9 10 11 12 |
type Query { students(clazz: String): [Student] } type Student { id: ID code: String name: String age: Int address: String clazz: String } |
In the GraphQL schema file, we will define many different types. In addition to the types defined for the data objects that we will provide to the client, in our example is the Student object, GraphQL also has 3 special types, Query, Mutation, and Subscription. The Query type is used to query data, the Mutation type is used to add, edit, delete data and the Subscription type is similar to the Query type, but the returned results will change over time (similar to Server Send Event). In my example, I have defined the Query type with the field of students along with the parameter clazz to filter, the return result will be a list of data with the type of Student.
We need to implement a Controller to define how Spring will get the data for us as follows:
|
1 2 3 4 5 6 7 8 9 10 11 12 13 14 15 16 17 18 19 20 21 22 23 24 25 |
package com.huongdanjava.graphql; import java.util.List; import org.springframework.beans.factory.annotation.Autowired; import org.springframework.graphql.data.method.annotation.Argument; import org.springframework.graphql.data.method.annotation.QueryMapping; import org.springframework.stereotype.Controller; import com.huongdanjava.graphql.repository.StudentRepository; import com.huongdanjava.graphql.repository.model.StudentModel; @Controller public class StudentGraphQLController { @Autowired private StudentRepository studentRepository; @QueryMapping public List<StudentModel> students(@Argument("clazz") String clazz) { if (clazz == null) { return studentRepository.findAll(); } return studentRepository.findByClazz(clazz); } } |
Spring will automatically map the Query type with the @QueryMapping annotation and the name of the method is the name of the query. Here, you can also pass the argument of the query using the @Argument annotation.
To support testing, Spring provides us with a GUI named GraphiQL to work with GraphQL, but this GUI is disabled by default. You can enable it by configuring the spring.graphql.graphiql.enabled property in the application.properties file as follows:
|
1 |
spring.graphql.graphiql.enabled=true |
Now you can run our application and check the results!
When you go to the address http://localhost:8081/graphiql, you will see the following result:

In this window, the left side is where we can write the query, and the right side is where we will display the results!
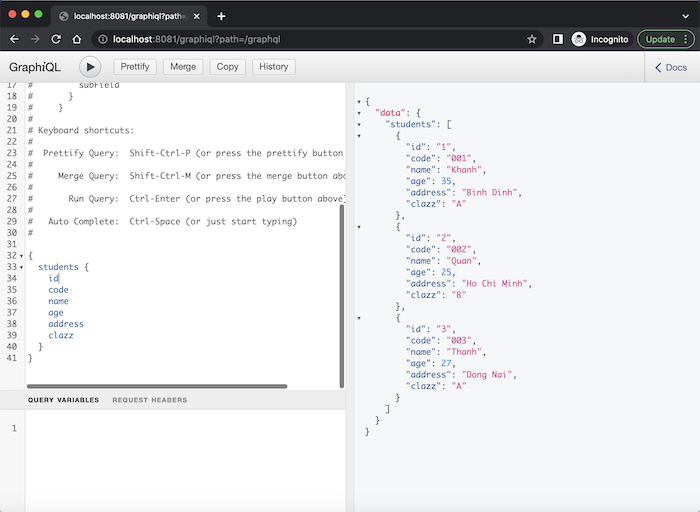
We will use GraphQL query to query the data. A GraphQL query will start with “{” and we will declare the field we want to query. For example, to get all student information with GraphQL, I would write the following query:
|
1 2 3 4 5 6 7 8 9 10 |
{ students { id code name age address clazz } } |
Result:
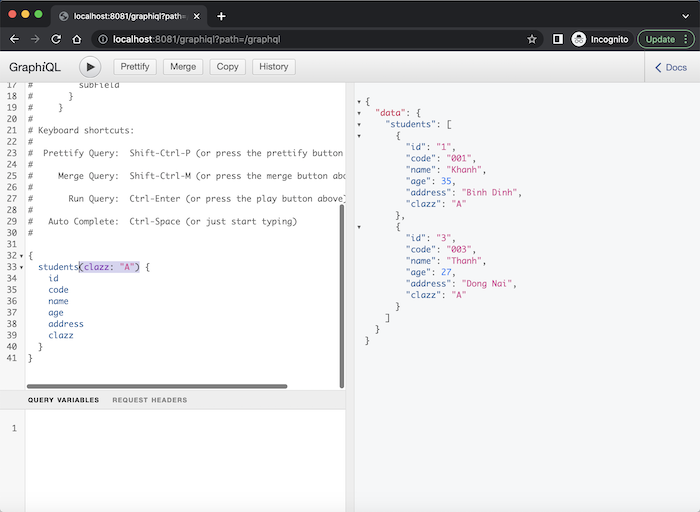
To get the list of students in class A, I will write the following query:
|
1 2 3 4 5 6 7 8 9 10 |
{ students(clazz: "A") { id code name age address clazz } } |
Result:
As for the list of names of all students, I just need to remove the other sub-fields, keeping only the sub-field names as follows:
|
1 2 3 4 5 |
{ students(clazz: "A") { name } } |
Result:
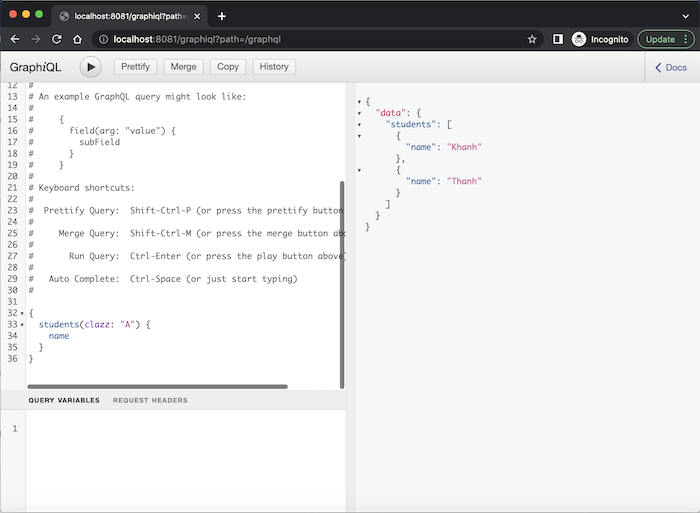
As you can see, with just one GraphQL query mapping for the Student data object, we can get all the information we want and the information returned can also be limited according to our needs.