I showed you how to expose SOAP Web Service using APIkit SOAP in Mule 3, APIkit SOAP in Mule 4 is different, from the way that we put the .wsdl file until the way we build the response to return back to the user. How is it in details? Let’s find out together in this tutorial!
First, I will create a new Mule project as an example:
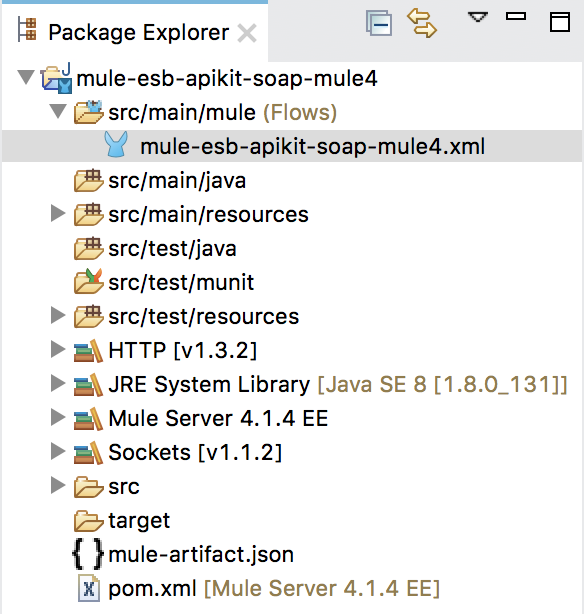
I will use the file hello.wsdl with the following content as an example:
|
1 2 3 4 5 6 7 8 9 10 11 12 13 14 15 16 17 18 19 20 21 22 23 24 25 26 27 28 29 30 31 32 33 34 35 36 37 38 39 40 41 42 43 44 45 46 47 48 49 50 51 52 53 54 55 56 57 58 59 60 |
<?xml version='1.0' encoding='UTF-8'?><wsdl:definitions xmlns:xsd="http://www.w3.org/2001/XMLSchema" xmlns:wsdl="http://schemas.xmlsoap.org/wsdl/" xmlns:tns="http://muleesbcxfsoapexpose.huongdanjava.com/" xmlns:soap="http://schemas.xmlsoap.org/wsdl/soap/" xmlns:ns1="http://schemas.xmlsoap.org/soap/http" name="HelloWorldServiceService" targetNamespace="http://muleesbcxfsoapexpose.huongdanjava.com/"> <wsdl:types> <xs:schema xmlns:xs="http://www.w3.org/2001/XMLSchema" xmlns:tns="http://muleesbcxfsoapexpose.huongdanjava.com/" attributeFormDefault="unqualified" elementFormDefault="unqualified" targetNamespace="http://muleesbcxfsoapexpose.huongdanjava.com/"> <xs:element name="hello" type="tns:hello"/> <xs:element name="helloResponse" type="tns:helloResponse"/> <xs:complexType name="hello"> <xs:sequence> <xs:element name="name" type="xs:string"/> </xs:sequence> </xs:complexType> <xs:complexType name="helloResponse"> <xs:sequence> <xs:element name="result" type="xs:string"/> </xs:sequence> </xs:complexType> <xs:element name="clientId" nillable="true" type="xs:string"/> </xs:schema> </wsdl:types> <wsdl:message name="helloResponse"> <wsdl:part element="tns:helloResponse" name="result"> </wsdl:part> <wsdl:part element="tns:clientId" name="clientId"> </wsdl:part> </wsdl:message> <wsdl:message name="hello"> <wsdl:part element="tns:hello" name="parameters"> </wsdl:part> <wsdl:part element="tns:clientId" name="clientId"> </wsdl:part> </wsdl:message> <wsdl:portType name="HelloWorldService"> <wsdl:operation name="hello"> <wsdl:input message="tns:hello" name="hello"> </wsdl:input> <wsdl:output message="tns:helloResponse" name="helloResponse"> </wsdl:output> </wsdl:operation> </wsdl:portType> <wsdl:binding name="HelloWorldServiceServiceSoapBinding" type="tns:HelloWorldService"> <soap:binding style="document" transport="http://schemas.xmlsoap.org/soap/http"/> <wsdl:operation name="hello"> <soap:operation soapAction="" style="document"/> <wsdl:input name="hello"> <soap:header message="tns:hello" part="clientId" use="literal"> </soap:header> <soap:body parts="parameters" use="literal"/> </wsdl:input> <wsdl:output name="helloResponse"> <soap:header message="tns:helloResponse" part="clientId" use="literal"> </soap:header> <soap:body parts="result" use="literal"/> </wsdl:output> </wsdl:operation> </wsdl:binding> <wsdl:service name="HelloWorldServiceService"> <wsdl:port binding="tns:HelloWorldServiceServiceSoapBinding" name="HelloWorldServicePort"> <soap:address location="http://localhost:8081/hello"/> </wsdl:port> </wsdl:service> </wsdl:definitions> |
In Mule 4, all resource files should be in the src/main/resources directory and for files that define REST or SOAP APIs, they should be in the available api directory so I won’t put the file hello.wsdl is in src/main/wsdl directory as in Mule 3:
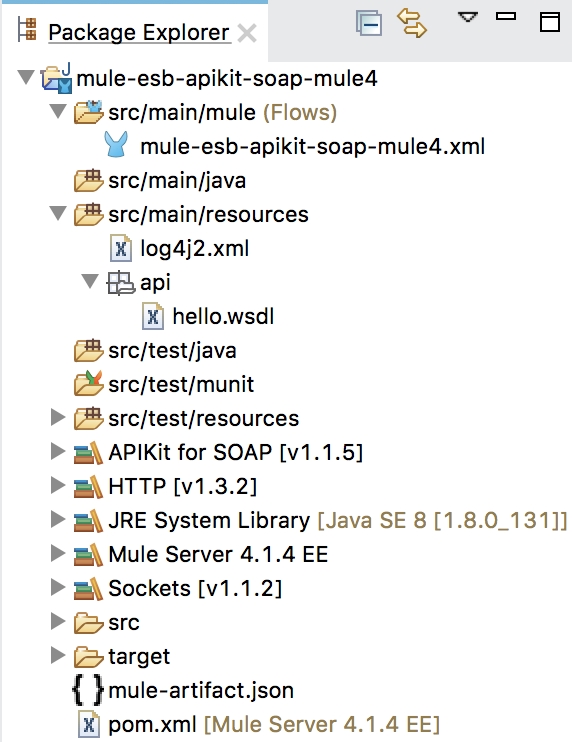
Now we will generate the Mule Flows from this .wsdl file!
Similar to Mule 3, you must also right-click the file hello.wsdl then select Mule and then select “Generate Flows from WSDL”, the following window will also appear:
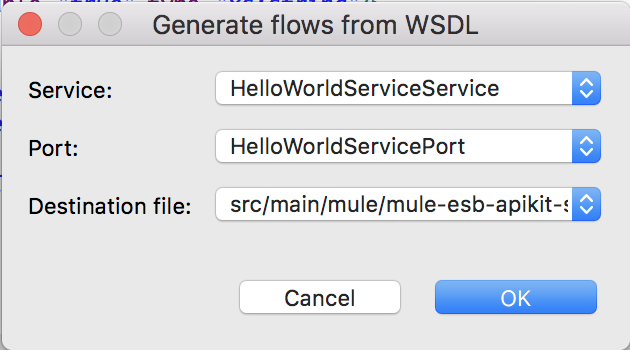
You can also leave the default and click OK as in Mule 3!
Then, you will also see the Mule Flows generated as follows:
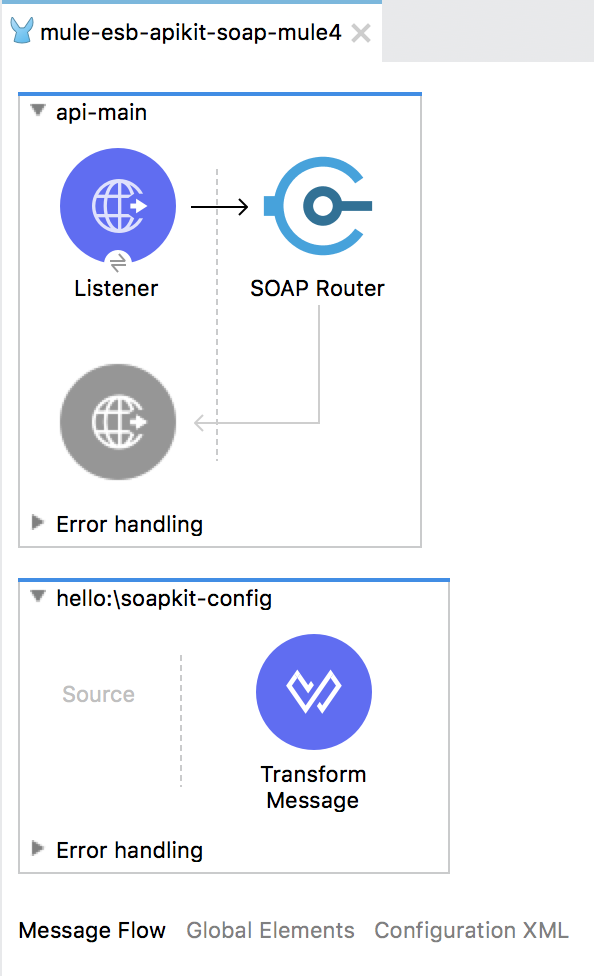
As you can see, similar to Mule 3, Anypoint Studio 7 also generated Mules Flows using SOAP API with an api-main Mule Flow will receive requests from the client and each SOAP Web Service operation will be generated into one Mule Flow. Our task is also to implement Mule Flow for each operation is done.
By default, the Mule Flow for each operation has only one endpoint Transform Message. The content of this Transform Message endpoint will depend on the operation of SOAP Web Service that will have different content. In this example, the content of the endpoint Transform Message for the hello operation is as follows:
|
1 2 3 4 5 6 7 8 9 10 11 12 13 |
%dw 2.0 output application/java ns soap http://schemas.xmlsoap.org/soap/envelope --- { body: { soap#Fault: { faultcode: "soap:Server", faultstring: "Operation [hello:\soapkit-config] not implemented" } } write "application/xml" } |
You can remove this endpoint Transform Message to implement this Mule Flow in your own way, but you must comply with the definition of the WSDL file.
I will edit the endpoint Transform Message of the hello operation to build the SOAP response message return to the client with the following content:
|
1 2 3 4 5 6 7 8 9 10 11 12 13 14 15 16 17 18 |
%dw 2.0 output application/java ns soap http://schemas.xmlsoap.org/soap/envelope ns ns0 http://muleesbcxfsoapexpose.huongdanjava.com/ --- { body: { ns0#helloResponse: { result: "Hello, " ++ payload.body.ns0#hello.name } } write "application/xml", headers: { clientId: { ns0#clientId: payload.headers.clientId.ns0#clientId } write "application/xml" } } |
As you can see, different from Mule 3, the <Body> section and the <Header> section of the SOAP response message in Mule 4 will be converted from Payload content and no longer separate. And when the client request arrives, the content of the SOAP message is also encapsulated in the Mule’s Payload Message!
By default, when generating the Mule Flows from the .wsdl file, the HTTP Listener Connector section will have the following default configuration:

Global Element Properties:
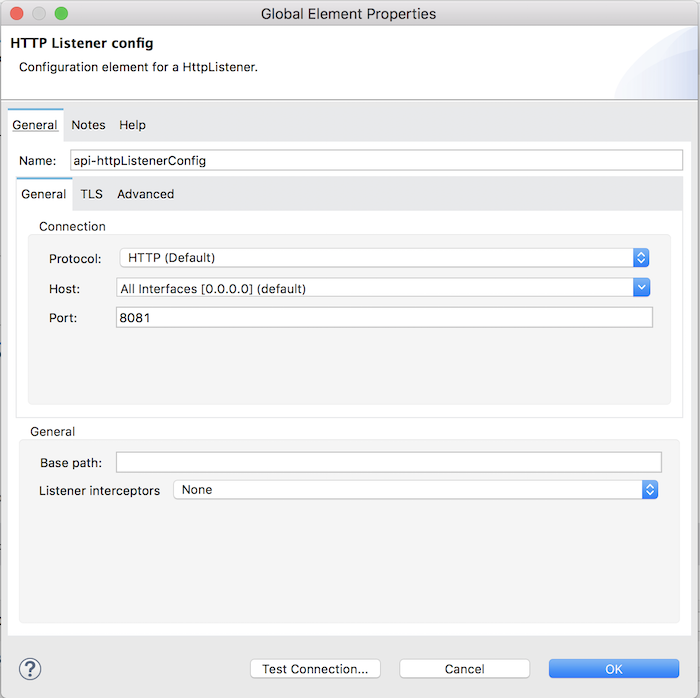
To match with the definition of hello.wsdl file, I will modify the Path section’s value to “/hello” as follows:

Now, we have completed a simple example to expose SOAP Web Service using the SOAP APIkit in Mule 4!
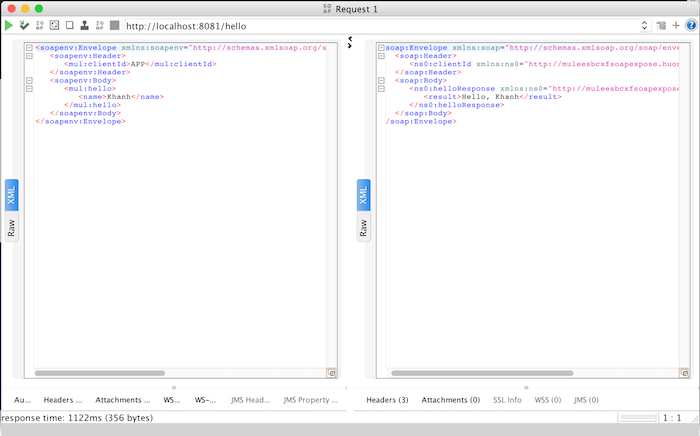
The results of my example will be as follows:
