GlassFish is one of the Java server runtimes that makes us possible to run Java web applications. In this tutorial, I show you how to install it in Eclipse so that you can easily develop Java EE, Jakarta EE applications using Eclipse!
Install GlassFish Eclipse plugin
The first thing you need to do is install the GlassFish plugin for Eclipse.
Please go to Help -> Install New Software…, then click the Add button, fill in the GlassFish plugin repository information as http://download.eclipse.org/glassfish-tools/1.0.1/repository/, as follows:
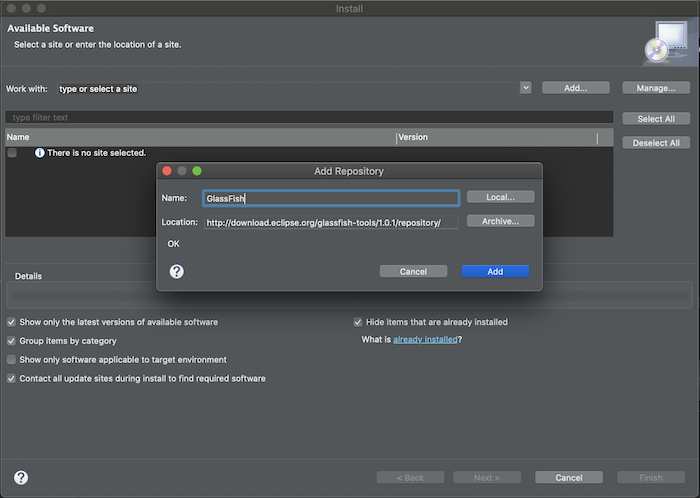
After clicking the Add button, you will see the following results:
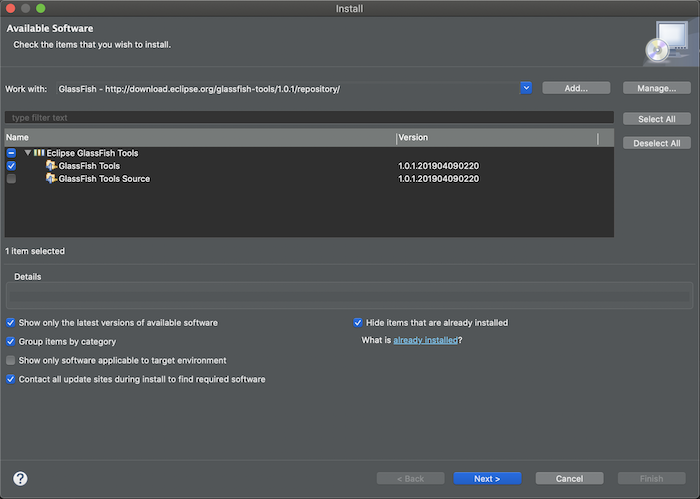
Click Next.

Continue to click on the Next button.
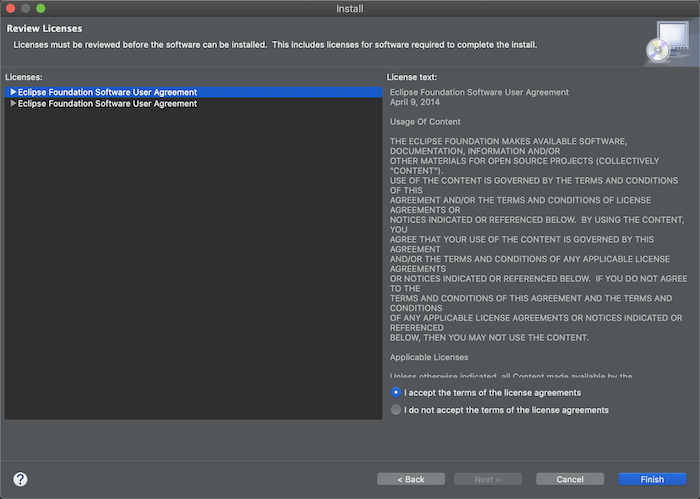
Please select “I accept the terms of the license agreements” to agree to the terms of use and then click the Finish button.
The installation process will begin.
After the installation is complete, Eclipse will need to restart.
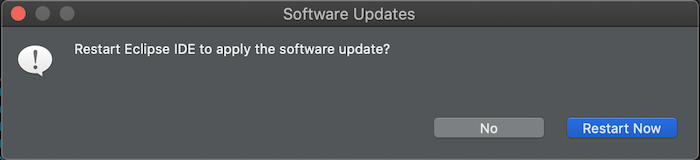
Please restart Eclipse!
Create a new GlassFish server in Eclipse
After installing the GlassFish plugin, we can create a new server runtime using GlassFish.
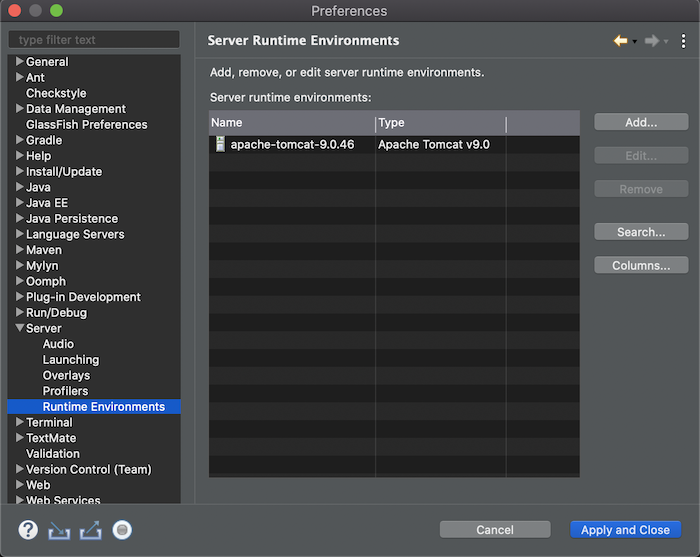
Go to Preferences in Eclipse, go to Server -> Runtime Environments as follows:
Click Add and then select GlassFish to configure the GlassFish server as follows:

Please click the Next button, then configure the GlassFish server as follows:
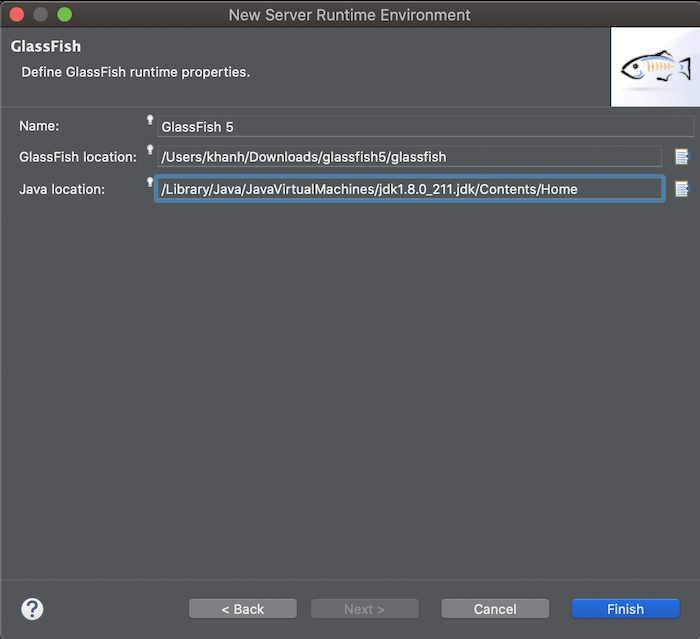
Click Finish to complete this configuration.
Define a GlassFish server to run the application
If you have a Java EE or Jakarta EE application, you can use this application using GlassFish as follows:
Right-click on the application project, select Run As -> Run on Server, select Manually define a new server, and then select GlassFish as follows:
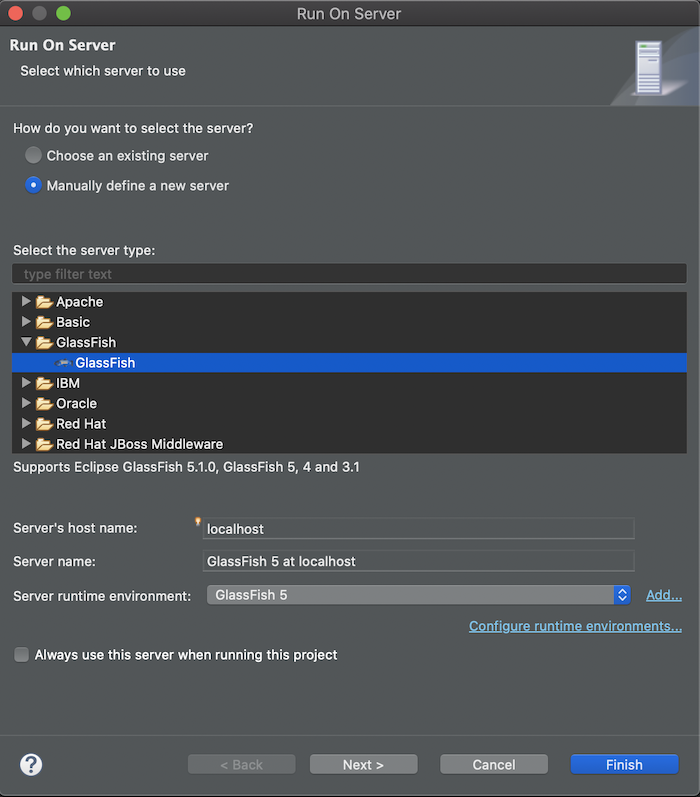
Click Next
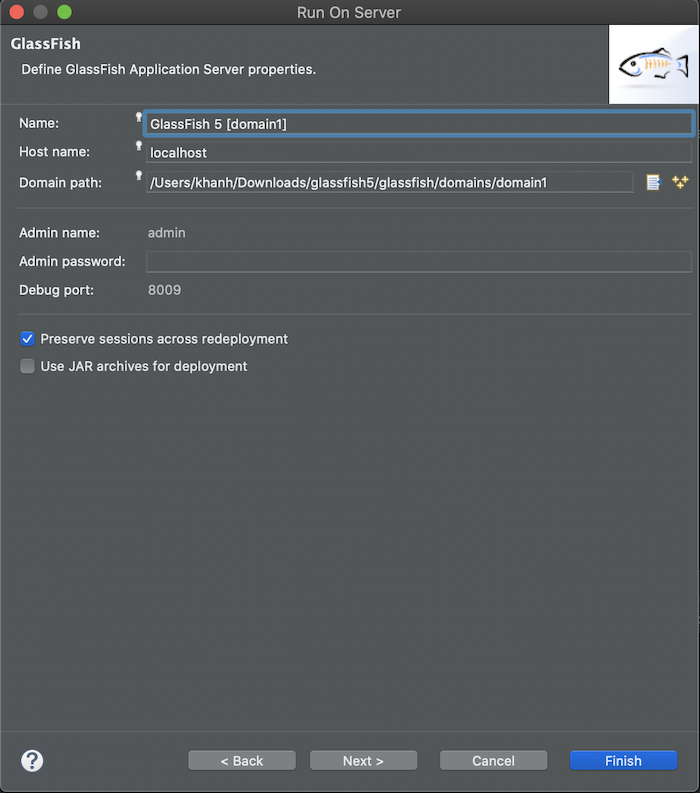
Please leave the default value and then click the Finish button!
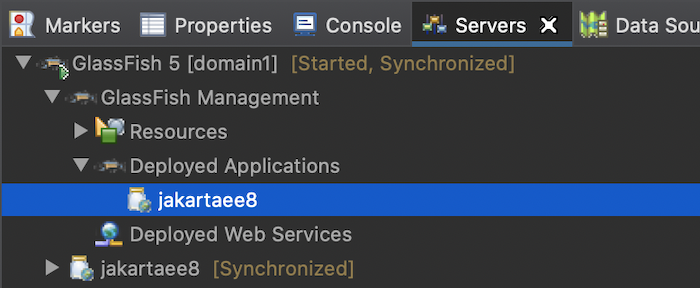
You will see the GlassFish server started as follows: