HttpServlet is one of the Jakarta EE Servlet objects that help us build web-based applications with Java. How is it in details? Let’s find out together in this tutorial!
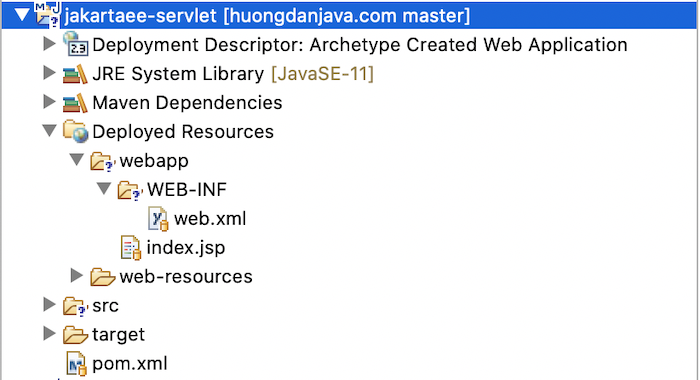
First, I will create a new Maven project for the Jakarta EE application as an example, as follows:
The first thing that you need to know about HttpServlet is that it is an abstract class in the package jakarta.servlet.http of the Jakarta EE Servlet API. It extends from another abstract class named GenericServlet and this GenericServlet class is an object that implements the Servlet interface, the main interface to define the servlet of the Jakarta EE Servlet API.
Using this HttpServlet object, we can build Java web applications to handle requests from clients with HTTP methods like GET, POST, HEAD, PUT, DELETE, TRACE and OPTIONS. When the client sends a request to the webserver container, the service() method in the HttpServlet object processes the request. Depending on the HTTP method that the client sends, further processing will be done by the doGet(), doPost(), doHead(), doPut(), doDelete(), doTrace() and doOptions() methods of this object.
We can override the doGet(), doPost(), doHead(), doPut(), doDelete(), doTrace() or doOptions() methods to process the request as we want. Let’s try to apply this to our example.
Now, I will add a new class called HelloWorldServlet located in the package com.huongdanjava.jakartaee.servlet, with the following content:
|
1 2 3 4 5 6 7 8 9 10 11 12 13 14 15 16 17 18 19 20 21 22 23 |
package com.huongdanjava.jakartaee.servlet; import java.io.IOException; import java.io.PrintWriter; import jakarta.servlet.ServletException; import jakarta.servlet.http.HttpServlet; import jakarta.servlet.http.HttpServletRequest; import jakarta.servlet.http.HttpServletResponse; public class HelloWorldServlet extends HttpServlet { private static final long serialVersionUID = 1L; @Override protected void doGet(HttpServletRequest req, HttpServletResponse resp) throws ServletException, IOException { // Setting up the content type of web page resp.setContentType("text/html"); // Writing the message on the web page PrintWriter out = resp.getWriter(); out.println("<h1>Hello World from Huong Dan Java</h1>"); } } |
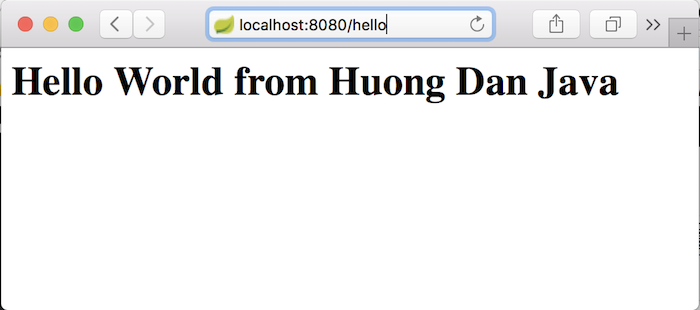
As you can see, my HelloWorldServlet class has extended from the HttpServlet class, and in this HelloWorldServlet class, I have overridden the doGet() method to process the request with the HTTP method GET. Simply return to the client an HTML page with the content “<h1>Hello World from Huong Dan Java</h1>”.
To declare this Servlet with web container, we have 2 ways:
- Declare using @WebServlet annotation of Jakarta EE Servlet API in this Servlet class.
- Declare this Servlet in the Deployment Descriptor file for the web application, web.xml located in the /src/main/webapp/WEB-INF directory.
The priority that the web container will process is first the configuration that we declare in the web.xml file, then the configuration of the @WebServlet annotation. I will talk more about these two ways in the incoming tutorials!
For simplicity, I will declare using the @WebServlet annotation in the HelloWorldServlet class as follows:
|
1 2 3 4 5 6 7 8 9 10 11 12 13 14 15 16 17 18 19 20 21 22 23 24 25 |
package com.huongdanjava.jakartaee.servlet; import java.io.IOException; import java.io.PrintWriter; import jakarta.servlet.ServletException; import jakarta.servlet.annotation.WebServlet; import jakarta.servlet.http.HttpServlet; import jakarta.servlet.http.HttpServletRequest; import jakarta.servlet.http.HttpServletResponse; @WebServlet("/hello") public class HelloWorldServlet extends HttpServlet { private static final long serialVersionUID = 1L; @Override protected void doGet(HttpServletRequest req, HttpServletResponse resp) throws ServletException, IOException { // Setting up the content type of web page resp.setContentType("text/html"); // Writing the message on the web page PrintWriter out = resp.getWriter(); out.println("<h1>Hello World from Huong Dan Java</h1>"); } } |
Now, if you run the application, you will see the following results: