In the previous tutorial, we learned about Quartz Scheduler. Spring framework also has a wrapper for Quartz Scheduler, so if your application uses Spring framework and needs to use Quartz Scheduler, then read this tutorial. I will show you how to use Quartz Scheduler with the Spring framework in this tutorial.
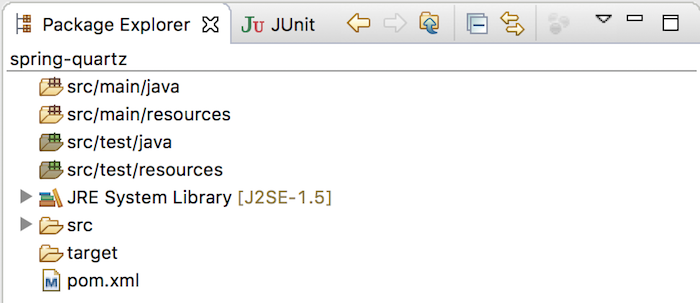
First, I will create a new Maven project as an example:

To use Quartz with the Spring framework, you need to declare Spring Context Support, Spring Transaction, and Quartz Scheduler dependencies as follows:
|
1 2 3 4 5 6 7 8 9 10 11 12 13 14 15 |
<dependency> <groupId>org.springframework</groupId> <artifactId>spring-context-support</artifactId> <version>6.2.8</version> </dependency> <dependency> <groupId>org.springframework</groupId> <artifactId>spring-tx</artifactId> <version>6.2.8</version> </dependency> <dependency> <groupId>org.quartz-scheduler</groupId> <artifactId>quartz</artifactId> <version>2.5.0</version> </dependency> |
We also need to declare to use the concepts of Job, Trigger, and Scheduler similar to Quartz Scheduler standalone, in Spring.
The first is about Job.
We have two ways to declare a Quartz Job with Spring, including:
- Declaring a class with a method of this class will serve to define the task that we need to run.
- Secondly, we will create a new class that extends QuartzJobBean of Spring Quartz.
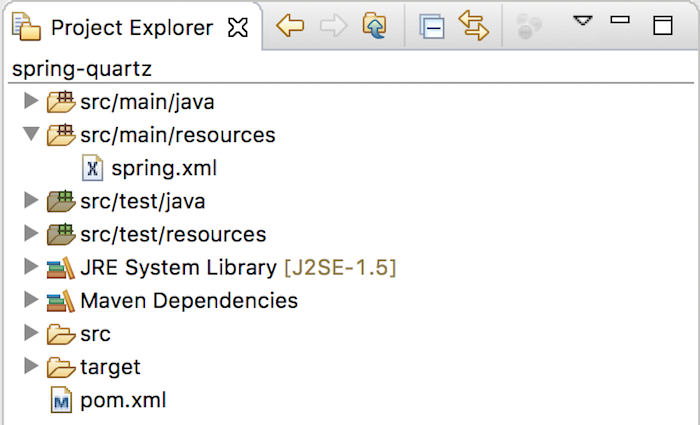
I will create a new configuration file of Spring spring.xml in the directory src/main/resources:

as follows:
|
1 2 3 4 5 |
<beans xmlns="http://www.springframework.org/schema/beans" xmlns:xsi="http://www.w3.org/2001/XMLSchema-instance" xsi:schemaLocation="http://www.springframework.org/schema/beans http://www.springframework.org/schema/beans/spring-beans.xsd"> </beans> |
For the first way, you need to create a class with any method, my example is as follows:
|
1 2 3 4 5 6 7 8 9 |
package com.huongdanjava.spring.quartz; public class Hello { public void sayHello() { System.out.println("Hello from Huong Dan Java"); } } |
then, you declare a Quartz Job in the spring.xml file using the MethodInvokingJobDetailFactoryBean object as follows:
|
1 2 3 4 5 6 |
<bean id="hello" class="com.huongdanjava.spring.quartz.Hello"/> <bean id="jobDetail" class="org.springframework.scheduling.quartz.MethodInvokingJobDetailFactoryBean"> <property name="targetObject" ref="hello"/> <property name="targetMethod" value="sayHello"/> </bean> |
with the targetObject property of MethodInvokingJobDetailFactoryBean will refer to our class’s “hello” bean in the Spring container and the targetMethod which will have the value as the method name in the Hello class, will execute the task.
For the second way, we need to create a new class that extends the abstract class QuartzJobBean (if you see the code of QuartzJobBean, you will see this class implements the Job interface of Quartz Scheduler):
|
1 2 3 4 5 6 7 8 9 10 11 12 13 14 |
package com.huongdanjava.spring.quartz; import org.quartz.JobExecutionContext; import org.quartz.JobExecutionException; import org.springframework.scheduling.quartz.QuartzJobBean; public class Hello extends QuartzJobBean { @Override protected void executeInternal(JobExecutionContext context) throws JobExecutionException { System.out.println("Hello from Huong Dan Java"); } } |
As you can see, here we need to implement the executeInternal() method to execute the task.
Then, declare this class in the Spring container using the JobDetailFactoryBean object as follows:
|
1 2 3 |
<bean id="jobDetail" class="org.springframework.scheduling.quartz.JobDetailFactoryBean"> <property name="jobClass" value="com.huongdanjava.springquartz.Hello"/> </bean> |
If you need to transfer data into Hello class, you can declare using the Setter method to set this data to Hello class, then use the jobDataMap property of the JobDetailFactoryBean object to ingest this data.
For example, I have a Student class as follows:
|
1 2 3 4 5 6 7 8 9 10 11 12 13 14 15 16 17 18 |
package com.huongdanjava.spring.quartz; public class Student { private String name; public Student(String name) { this.name = name; } public String getName() { return name; } public void setName(String name) { this.name = name; } } |
Now, if I want to use the Student object in the Hello class, I will use the Setter method as follows:
|
1 2 3 4 5 6 7 8 9 10 11 12 13 14 15 16 17 18 19 20 |
package com.huongdanjava.spring.quartz; import org.quartz.JobExecutionContext; import org.quartz.JobExecutionException; import org.springframework.scheduling.quartz.QuartzJobBean; public class Hello extends QuartzJobBean { private Student student; @Override protected void executeInternal(JobExecutionContext context) throws JobExecutionException { System.out.println("Hello from Huong Dan Java, " + student.getName()); } public void setStudent(Student student) { this.student = student; } } |
Then, declare to inject the Student object into the Hello class in the declaration of the JobDetailFactoryBean class in the Spring container as follows:
|
1 2 3 4 5 6 7 8 9 10 11 12 |
<bean id="student" class="com.huongdanjava.spring.quartz.Student"> <constructor-arg value="Khanh"/> </bean> <bean id="jobDetail" class="org.springframework.scheduling.quartz.JobDetailFactoryBean"> <property name="jobClass" value="com.huongdanjava.spring.quartz.Hello"/> <property name="jobDataMap"> <map> <entry key="student" value-ref="student"/> </map> </property> </bean> |
Next is Trigger.
Spring also supports us in two ways to create a Trigger like Quartz Scheduler standalone, including Simple Trigger and Cron Trigger.
With Simple Trigger, we will use the SimpleTriggerFactoryBean class to create a trigger.
|
1 2 3 4 5 6 7 8 9 10 11 12 13 14 15 16 17 18 |
<bean id="student" class="com.huongdanjava.spring.quartz.Student"> <constructor-arg value="Khanh"/> </bean> <bean id="jobDetail" class="org.springframework.scheduling.quartz.JobDetailFactoryBean"> <property name="jobClass" value="com.huongdanjava.spring.quartz.Hello"/> <property name="jobDataMap"> <map> <entry key="student" value-ref="student" /> </map> </property> </bean> <bean id="simpleTrigger" class="org.springframework.scheduling.quartz.SimpleTriggerFactoryBean"> <property name="jobDetail" ref="jobDetail" /> <property name="startDelay" value="1000" /> <property name="repeatInterval" value="2000" /> </bean> |
With the Cron Trigger, we will use the CronTriggerFactoryBean class:
|
1 2 3 4 5 6 7 8 9 10 11 12 13 14 15 16 17 |
<bean id="student" class="com.huongdanjava.spring.quartz.Student"> <constructor-arg value="Khanh"/> </bean> <bean id="jobDetail" class="org.springframework.scheduling.quartz.JobDetailFactoryBean"> <property name="jobClass" value="com.huongdanjava.spring.quartz.Hello"/> <property name="jobDataMap"> <map> <entry key="student" value-ref="student"/> </map> </property> </bean> <bean id="cronTrigger" class="org.springframework.scheduling.quartz.CronTriggerFactoryBean"> <property name="jobDetail" ref="jobDetail"/> <property name="cronExpression" value="0/5 * * * * ?"/> </bean> |
If you notice, you will see the difference when declaring a Trigger in Spring is that Spring allows us to configure the Trigger to run for a Job. So, when configuring the Scheduler, we will not need to configure a Job for the Scheduler anymore.
Finally, the configuration for the Scheduler.
We will configure the Scheduler in Spring using the SchedulerFactoryBean class as follows:
|
1 2 3 4 5 6 7 8 9 10 11 12 13 14 15 16 17 18 19 20 21 22 23 24 25 |
<bean id="student" class="com.huongdanjava.springquartz.Student"> <constructor-arg value="Khanh"/> </bean> <bean id="jobDetail" class="org.springframework.scheduling.quartz.JobDetailFactoryBean"> <property name="jobClass" value="com.huongdanjava.spring.quartz.Hello"/> <property name="jobDataMap"> <map> <entry key="student" value-ref="student"/> </map> </property> </bean> <bean id="cronTrigger" class="org.springframework.scheduling.quartz.CronTriggerFactoryBean"> <property name="jobDetail" ref="jobDetail"/> <property name="cronExpression" value="0/5 * * * * ?"/> </bean> <bean class="org.springframework.scheduling.quartz.SchedulerFactoryBean"> <property name="triggers"> <list> <ref bean="cronTrigger" /> </list> </property> </bean> |
OK, here we have configured Job, Trigger, and Scheduler of Quartz Scheduler with the Spring framework.
The content of the Spring configuration file will now be as follows:
|
1 2 3 4 5 6 7 8 9 10 11 12 13 14 15 16 17 18 19 20 21 22 23 24 25 26 27 28 29 30 |
<beans xmlns="http://www.springframework.org/schema/beans" xmlns:xsi="http://www.w3.org/2001/XMLSchema-instance" xsi:schemaLocation="http://www.springframework.org/schema/beans http://www.springframework.org/schema/beans/spring-beans.xsd"> <bean id="student" class="com.huongdanjava.spring.quartz.Student"> <constructor-arg value="Khanh"/> </bean> <bean id="jobDetail" class="org.springframework.scheduling.quartz.JobDetailFactoryBean"> <property name="jobClass" value="com.huongdanjava.spring.quartz.Hello"/> <property name="jobDataMap"> <map> <entry key="student" value-ref="student"/> </map> </property> </bean> <bean id="cronTrigger" class="org.springframework.scheduling.quartz.CronTriggerFactoryBean"> <property name="jobDetail" ref="jobDetail"/> <property name="cronExpression" value="0/5 * * * * ?"/> </bean> <bean class="org.springframework.scheduling.quartz.SchedulerFactoryBean"> <property name="triggers"> <list> <ref bean="cronTrigger" /> </list> </property> </bean> </beans> |
I will create a new main class to run this application:
|
1 2 3 4 5 6 7 8 9 10 11 12 |
package com.huongdanjava.spring.quartz; import org.springframework.context.ApplicationContext; import org.springframework.context.support.ClassPathXmlApplicationContext; public class Application { public static void main(String[] args) { ApplicationContext ac = new ClassPathXmlApplicationContext("spring.xml"); } } |
Result:


