In the previous tutorial, I showed you how to implement WebSocket using Spring WebSocket. In the example of that post, all users subscribed to “/topic/messages” will receive messages published to this topic. In case you want to only send to a certain user, how? In this tutorial, I will show you how to send a STOMP message to a specific user with Spring WebSocket!
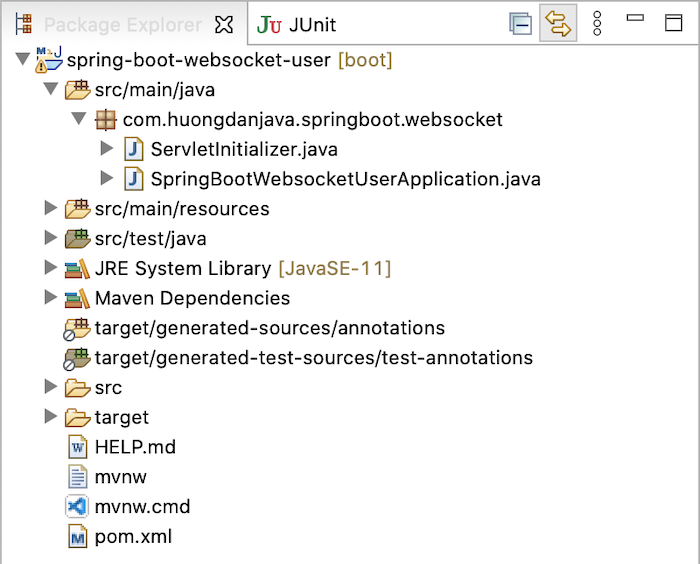
I also created a Spring Boot project with Web and WebSocket dependency like the previous post.
The result is as follows:

I also declare to use WebJars with JQuery, SocketJS client and Stomp WebSocket dependencies as follows:
|
1 2 3 4 5 6 7 8 9 10 11 12 13 14 15 16 17 18 19 |
<dependency> <groupId>org.webjars</groupId> <artifactId>webjars-locator-core</artifactId> </dependency> <dependency> <groupId>org.webjars.npm</groupId> <artifactId>jquery</artifactId> <version>3.6.0</version> </dependency> <dependency> <groupId>org.webjars</groupId> <artifactId>sockjs-client</artifactId> <version>1.5.1</version> </dependency> <dependency> <groupId>org.webjars</groupId> <artifactId>stomp-websocket</artifactId> <version>2.3.4</version> </dependency> |
Similar to the previous post, I also created a new class to configure WebSocket as follows:
|
1 2 3 4 5 6 7 8 9 10 11 12 13 14 15 16 17 18 19 20 21 22 23 24 25 |
package com.huongdanjava.springboot.websocket; import org.springframework.context.annotation.Configuration; import org.springframework.messaging.simp.config.ChannelRegistration; import org.springframework.messaging.simp.config.MessageBrokerRegistry; import org.springframework.web.socket.config.annotation.EnableWebSocketMessageBroker; import org.springframework.web.socket.config.annotation.StompEndpointRegistry; import org.springframework.web.socket.config.annotation.WebSocketMessageBrokerConfigurer; @Configuration @EnableWebSocketMessageBroker public class WebSocketConfiguration implements WebSocketMessageBrokerConfigurer { @Override public void registerStompEndpoints(StompEndpointRegistry registry) { registry.addEndpoint("/hello").withSockJS(); } @Override public void configureMessageBroker(MessageBrokerRegistry registry) { registry.enableSimpleBroker("queue"); registry.setApplicationDestinationPrefixes("/app"); registry.setUserDestinationPrefix("/users"); } } |
Differences here:
- The first is that I let the value of the parameter in the enableSimpleBroker() method be “queue”, the purpose is to show the purpose of the example, point-to-point, but you can name it whatever you want!
- The main thing you need to know is that to send a message to a specific user, we will send the message to a default endpoint that starts with “/user”, “/user/queue/messages” for example. We can change this default prefix by using the setUserDestinationPrefix() method of the MessageBrokerRegistry object like I did above. In our example now, we need a message to the endpoint “/users/queue/messages”.
To handle the message from the client sent to the STOMP endpoint of the WebSocket server, I also created a new MessageController class with the following content:
|
1 2 3 4 5 6 7 8 9 10 11 12 13 14 15 16 17 18 19 20 21 22 |
package com.huongdanjava.springboot.websocket; import org.springframework.beans.factory.annotation.Autowired; import org.springframework.messaging.handler.annotation.MessageMapping; import org.springframework.messaging.handler.annotation.Payload; import org.springframework.messaging.simp.SimpMessageHeaderAccessor; import org.springframework.messaging.simp.SimpMessagingTemplate; import org.springframework.stereotype.Controller; @Controller public class MessageController { @Autowired private SimpMessagingTemplate simpMessagingTemplate; @MessageMapping("/hello") public void send(SimpMessageHeaderAccessor sha, @Payload String username) { String message = "Hello from " + sha.getUser().getName(); simpMessagingTemplate.convertAndSendToUser(username, "/queue/messages", message); } } |
I also use @MessageMapping to define a mapping method handle for the “/hello” request to the WebSocket server.
The difference here is that we don’t use the @SendTo annotation like in the previous tutorial, but will use the SimpMessagingTemplate class with the convertAndSendToUser() method to send a message to a specific user.
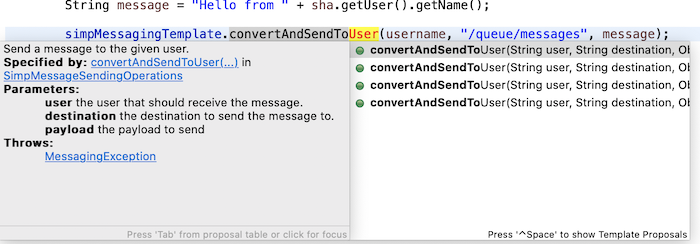
There are multiple overloads for this convertAndSendToUser() method:

I’m just using a simple method with 3 parameters: user, destination and payload.
The second parameter, destination, is the endpoint that the client needs to subscribe to, of course it is necessary to add the prefix that we have configured in the WebSocketConfiguration class. In my example, clients need to subscribe to the “/users/queue/messages” endpoint.
The third parameter, payload, is the message content that we need to send to the user.
The 1st parameter, user is the most important parameter that took me a lot of time to determine, because there is currently no Spring official document talking about this. It is actually the username associated with a session id when a client connects to the WebSocket server. By default, only session id is generated and comes with each WebSocket connection and username, if we don’t add code to define username, this username will be null. This username information, if any, will be contained in the implementation of the java.security.Principal interface, the SimpMessageHeaderAccessor class contains information about the WebSocket connection header and will contain the information of this implementation class. That’s why in the send() method of the MessageController class, I used the SimpMessageHeaderAccessor class as a parameter of this method.
In the example of this tutorial, I will pass the username information into the header of the WebSocket connection when the client connects to the WebSocket server and on the WebSocket server side, I will add the code for Spring to get it as the username of the WebSocket connection.
My front-end code is as follows:
index.html:
|
1 2 3 4 5 6 7 8 9 10 11 12 13 14 15 16 17 18 19 20 21 22 23 24 25 26 27 28 29 30 31 |
<!DOCTYPE html> <html> <head> <title>Hello WebSocket</title> <script src="/webjars/jquery/dist/jquery.min.js"></script> <script src="/webjars/sockjs-client/sockjs.min.js"></script> <script src="/webjars/stomp-websocket/stomp.min.js"></script> <script src="/app.js"></script> </head> <body> <div id="main-content"> <div> <div> <label>What is your username?</label> <input type="text" id="username" placeholder="Your username here..."> </div> <button id="connect" type="submit">Connect</button> <form> <div> <label>User will received message</label> <input type="text" id="name" placeholder="User will receive the message..."> </div> <button id="send" type="submit">Send</button> </form> </div> </div> <div> <label>Message from someone: </label><span id="message"></span> </div> </body> </html> |
app.js:
|
1 2 3 4 5 6 7 8 9 10 11 12 13 14 15 16 17 18 19 20 21 22 23 24 |
var stompClient = null; function connect(username) { var socket = new SockJS('/hello'); stompClient = Stomp.over(socket); stompClient.connect({ username: username, }, function() { console.log('Web Socket is connected'); stompClient.subscribe('/users/queue/messages', function(message) { $("#message").text(message.body); }); }); } $(function() { $("form").on('submit', function(e) { e.preventDefault(); }); $("#connect").click(function() { connect($("#username").val()); }); $("#send").click(function() { stompClient.send("/app/hello", {}, $("#name").val()); }); }); |
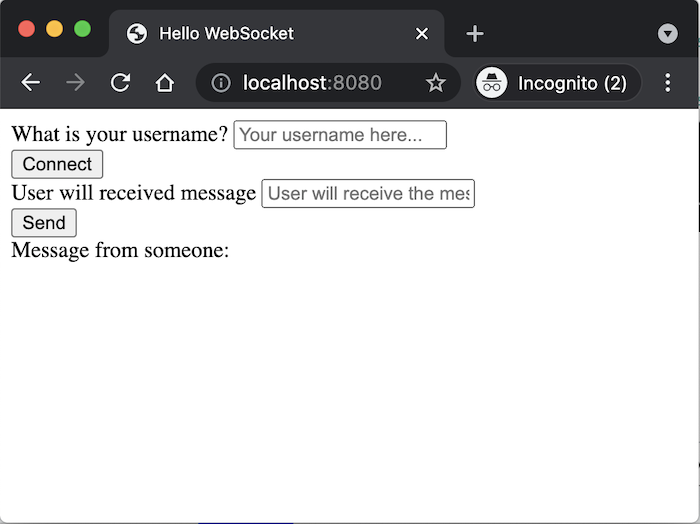
The results when running my example are as follows:

We will enter the username that will be associated with the WebSocket connection then click the Connect button to create a WebSocket connection. For simplicity, I only allow users to enter the username they want to send the message, the message content will automatically generate from the WebSocket server. When a user receives a message from someone, the content of this message will be displayed behind the text “Message from someone”.
In the app.js file, as you can see, the client is subscribing to the “/users/queue/messages” endpoint to receive messages from other users.
Now, I will code the most important part of adding the username information associated with each connection to the WebSocket server.
First, I will create a new User class that implements the java.security.Principal interface:
|
1 2 3 4 5 6 7 8 9 10 11 12 13 14 15 16 17 18 |
package com.huongdanjava.springboot.websocket; import java.security.Principal; public class User implements Principal { private String name; public User(String name) { this.name = name; } @Override public String getName() { return name; } } |
Next, we will update the WebSocketConfiguration class to add an interceptor for each WebSocket connection to the WebSocket server. We will add code to set the user information for each connection, as follows:
|
1 2 3 4 5 6 7 8 9 10 11 12 13 14 15 16 17 18 19 20 21 22 23 24 25 26 27 28 29 30 |
package com.huongdanjava.springboot.websocket; import org.springframework.context.annotation.Configuration; import org.springframework.messaging.simp.config.ChannelRegistration; import org.springframework.messaging.simp.config.MessageBrokerRegistry; import org.springframework.web.socket.config.annotation.EnableWebSocketMessageBroker; import org.springframework.web.socket.config.annotation.StompEndpointRegistry; import org.springframework.web.socket.config.annotation.WebSocketMessageBrokerConfigurer; @Configuration @EnableWebSocketMessageBroker public class WebSocketConfiguration implements WebSocketMessageBrokerConfigurer { @Override public void registerStompEndpoints(StompEndpointRegistry registry) { registry.addEndpoint("/hello").withSockJS(); } @Override public void configureMessageBroker(MessageBrokerRegistry registry) { registry.enableSimpleBroker("queue"); registry.setApplicationDestinationPrefixes("/app"); registry.setUserDestinationPrefix("/users"); } @Override public void configureClientInboundChannel(ChannelRegistration registration) { registration.interceptors(new UserInterceptor()); } } |
The content of the UserInterceptor class is as follows:
|
1 2 3 4 5 6 7 8 9 10 11 12 13 14 15 16 17 18 19 20 21 22 23 24 25 26 27 28 29 30 31 32 33 |
package com.huongdanjava.springboot.websocket; import java.util.ArrayList; import java.util.Map; import org.springframework.messaging.Message; import org.springframework.messaging.MessageChannel; import org.springframework.messaging.simp.SimpMessageHeaderAccessor; import org.springframework.messaging.simp.stomp.StompCommand; import org.springframework.messaging.simp.stomp.StompHeaderAccessor; import org.springframework.messaging.support.ChannelInterceptor; import org.springframework.messaging.support.MessageHeaderAccessor; public class UserInterceptor implements ChannelInterceptor { @Override public Message<?> preSend(Message<?> message, MessageChannel channel) { StompHeaderAccessor accessor = MessageHeaderAccessor.getAccessor(message, StompHeaderAccessor.class); if (StompCommand.CONNECT.equals(accessor.getCommand())) { Object raw = message.getHeaders().get(SimpMessageHeaderAccessor.NATIVE_HEADERS); if (raw instanceof Map) { Object name = ((Map) raw).get("username"); if (name instanceof ArrayList) { accessor.setUser(new User(((ArrayList<String>) name).get(0).toString())); } } } return message; } } |
In other words, for each WebSocket connection, I will get the username information that I have passed on the client side to assign user information to that connection. The setUser() method of the SimpMessageHeaderAccessor class with the java.security.Principal interface parameter will help us do this.
Now we can run the application to see how the results are!
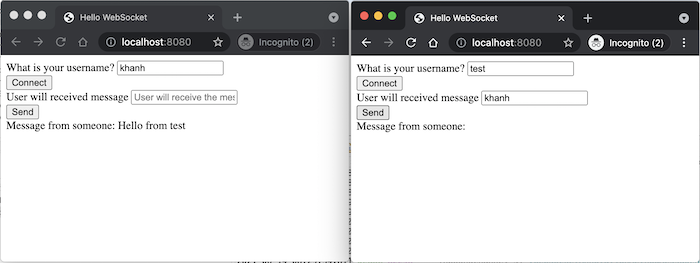
I will open 2 browser windows, enter the user information “khanh” and “test” for each browser window and press the Connect button. Then, in the “test” user’s window, I will enter the username “khanh” and press the Send button. In the window of the user “khanh”, you will see the following results:


Filip
The only tutorial on the Internet that shows how it’s done…
Can’t thank you more Khanh!
gao
I meet the same promblem,and the console doesn’t print the msg
Mary
Thank you so much.How can i save and retrieve messages to mongodb or can i do this with this project ?Do you have a similar project?
Skyler Dache
I just wanted to say, thank you so so much! It’s obviously complicated to do this in Spring. I have spent so much time trying to figure this stuff out, and these two posts have enabled me to finally write the web application I’ve been wanting to write! thanks a million!
Khanh Nguyen
You’re welcome @Skyler
Itamar
Hi,
This tutorial can be a solution to server that need to support multiple clients concurrently?
Also I tried to do this with one change that the client is also write in java – when I do this the response don’t come back where I subscribe it in the client – why is it?
Also When I tried to solve it with @SendToUser its work, But when I open to client (on java) – for the first client I registerd I all the time get respnse and for the second there is not respnose from the server at all (but I debug and the request go to the server).
thanks
Tomek
Thank you for your work, Khanh,
May I ask you where the server store websocket users? If you click ‘connect’ twice and next click ‘send’ button you will receive the message from server twice too. Why?
Even after username changed (next ‘Connect’ button with different) you’ll receive more than one message from the server.
How can we list or delete websocket connections?
Tomek
OK, i know, ‘stompClient.subscribe(‘/user/queue/reply’…’ more than once. 🙂
But how can server list websocket users and how to secure websocket?
Tomek
I’ve found a solution. Thanks again for the tutorial.
mikej1688
I run the code posted here. Both sender and receiver connected to the server. And the server created msg. However, the receiver didn’t receive the msg. Don’t know what was wrong.
Khanh Nguyen
Can you see any message in the console of browser @mikej1688?
Steve
I too get same issue not recieving messages