
WebSocket is one of the Socket types, in short, for you to easily imagine WebSocket, it helps us to create a 2-way connection between server-side and client-side in any web application. Once the connection has been established, the client and server can exchange information, the client can send messages to the server, and vice versa. Unlike an HTTP connection, only the client can send a request to the server, the server returns a response, the server cannot send a message to any client on its own. WebSocket is often used in web applications that require the real-time of a certain function. In this tutorial, I will show you how to implement WebSocket in a web application with Spring framework.
First, I will create a new Spring Boot project:
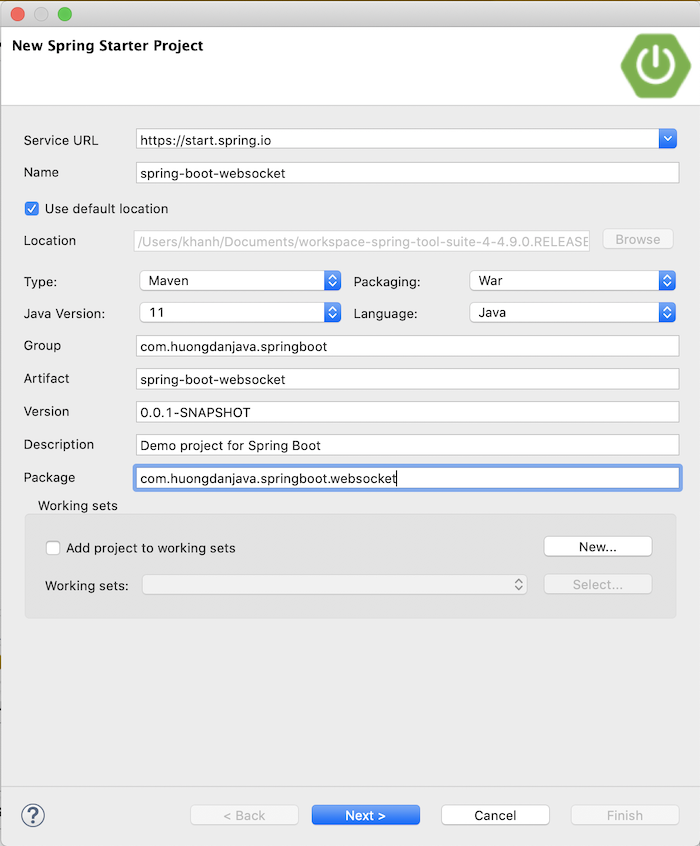
with Web and WebSocket dependency as follows:
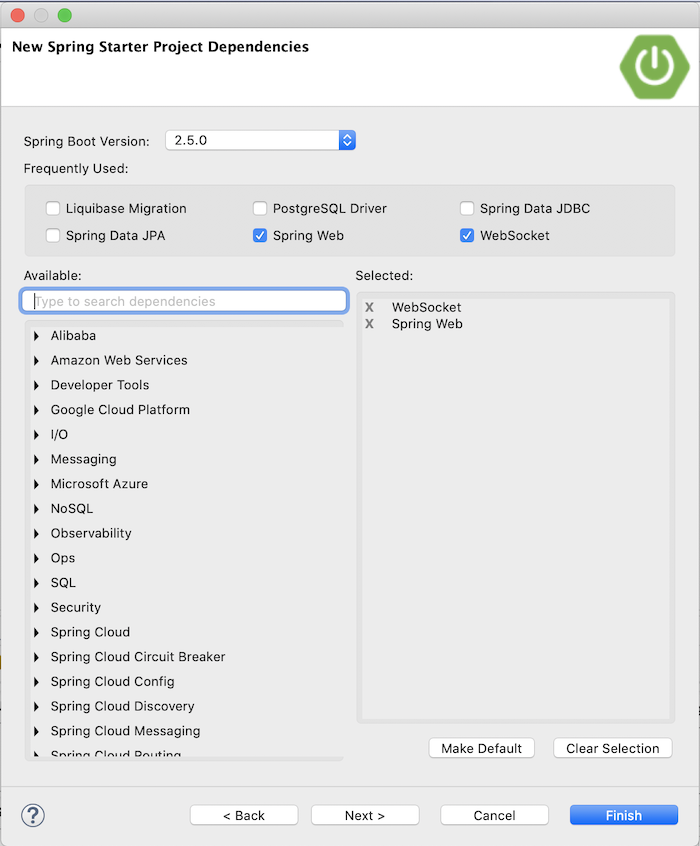
to make an example.
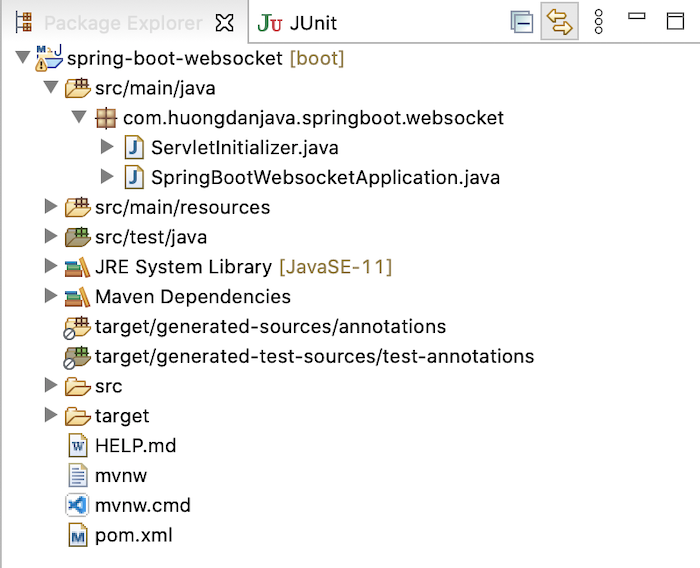
Result:
Create a new WebSocket server
To initialize a WebSocket server with Spring WebSocket, first, you need to understand some concepts as follows:
The first is about Message Broker, it is a message-oriented middleware server in the middle to deliver messages from requests to topics by pub-sub or queue by point-to-point mechanism. That is, instead of applications sending messages directly to the topic or queue that you often see when working with Message Queue, with Message Broker, messages must go through this Message Broker. Spring uses Message Broker to implement WebSocket behind the sense!
The second one is that I will talk about STOMP. What is STOMP? It stands for Streaming Text Oriented Messaging Protocol, which translates to STOMP is a text-oriented messaging protocol, used by the client and server, after being connected to each other, to exchange information. Spring also supports this protocol in transmitting information between client and server with WebSocket.
OK, now we will declare to create a new WebSocket server!
You need to create a new class to configure WebSocket. This class will implement the WebSocketMessageBrokerConfigurer interface and be annotated with the @EnableWebSocketMessageBroker annotation:
|
1 2 3 4 5 6 7 8 9 10 11 |
package com.huongdanjava.springboot.websocket; import org.springframework.context.annotation.Configuration; import org.springframework.web.socket.config.annotation.EnableWebSocketMessageBroker; import org.springframework.web.socket.config.annotation.WebSocketMessageBrokerConfigurer; @Configuration @EnableWebSocketMessageBroker public class WebSocketConfiguration implements WebSocketMessageBrokerConfigurer { } |
Of course, it also needs to be annotated with the @Configuration annotation for Spring Boot to automatically scan!
There are two methods that we need to implement in this WebSocketConfiguration class: configureMessageBroker() and registerStompEndpoints(). The configureMessageBroker() method with the MessageBrokerRegistry class parameter allows us to configure the Message Broker with the enableSimpleBroker() method:
|
1 2 3 4 5 |
@Override public void configureMessageBroker(MessageBrokerRegistry registry) { registry.enableSimpleBroker("/topic"); registry.setApplicationDestinationPrefixes("/app"); } |
The parameter of the enableSimpleBroker() method is the prefix of the endpoints that clients can subscribe to and receive messages from the server. This means the endpoint to which clients subscribe must start with the value declared with the enableSimpleBroker() method. Otherwise, our application will not run.
In the above configureMessageBroker() method, I also use the setApplicationDestinationPrefixes() method to define the prefix for the destinations that the client will send messages to the WebSocket server. If you have worked with RESTful Web Service using Spring MVC, you can imagine the purpose of this method like you define a request mapping in the Controller at the class level. Methods that define request URLs will prefix the value of this request mapping.
The registerStompEndpoints() method with the StompEndpointRegistry class parameter is the same as when defining the request URL in the RESTful Web Service, helping us to define the endpoints that the client will use to call and connect to the WebSocket. We use the addEndpoint() method of the StompEndpointRegistry class to add the endpoints you want. For example, I define an endpoint as follows:
|
1 2 3 4 |
@Override public void registerStompEndpoints(StompEndpointRegistry registry) { registry.addEndpoint("/hello"); } |
Some browsers may not support WebSocket connection such as Chrome browser’s incognito mode. In this case, you can call the withSockJS() method to use other alternatives like xhr-streaming, xhr-polling instead of the default WebSocket connection.
The content of my WebSocketConfiguration class now is as follows:
|
1 2 3 4 5 6 7 8 9 10 11 12 13 14 15 16 17 18 19 20 21 22 23 |
package com.huongdanjava.springboot.websocket; import org.springframework.context.annotation.Configuration; import org.springframework.messaging.simp.config.MessageBrokerRegistry; import org.springframework.web.socket.config.annotation.EnableWebSocketMessageBroker; import org.springframework.web.socket.config.annotation.StompEndpointRegistry; import org.springframework.web.socket.config.annotation.WebSocketMessageBrokerConfigurer; @Configuration @EnableWebSocketMessageBroker public class WebSocketConfiguration implements WebSocketMessageBrokerConfigurer { @Override public void registerStompEndpoints(StompEndpointRegistry registry) { registry.addEndpoint("/hello").withSockJS(); } @Override public void configureMessageBroker(MessageBrokerRegistry registry) { registry.enableSimpleBroker("/topic"); registry.setApplicationDestinationPrefixes("/app"); } } |
To handle the message from the client sent to the endpoint we just configured above “/hello”, you can create a new MessageController controller with the following content:
|
1 2 3 4 5 6 7 8 9 10 11 12 13 14 15 |
package com.huongdanjava.springboot.websocket; import org.springframework.messaging.handler.annotation.MessageMapping; import org.springframework.messaging.handler.annotation.SendTo; import org.springframework.stereotype.Controller; @Controller public class MessageController { @MessageMapping("/hello") @SendTo("/topic/messages") public String send(String username) { return "Hello, " + username; } } |
Like the controller in Spring MVC, you can annotate the class handle message from the client with the @Controller annotation, but instead of using the @RequestMapping annotation in the message handle method, we use the @MessageMapping annotation with the value being the value of the endpoint that we use. We have configured in WebSocketConfiguration class, my example is “/hello”.
After the method processes the business logic and returns the result, this result will be sent to the destination the client subscribed to, declared in the @SendTo annotation. Remember that the value declared in the @SendTo annotation must start as the value we declared in the enableSimpleBroker() method above!
Now, if you run the application, look at the log message, you will see that the WebSocket server will start and be ready to receive connections from the client side as follows:
|
1 2 3 4 5 6 7 8 9 10 11 12 13 14 15 16 17 18 19 20 21 22 23 |
. ____ _ __ _ _ /\\ / ___'_ __ _ _(_)_ __ __ _ \ \ \ \ ( ( )\___ | '_ | '_| | '_ \/ _` | \ \ \ \ \\/ ___)| |_)| | | | | || (_| | ) ) ) ) ' |____| .__|_| |_|_| |_\__, | / / / / =========|_|==============|___/=/_/_/_/ :: Spring Boot :: (v2.5.0) 2021-06-05 11:36:45.108 INFO 38061 --- [ main] c.h.s.w.SpringBootWebsocketApplication : Starting SpringBootWebsocketApplication using Java 15.0.1 on Khanhs-MBP with PID 38061 (/Users/khanh/Documents/workspace-spring-tool-suite-4-4.9.0.RELEASE/spring-boot-websocket/target/classes started by khanh in /Users/khanh/Documents/workspace-spring-tool-suite-4-4.9.0.RELEASE/spring-boot-websocket) 2021-06-05 11:36:45.110 INFO 38061 --- [ main] c.h.s.w.SpringBootWebsocketApplication : No active profile set, falling back to default profiles: default 2021-06-05 11:36:46.683 INFO 38061 --- [ main] o.s.b.w.embedded.tomcat.TomcatWebServer : Tomcat initialized with port(s): 8080 (http) 2021-06-05 11:36:46.694 INFO 38061 --- [ main] o.apache.catalina.core.StandardService : Starting service [Tomcat] 2021-06-05 11:36:46.694 INFO 38061 --- [ main] org.apache.catalina.core.StandardEngine : Starting Servlet engine: [Apache Tomcat/9.0.46] 2021-06-05 11:36:46.860 INFO 38061 --- [ main] o.a.c.c.C.[Tomcat].[localhost].[/] : Initializing Spring embedded WebApplicationContext 2021-06-05 11:36:46.860 INFO 38061 --- [ main] w.s.c.ServletWebServerApplicationContext : Root WebApplicationContext: initialization completed in 1609 ms 2021-06-05 11:36:47.306 INFO 38061 --- [ main] o.s.b.w.embedded.tomcat.TomcatWebServer : Tomcat started on port(s): 8080 (http) with context path '' 2021-06-05 11:36:47.307 INFO 38061 --- [ main] o.s.m.s.b.SimpleBrokerMessageHandler : Starting... 2021-06-05 11:36:47.307 INFO 38061 --- [ main] o.s.m.s.b.SimpleBrokerMessageHandler : BrokerAvailabilityEvent[available=true, SimpleBrokerMessageHandler [org.springframework.messaging.simp.broker.DefaultSubscriptionRegistry@6a1ef65c]] 2021-06-05 11:36:47.308 INFO 38061 --- [ main] o.s.m.s.b.SimpleBrokerMessageHandler : Started. 2021-06-05 11:36:47.319 INFO 38061 --- [ main] c.h.s.w.SpringBootWebsocketApplication : Started SpringBootWebsocketApplication in 2.769 seconds (JVM running for 3.982) 2021-06-05 11:36:47.320 INFO 38061 --- [ main] o.s.b.a.ApplicationAvailabilityBean : Application availability state LivenessState changed to CORRECT 2021-06-05 11:36:47.321 INFO 38061 --- [ main] o.s.b.a.ApplicationAvailabilityBean : Application availability state ReadinessState changed to ACCEPTING_TRAFFIC 2021-06-05 11:37:47.023 INFO 38061 --- [MessageBroker-1] o.s.w.s.c.WebSocketMessageBrokerStats : WebSocketSession[0 current WS(0)-HttpStream(0)-HttpPoll(0), 0 total, 0 closed abnormally (0 connect failure, 0 send limit, 0 transport error)], stompSubProtocol[processed CONNECT(0)-CONNECTED(0)-DISCONNECT(0)], stompBrokerRelay[null], inboundChannel[pool size = 0, active threads = 0, queued tasks = 0, completed tasks = 0], outboundChannel[pool size = 0, active threads = 0, queued tasks = 0, completed tasks = 0], sockJsScheduler[pool size = 1, active threads = 1, queued tasks = 0, completed tasks = 0] |
Next, we will code the client to see how WebSocket works!
Create a new client to connect to the WebSocket server
I will write HTML, JavaScript code to simulate sending messages from client to server, and also how the server sends messages to the client.
I will use WebJars to add JQuery, SocketJS client and Stomp WebSocket dependencies as follows:
|
1 2 3 4 5 6 7 8 9 10 11 12 13 14 15 16 17 18 19 |
<dependency> <groupId>org.webjars</groupId> <artifactId>webjars-locator-core</artifactId> </dependency> <dependency> <groupId>org.webjars.npm</groupId> <artifactId>jquery</artifactId> <version>3.6.0</version> </dependency> <dependency> <groupId>org.webjars</groupId> <artifactId>sockjs-client</artifactId> <version>1.5.1</version> </dependency> <dependency> <groupId>org.webjars</groupId> <artifactId>stomp-websocket</artifactId> <version>2.3.4</version> </dependency> |
JQuery makes it easier to write Javascript code, SockJS to work with WebSocket connection and Stomp WebSocket let us work with that STOMP message!
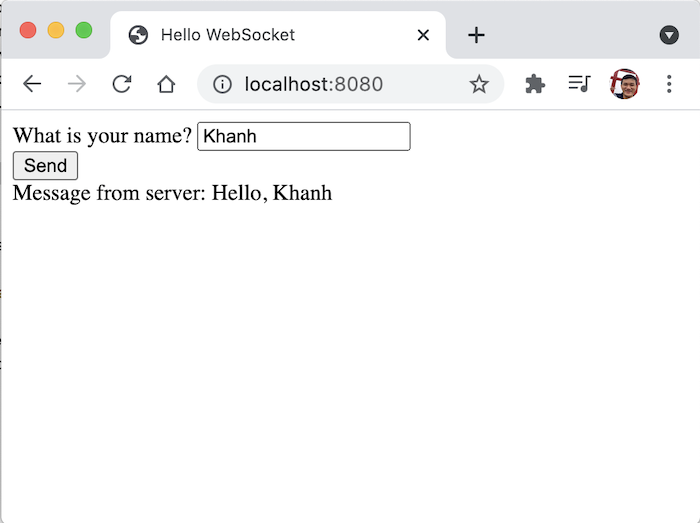
I will create a new HTML page that allows us to enter the user name, press the submit button to send the message to the WebSocket server, and a place to display the results returned from the WebSocket server.
The contents of the index.html file in the src/main/resources/static directory are as follows:
|
1 2 3 4 5 6 7 8 9 10 11 12 13 14 15 16 17 18 19 20 21 22 23 24 25 26 |
<!DOCTYPE html> <html> <head> <title>Hello WebSocket</title> <script src="/webjars/jquery/dist/jquery.min.js"></script> <script src="/webjars/sockjs-client/sockjs.min.js"></script> <script src="/webjars/stomp-websocket/stomp.min.js"></script> <script src="/app.js"></script> </head> <body> <div id="main-content"> <div> <form> <div> <label>What is your name?</label> <input type="text" id="name" placeholder="Your name here..."> </div> <button id="send" type="submit">Send</button> </form> </div> </div> <div> <label>Message from server: </label><span id="message"></span> </div> </body> </html> |
The app.js file is also in the src/main/resources/static directory with the following content:
|
1 2 3 4 5 6 7 8 9 10 11 12 13 14 15 16 17 18 19 20 21 22 23 24 25 |
var stompClient = null; $(document).ready(function() { connect(); }); function connect() { var socket = new SockJS('/hello'); stompClient = Stomp.over(socket); stompClient.connect({}, function() { console.log('Web Socket is connected'); stompClient.subscribe('/topic/messages', function(message) { $("#message").text(message.body); }); }); } $(function() { $("form").on('submit', function(e) { e.preventDefault(); }); $("#send").click(function() { stompClient.send("/app/hello", {}, $("#name").val()); }); }); |
If you know a little about JQuery, you will understand what my code means: when the browser has loaded the content of the index.html page, my web will automatically connect to the WebSocket server using the SockJS client library and use the library Stomp WebSocket to send STOMP messages. The Stomp Client object will subscribe to “/topic/messages” to receive messages from the WebSocket server.
Stomp Client allows us to send a STOMP message to the WebSocket server using the endpoint “/app/hello” with the value we entered in the textbox.
Every time a message is received from the WebSocket server, the value in the body of this STOMP message will be displayed.
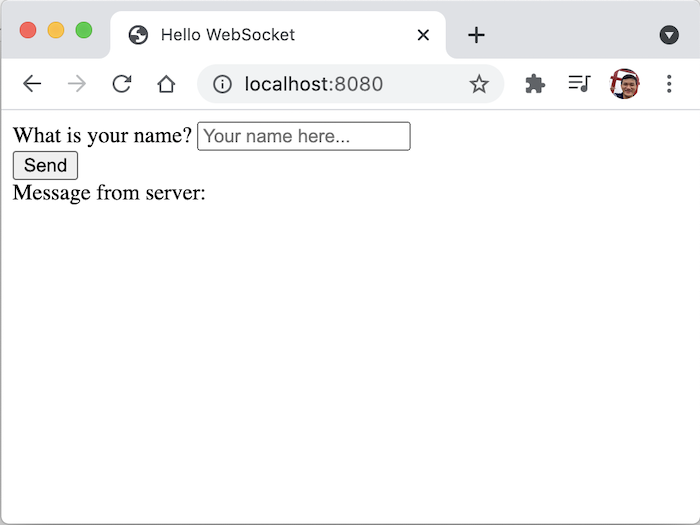
The result when I run the application, enter Khanh in the textbox and press the Send button as follows:
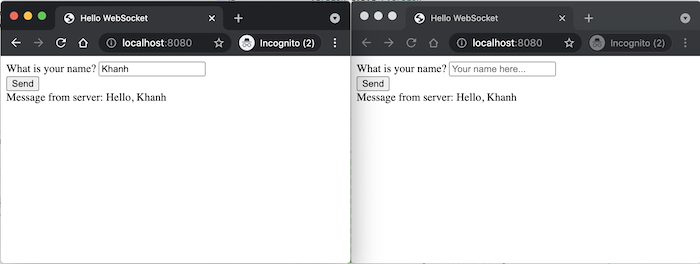
If you open 2 browser windows and do the same operation again, you will also see that both browsers receive messages from the WebSocket server. Mine is as follows:

Ducky
Hi anh Khánh,
E dùng stompjs ở client thì lúc build angular nó báo là stompjs sử dụng commonjs nên sẽ gây ra gói build có size lớn hay là làm chậm app.
vậy có cái nào thay thế mà kết hợp được với spring ko a nhỉ?
Paul
It is necessary a server mq?
Khanh Nguyen
This is just a simple broker, so we don’t need an MQ server @Paul.