In the tutorial showing you how to implement WebSocket with Spring WebSocket, my example application will allow all clients to receive all messages when they subscribe to the endpoint, and in the tutorial about sending messages to a specific user, my example application allows the client to send a message to a user associated with a specific sessionId. A bit inconvenient here if our need is just to send a request to the WebSocket server, need it to handle the business logic and return the results for ourselves, of course you can also solve the problem by sending STOMP message as I instructed, but we also have to assign a user associated with sessionId to be able to do this. Using Spring WebSocket’s @SendToUser annotation, you will not need to assign this user information. How is it in detail? I will guide you all in this tutorial.
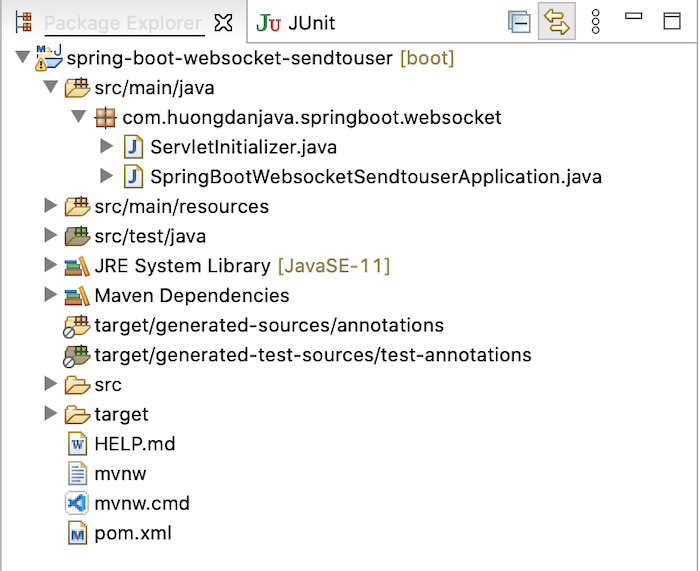
I also created a new Spring Boot with Web and WebSocket dependency.
The result is as follows:
I also declare to use WebJars with JQuery, SocketJS client and Stomp WebSocket dependencies as follows:
|
1 2 3 4 5 6 7 8 9 10 11 12 13 14 15 16 17 18 19 |
<dependency> <groupId>org.webjars</groupId> <artifactId>webjars-locator-core</artifactId> </dependency> <dependency> <groupId>org.webjars.npm</groupId> <artifactId>jquery</artifactId> <version>3.6.0</version> </dependency> <dependency> <groupId>org.webjars</groupId> <artifactId>sockjs-client</artifactId> <version>1.5.1</version> </dependency> <dependency> <groupId>org.webjars</groupId> <artifactId>stomp-websocket</artifactId> <version>2.3.4</version> </dependency> |
WebSocketConfiguration class to configure WebSocket:
|
1 2 3 4 5 6 7 8 9 10 11 12 13 14 15 16 17 18 19 20 21 22 23 |
package com.huongdanjava.springboot.websocket; import org.springframework.context.annotation.Configuration; import org.springframework.messaging.simp.config.MessageBrokerRegistry; import org.springframework.web.socket.config.annotation.EnableWebSocketMessageBroker; import org.springframework.web.socket.config.annotation.StompEndpointRegistry; import org.springframework.web.socket.config.annotation.WebSocketMessageBrokerConfigurer; @Configuration @EnableWebSocketMessageBroker public class WebSocketConfiguration implements WebSocketMessageBrokerConfigurer { @Override public void registerStompEndpoints(StompEndpointRegistry registry) { registry.addEndpoint("/hello").withSockJS(); } @Override public void configureMessageBroker(MessageBrokerRegistry registry) { registry.enableSimpleBroker("queue"); registry.setApplicationDestinationPrefixes("/app"); } } |
We will use the @SendToUser annotation in the controller to handle the request message from the client as follows:
|
1 2 3 4 5 6 7 8 9 10 11 12 13 14 15 |
package com.huongdanjava.springboot.websocket; import org.springframework.messaging.handler.annotation.MessageMapping; import org.springframework.messaging.simp.annotation.SendToUser; import org.springframework.stereotype.Controller; @Controller public class MessageController { @MessageMapping("/hello") @SendToUser("/queue/reply") public String send(String username) { return "Hello, " + username; } } |
The value declared in the @SendToUser annotation is the endpoint that the client will subscribe to to receive messages from the WebSocket server!
In essence, Spring also uses an endpoint to send a message to a certain user with the default prefix “/user”. You can also change this default prefix by using the setUserDestinationPrefix() method of the MessageBrokerRegistry object in the WebSocketConfiguration class as I did in the previous post. The difference here is that instead of we need to manage the user associated with the sessionId of the WebSocket connection, now Spring will use the sessionId to only send messages to the requesting client only!
Now I’ll add the front-end code to see how our example works!
index.html:
|
1 2 3 4 5 6 7 8 9 10 11 12 13 14 15 16 17 18 19 20 21 22 23 24 25 26 |
<!DOCTYPE html> <html> <head> <title>Hello WebSocket</title> <script src="/webjars/jquery/dist/jquery.min.js"></script> <script src="/webjars/sockjs-client/sockjs.min.js"></script> <script src="/webjars/stomp-websocket/stomp.min.js"></script> <script src="/app.js"></script> </head> <body> <div id="main-content"> <div> <form> <div> <label>What is your name?</label> <input type="text" id="name" placeholder="Your name here..."> </div> <button id="send" type="submit">Send</button> </form> </div> </div> <div> <label>Message from server: </label><span id="message"></span> </div> </body> </html> |
app.js
|
1 2 3 4 5 6 7 8 9 10 11 12 13 14 15 16 17 18 19 20 21 22 23 24 25 |
var stompClient = null; $(document).ready(function() { connect(); }); function connect() { var socket = new SockJS('/hello'); stompClient = Stomp.over(socket); stompClient.connect({}, function() { console.log('Web Socket is connected'); stompClient.subscribe('/user/queue/reply', function(message) { $("#message").text(message.body); }); }); } $(function() { $("form").on('submit', function(e) { e.preventDefault(); }); $("#send").click(function() { stompClient.send("/app/hello", {}, $("#name").val()); }); }); |
As you can see, on the client side, we will subscribe to the endpoint with the default prefix starting with “/user” as in the previous post.
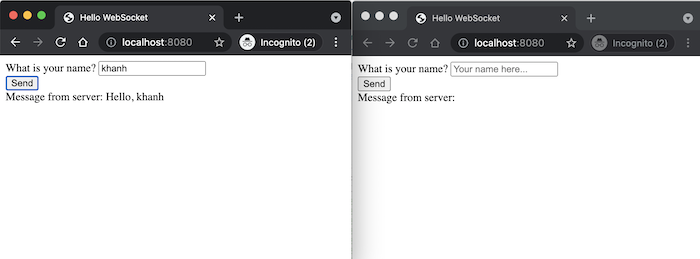
Now, if I will open 2 browser windows, enter my name in the ” What is your name” box, press the Send button, you will see that only the window I am working on receives a message from the WebSocket server: