Spring Boot is a framework built on top of the Spring Framework to simplify the development process of applications using the Spring Framework. It provides auto-configuration mechanisms by offering default configurations for Spring modules, such as Spring MVC, Spring Data JPA, etc. It also provides dependency management and features necessary for applications in the production environment. How is it in detail? Let’s explore this in this tutorial!
First, I want to tell you that you can create a new Spring Boot project using:
- Java IDEs such as Spring Tool Suite, IntelliJ,
- Spring Boot CLI,
- or Spring Initializr
I will create a new Spring Boot project using IntelliJ IDE as follows:
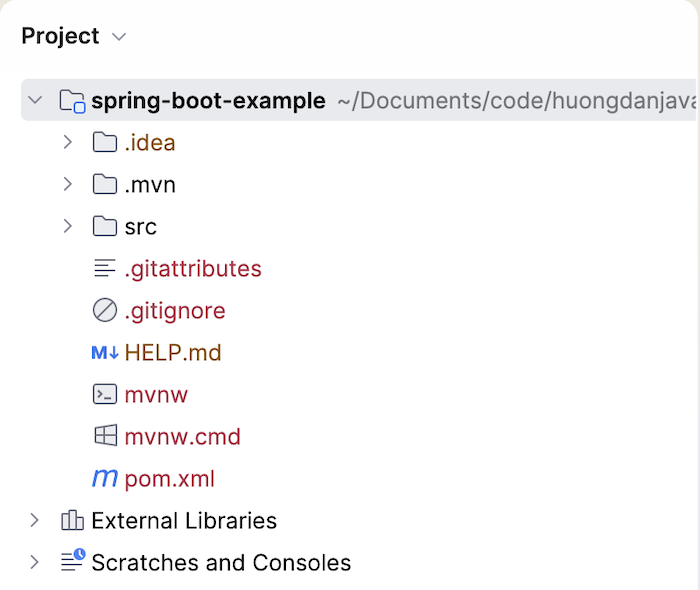
Now let’s talk about Spring Boot’s auto-configuration mechanism.
In the past, when developing Java applications using Spring modules like Spring MVC and Spring Data JPA without Spring Boot, you had to manually declare the dependencies you needed, declare the beans the application needed in the Spring container, configure related information such as Spring MVC and Spring Data JPA, and configure the server runtime to run the application. Spring Boot minimizes these steps by using default configurations.
To work with Spring Boot, we will add Starter dependencies.
For example, to implement web applications with Spring Boot, you can add the spring-boot-starter-webmvc dependency as follows:
|
1 2 3 4 |
<dependency> <groupId>org.springframework.boot</groupId> <artifactId>spring-boot-starter-webmvc</artifactId> </dependency> |
With this dependency declaration, Spring Boot will automatically include the dependencies related to Spring MVC web applications into our project.
When running the application, Spring Boot will use the dependency information in the application’s classpath to automatically apply default configurations. For example, for Spring Starter WebMVC, Spring Boot will automatically apply some default configurations as follows:
- Register
DispatcherServlet - Servlet context path is “/”
- Use Apache Tomcat server to run the application
- …
I will discuss the auto-configuration mechanism of Spring Boot in detail in later tutorials.
For pure Spring Framework applications, to run the application, we need to deploy it to a Server Runtime such as Apache Tomcat, Jetty, etc. For Spring Boot applications, you don’t need to do this.
Spring Boot uses an embedded server runtime, defaulting to Apache Tomcat, to run the application!
You just need to run the Spring Boot application with the command “java -jar” and point to the Spring Boot application file to launch it. This is very convenient when deploying Spring Boot applications using containerization with Docker, Kubernetes, cloud-native, CI/CD.
Spring Boot not only makes the development of Java applications using the Spring Framework easier, but it also provides essential features for running applications in a production environment.
For example, if you use the Spring Boot Actuator module in your application, when you run it, Spring Boot will automatically expose additional endpoints, such as:
- /actuator/health
- /actuator/info
- /actuator/metrics
allowing you to monitor the running application.
For the Spring MVC project created using the Maven Archetype “huongdanjava-springmvc-archetype” that I introduced in the tutorial Create a new Spring MVC project using huongdanjava-spring-mvc-archetype, you can rewrite it with Spring Boot as follows:
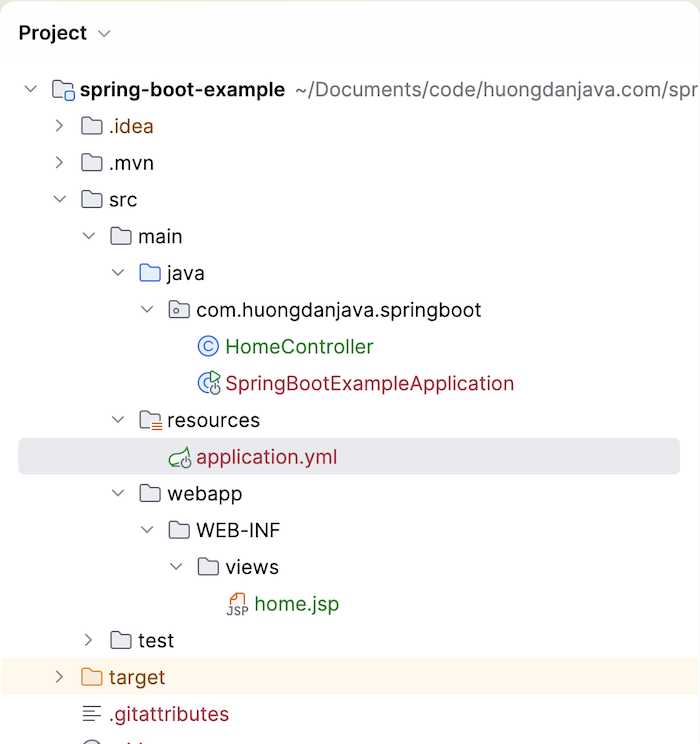
The content of the HomeController file is the same as in the spring-mvc-example project!
The application.yml file will have the following content:
|
1 2 3 4 5 6 7 8 9 10 11 12 13 14 |
spring: application.: name: spring-boot-example mvc: view: prefix: /WEB-INF/views/ suffix: .jsp server: port: 8585 servlet: context-path: /springmvc |
You also need to add some dependencies as follows:
|
1 2 3 4 5 6 7 8 9 10 11 12 13 14 |
<dependency> <groupId>org.apache.tomcat.embed</groupId> <artifactId>tomcat-embed-jasper</artifactId> <scope>provided</scope> </dependency> <dependency> <groupId>jakarta.servlet.jsp.jstl</groupId> <artifactId>jakarta.servlet.jsp.jstl-api</artifactId> </dependency> <dependency> <groupId>org.glassfish.web</groupId> <artifactId>jakarta.servlet.jsp.jstl</artifactId> </dependency> |
This is so that Spring Boot can render JSP files correctly with the JSTL engine!
Running this Spring Boot application, you will see the same result.