In the previous post, I showed you how to auto component scan using the configuration in the XML file. In this tutorial, I show you how to do this with Java code using the @ComponentScan annotation.
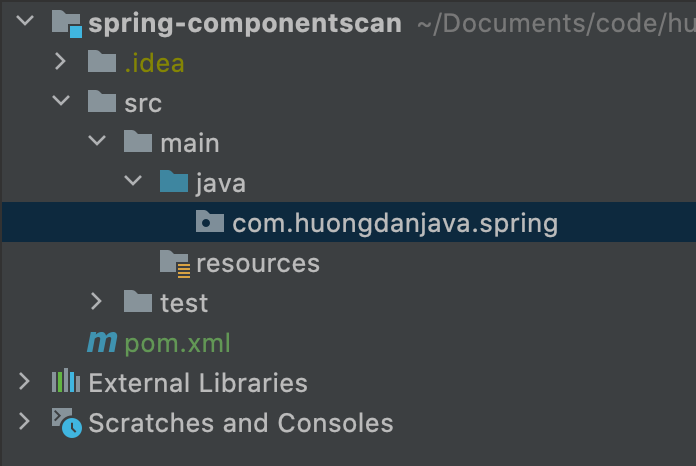
First, I will create a new Maven project as an example:
I will use Java 21 for this example application:
|
1 2 3 4 |
<properties> <maven.compiler.source>21</maven.compiler.source> <maven.compiler.target>21</maven.compiler.target> </properties> |
Spring dependency is as follows:
|
1 2 3 4 5 |
<dependency> <groupId>org.springframework</groupId> <artifactId>spring-context</artifactId> <version>6.2.2</version> </dependency> |
Now, I will add a HelloWorld class declared with the @Component annotation as follows:
|
1 2 3 4 5 6 7 8 9 10 11 |
package com.huongdanjava.spring; import org.springframework.stereotype.Component; @Component public class HelloWorld { public void print() { System.out.print("Hello World!"); } } |
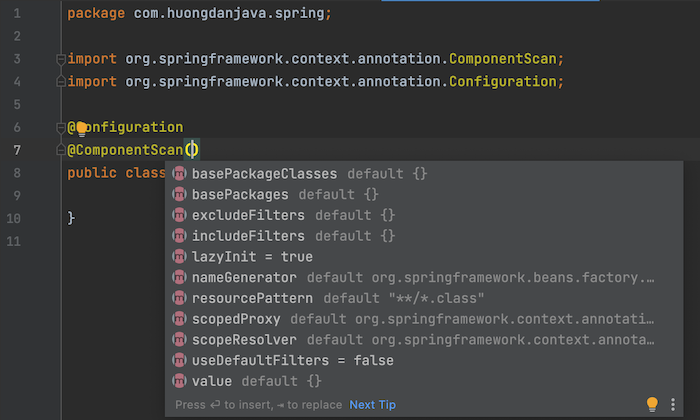
Next, I will create a new class to configure the application:
|
1 2 3 4 5 6 7 8 |
package com.huongdanjava.spring; import org.springframework.context.annotation.ComponentScan; @ComponentScan public class ApplicationConfiguration { } |
As you can see, I have annotated this ApplicationConfiguration class with the @ComponentScan annotation, the purpose of the @ComponentScan annotation is to automatically scan and initialize the beans in the Spring container for the annotated classes with the @Component, @Repository, @Service, and @Controller annotation.
The attributes of the @ComponentScan annotation are as follows:
The @ComponentScan annotation allows us to declare packages that Spring can scan and initialize beans. By default, if we don’t declare attribute basePackages, then Spring will get the package containing the class that we declare this @ComponentScan annotation, to scan. You can declare the basePackages attribute if you want, for example like this:
|
1 2 3 4 5 6 7 8 |
package com.huongdanjava.spring; import org.springframework.context.annotation.ComponentScan; @ComponentScan("com.huongdanjava.spring") public class ApplicationConfiguration { } |
The @ComponentScan annotation also allows us to declare packages of the classes they belong to for scanning, using the basePackageClasses attribute.
We can also define how the bean names are generated (attribute nameGenerator), a filter that allows Spring to create beans for some classes (attribute includeFilters), disallow the creation of beans for some classes (attribute excludeFilters), and create beans immediately or only when that class is used to (attribute lazyInit), … Depending on your needs, please configure this annotation correctly!
In my example, the ApplicationConfiguration class is in the same package as the HelloWorld class, so I don’t need to declare anymore.
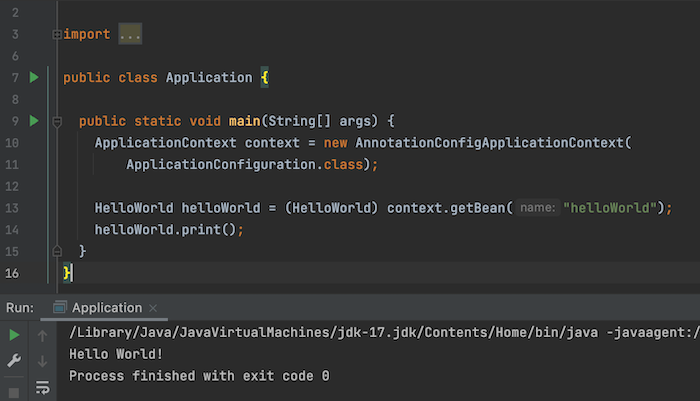
The main class to run this application has the following content:
|
1 2 3 4 5 6 7 8 9 10 11 12 13 14 15 |
package com.huongdanjava.spring; import org.springframework.context.ApplicationContext; import org.springframework.context.annotation.AnnotationConfigApplicationContext; import org.springframework.context.support.ClassPathXmlApplicationContext; public class Application { public static void main(String[] args) { ApplicationContext context = new AnnotationConfigApplicationContext(ApplicationConfiguration.class); HelloWorld helloWorld = (HelloWorld) context.getBean("helloWorld"); helloWorld.print(); } } |
The result when running the application is still the same as in the previous tutorial: