Database migration, also known as version control for the database, is the job of managing information and structuring the database in a versioning style. For example, you are developing a student management application that uses a database, the first release of this application you need 2 tables to manage information is student and clazz, the second release we need to edit student or clazz table information, or maybe add a new subject table to manage the subject, … For each release, we will have a version related to the database structure for our application. To realize this need, we have many different ways in Java, such as using Flyway or Liquibase, … In this tutorial, I will introduce you to Liquibase to implement database migration.
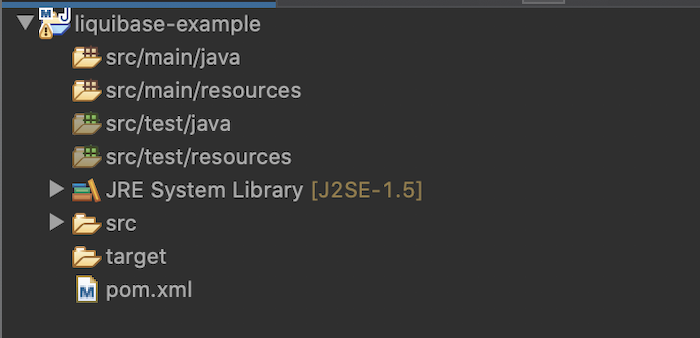
First, I will create a new Maven project as an example:
I will use Java 21 for this project:
|
1 2 3 4 |
<properties> <maven.compiler.source>21</maven.compiler.source> <maven.compiler.target>21</maven.compiler.target> </properties> |
To work with Liquibase, you need to declare its dependency:
|
1 2 3 4 5 |
<dependency> <groupId>org.liquibase</groupId> <artifactId>liquibase-core</artifactId> <version>4.31.1</version> </dependency> |
I will also use a PostgreSQL database as an example for this tutorial:
|
1 2 3 4 5 |
<dependency> <groupId>org.postgresql</groupId> <artifactId>postgresql</artifactId> <version>42.7.5</version> </dependency> |
When working with Liquibase, you need to understand three basic concepts of it: changelog, changeset, changetype and precondition.
A changelog can contain many changesets and a changeset can contain many changetypes. Literally, for you to understand, the changelog is a file that defines all versions of the database structure in the way of Liquibase so that it can execute the database version change for us. You can define this changelog file in many different formats, including SQL, XML, JSON, YAML, …
If you define it in XML, the content of the changelog file will have the following basic contents:
|
1 2 3 4 5 6 7 8 |
<?xml version="1.0" encoding="UTF-8"?> <databaseChangeLog xmlns="http://www.liquibase.org/xml/ns/dbchangelog" xmlns:xsi="http://www.w3.org/2001/XMLSchema-instance" xsi:schemaLocation="http://www.liquibase.org/xml/ns/dbchangelog http://www.liquibase.org/xml/ns/dbchangelog/dbchangelog-4.3.xsd"> <!-- Define changeset --> </databaseChangeLog> |
Inside the <databaseChangeLog> tag representing the changelog, we will define the changeset. You can think of each changeset as a version of the database structure of the application. There are 2 required properties for each changeset that you must declare as id and author.
|
1 2 3 4 5 6 7 8 9 10 11 12 13 14 |
<?xml version="1.0" encoding="UTF-8"?> <databaseChangeLog xmlns="http://www.liquibase.org/xml/ns/dbchangelog" xmlns:xsi="http://www.w3.org/2001/XMLSchema-instance" xsi:schemaLocation="http://www.liquibase.org/xml/ns/dbchangelog http://www.liquibase.org/xml/ns/dbchangelog/dbchangelog-4.3.xsd"> <!-- Define changeset --> <changeSet id="1" author="khanh"> <comment>A sample change set 1</comment> </changeSet> <changeSet id="2" author="khanh"> <comment>A sample change set 2</comment> </changeSet> </databaseChangeLog> |
Each changeset will support you with many changetypes. Literally, the changetype represents the SQL statements for you to add, new, delete, and modify the database structure. For changelog with XML format, you can see the changetype as follows:

For example, now I need to create a new table named student with information about the student’s name and age. I will define changeset with the changetype as follows:
|
1 2 3 4 5 6 7 8 9 10 11 12 13 14 15 |
<?xml version="1.0" encoding="UTF-8"?> <databaseChangeLog xmlns="http://www.liquibase.org/xml/ns/dbchangelog" xmlns:xsi="http://www.w3.org/2001/XMLSchema-instance" xsi:schemaLocation="http://www.liquibase.org/xml/ns/dbchangelog http://www.liquibase.org/xml/ns/dbchangelog/dbchangelog-4.3.xsd"> <changeSet id="1" author="khanh"> <createTable tableName="student"> <column name="id" type="BIGINT" autoIncrement="true"> <constraints primaryKey="true" nullable="false" /> </column> <column name="name" type="VARCHAR(200)" /> <column name="age" type="BIGINT" /> </createTable> </changeSet> </databaseChangeLog> |
Before executing the changetype, you can add preconditions to check if Liquibase needs to execute our changetype or not? An example where we can add a precondition is to check if a table already exists before executing the changetype to create it:
|
1 2 3 4 5 6 7 8 9 10 11 12 13 14 15 16 17 18 19 20 21 22 |
<?xml version="1.0" encoding="UTF-8"?> <databaseChangeLog xmlns="http://www.liquibase.org/xml/ns/dbchangelog" xmlns:xsi="http://www.w3.org/2001/XMLSchema-instance" xsi:schemaLocation="http://www.liquibase.org/xml/ns/dbchangelog http://www.liquibase.org/xml/ns/dbchangelog/dbchangelog-4.3.xsd"> <changeSet id="1" author="khanh"> <preConditions onFail="MARK_RAN"> <not> <tableExists tableName="student" /> </not> </preConditions> <createTable tableName="student"> <column name="id" type="BIGINT" autoIncrement="true"> <constraints primaryKey="true" nullable="false" /> </column> <column name="name" type="VARCHAR(200)" /> <column name="age" type="BIGINT" /> </createTable> </changeSet> </databaseChangeLog> |
Now, I will write code to see how Liquibase works.
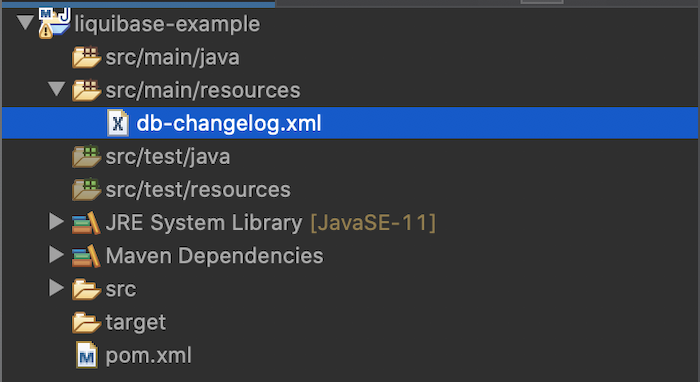
I will save the above changelog content in the db-changelog.xml file in the project’s src/main/resources directory:
I will create a new main class as an example:
|
1 2 3 4 5 6 7 8 9 |
package com.huongdanjava.liquibase; public class Application { public static void main(String[] args) { } } |
To work with Liquibase, you need to use objects of the Liquibase class. We will need to pass this object the connection to the database and the path to the changelog configuration file. There are 3 constructors in the Liquibase class that allow us to pass this information.
I use one of these 3 constructors as follows:
|
1 2 3 4 5 6 7 8 9 10 11 12 13 14 15 16 17 18 19 20 21 22 23 24 25 |
package com.huongdanjava.liquibase; import java.sql.Connection; import java.sql.DriverManager; import java.sql.SQLException; import liquibase.Liquibase; import liquibase.database.Database; import liquibase.database.DatabaseFactory; import liquibase.database.jvm.JdbcConnection; import liquibase.exception.LiquibaseException; import liquibase.resource.ClassLoaderResourceAccessor; public class Application { public static void main(String[] args) throws SQLException, LiquibaseException { Connection c = DriverManager.getConnection("jdbc:postgresql://localhost:5432/liquibase_example", "postgres", "123456"); Database database = DatabaseFactory.getInstance() .findCorrectDatabaseImplementation(new JdbcConnection(c)); Liquibase liquibase = new Liquibase("classpath:db-changelog.xml", new ClassLoaderResourceAccessor(), database); } } |
The second parameter in the Liquibase constructor in the above example specifies how Liquibase will read the changelog configuration file. It implements Liquibase’s ResourceAccessor interface!
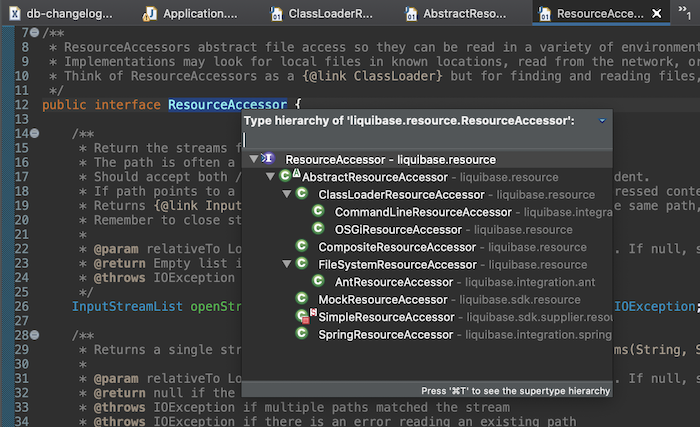
You can use any of its implementations, depending on your project.
After you have the Liquibase object, you can call the update() method with a parameter, which means the context in which we are running the database migration. You can leave it empty or null if you want. I will leave empty:
|
1 2 3 4 5 6 7 8 9 10 11 12 13 14 15 16 17 18 19 20 21 22 23 24 25 26 27 |
package com.huongdanjava.liquibase; import java.sql.Connection; import java.sql.DriverManager; import java.sql.SQLException; import liquibase.Liquibase; import liquibase.database.Database; import liquibase.database.DatabaseFactory; import liquibase.database.jvm.JdbcConnection; import liquibase.exception.LiquibaseException; import liquibase.resource.ClassLoaderResourceAccessor; public class Application { public static void main(String[] args) throws SQLException, LiquibaseException { Connection c = DriverManager.getConnection("jdbc:postgresql://localhost:5432/liquibase_example", "postgres", "123456"); Database database = DatabaseFactory.getInstance() .findCorrectDatabaseImplementation(new JdbcConnection(c)); Liquibase liquibase = new Liquibase("db-changelog.xml", new ClassLoaderResourceAccessor(), database); liquibase.update(""); } } |
OK, now run the application.
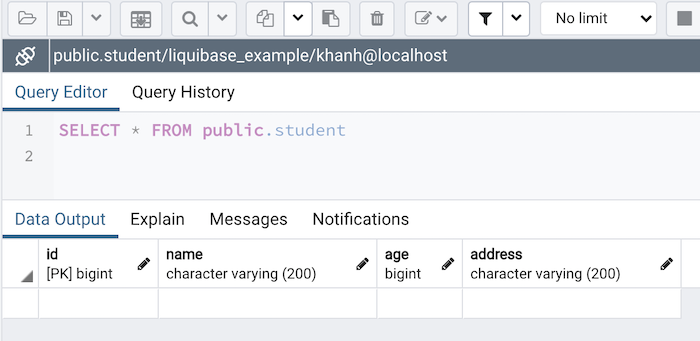
To check the results, go to your database. You will see that Liquibase creates 3 tables in my example above:
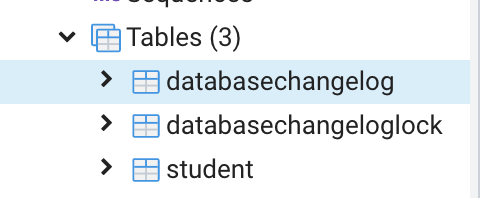
In addition to the student table with the database structure we defined in changeset:
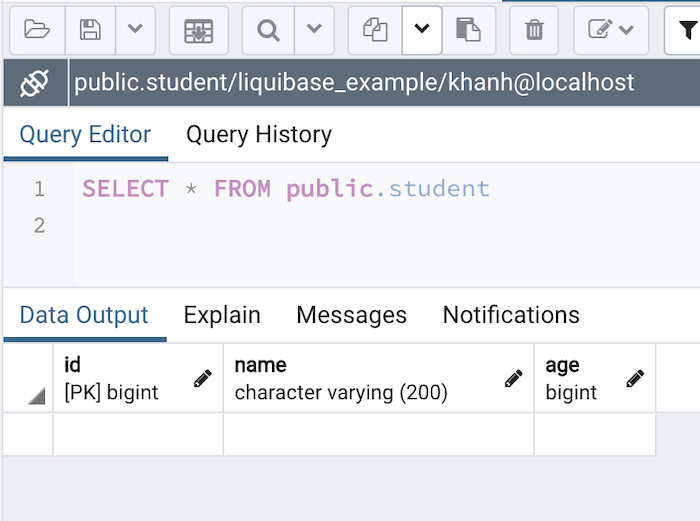
as you can see, we have 2 more tables, databasechangelog and databasechangeloglock.
The purpose of the databasechangelog table is to keep track of all changeset Liquibase has run. If you query this table, you will see the following results:
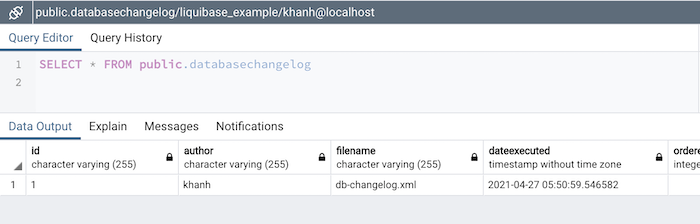
The execute order for each changeset will depend on whether you define those changesets before or after in the db-changelog.xml file. The id of each changeset along with the author and filename just tells Liquibase that it has executed the changeset yet against this databasechangelog table.
Table databasechangeloglock just lets Liquibase make sure that there is only one process of database migration performed at the same time.
Now, if I add a new changeset to add the column address in the student table:
|
1 2 3 4 5 6 7 8 9 10 11 12 13 14 15 16 17 18 19 20 21 |
<?xml version="1.0" encoding="UTF-8"?> <databaseChangeLog xmlns="http://www.liquibase.org/xml/ns/dbchangelog" xmlns:xsi="http://www.w3.org/2001/XMLSchema-instance" xsi:schemaLocation="http://www.liquibase.org/xml/ns/dbchangelog http://www.liquibase.org/xml/ns/dbchangelog/dbchangelog-4.0.xsd"> <changeSet id="1" author="khanh"> <createTable tableName="student"> <column name="id" type="BIGINT" autoIncrement="true"> <constraints primaryKey="true" nullable="false" /> </column> <column name="name" type="VARCHAR(200)" /> <column name="age" type="BIGINT" /> </createTable> </changeSet> <changeSet id="2" author="khanh"> <addColumn tableName="student"> <column name="address" type="VARCHAR(200)" /> </addColumn> </changeSet> </databaseChangeLog> |
then you will see the following results: