Docker is a tool for creating stable environments with applications, enabling us to easily run these built-in environments on different systems. How it is in details, I will have some incoming posts about it. In this tutorial, I only guide you to install Docker on Ubuntu.
Currently, I’m using Ubuntu 16.04.
First, we need to configure the apt command using the Docker repository.
To do this, first of all, you need to make sure our apt command supports HTTPS and CA authentication by running the following command:
|
1 |
sudo apt-get install apt-transport-https ca-certificates |
Then install the key:
|
1 |
sudo apt-key adv --keyserver hkp://ha.pool.sks-keyservers.net:80 --recv-keys 58118E89F3A912897C070ADBF76221572C52609D |
and add source list:
|
1 |
echo "deb https://apt.dockerproject.org/repo ubuntu-xenial main" | sudo tee /etc/apt/sources.list.d/docker.list |
of the Docker to apt command.
Next, we need to run the following command to update the apt cache:
|
1 |
sudo apt-get update |
Now, you can install Docker using the apt command by running the following command:
|
1 |
sudo apt-get install docker-engine |
After installation is complete, let’s start the Docker with the following command:
|
1 |
sudo service docker start |
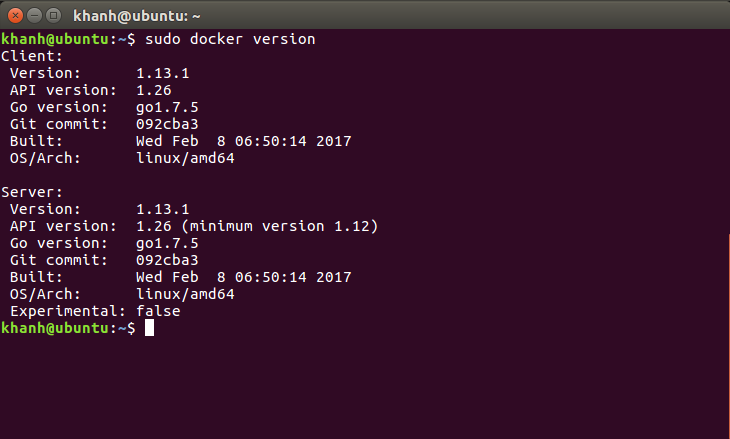
To test the results, let’s run the following command:
|
1 |
sudo docker version |
If you can see the result as follows then we have successfully installed Docker on Ubuntu.


