If any of you have worked with Apache Maven, you will know the concept of Local Maven Repository. For those who do not know, I would like to say roughly as follows:
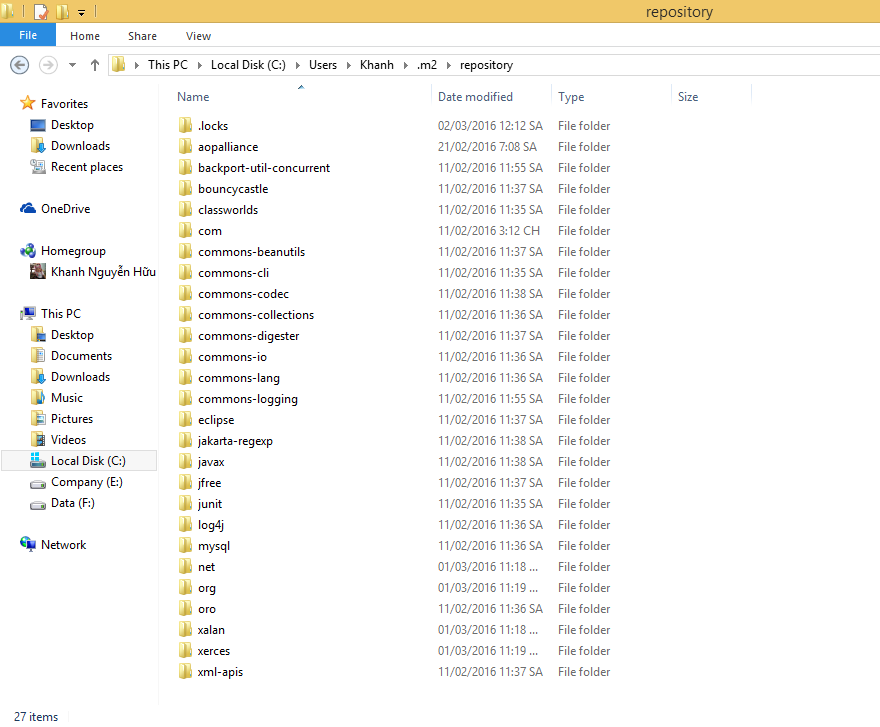
Local Maven Repository is a directory in your computer. It is created when you use Maven in your projects, which will contain all the libraries you need to build projects. By default this directory will be in the user’s directory named “.m2/repository”, as shown below:

Inside it contains all the libraries needed for you:
Now let’s get back to the main topic of this tutorial. Why do you need to put a library into the Local Maven Repository?
The simple reason is that: when working with Maven sometimes the library or version of the library you need, Maven cannot find it somewhere on the internet (or it might be called the Remote Maven Repository). Either the library which you write needs to be included in the Local Maven Repository so that other Maven projects can be used.
So what’s the solution?
Fortunately, Maven has seen that need and it has helped us to easily put any library you want into the Local Maven Repository with a simple command.
Let’s see what it looks like:
|
1 |
mvn install:install-file -Dfile=<path-to-file> -DgroupId=<Group-Id-of-library> -DartifactId=<Artifact-Id-of-library> -Dversion=<Version-of-library> -Djavadoc=<Path-to-javadoc-file> -Dsources=<Path-to-sources-file> -Dpackaging=jar |
Inside:
- For the -Dfile parameter you must provide the current path of the library you need to include in the Local Maven Repository.
- The parameters -DgroupId, -DartifactId, and -Dversion are the parameters defined for our library in the Local Maven Repository.
- For the -Djavadoc and -Dsources parameters, which are optional, you need to provide the path to the Javadoc file and the sources file of the library for Maven to install into the Local Maven Repository along with the library!
OK, I will make an example.
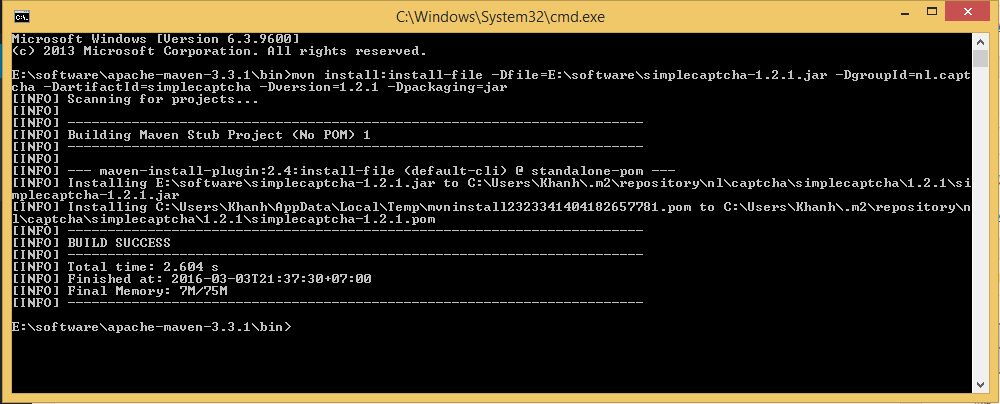
Here, I need to bring the Simple Captcha 1.2.1 library into the Local Maven Repository, I will run the following line:
|
1 |
mvn install:install-file -Dfile=E:\software\simplecaptcha-1.2.1.jar -DgroupId=nl.captcha -DartifactId=simplecaptcha -Dversion=1.2.1 -Dpackaging=jar |
Result: