In the article Implement OAuth Resource Server using Spring Security OAuth2 Resource Server, I showed you how to protect resources managed by Resource Server using an access token issued by Authorization Server. In the example of this article Implement OAuth Resource Server using Spring Security OAuth2 Resource Server, I use Postman to act as a Client Application, also known as an OAuth2 Client, requesting resources. To implement an OAuth2 Client using code, you can use the Spring Security OAuth2 Client library. How is it in detail? Let’s find out together in this tutorial!
As an example, I will reuse the Resource Server and Authorization Server that I built in the article Implement OAuth Resource Server using Spring Security OAuth2 Resource Server, guys!
Now I will create another Spring Boot application that acts as an OAuth2 Client, and expose an API for the user to pass the “name”, this API will return the text “Hello Khanh” for example:

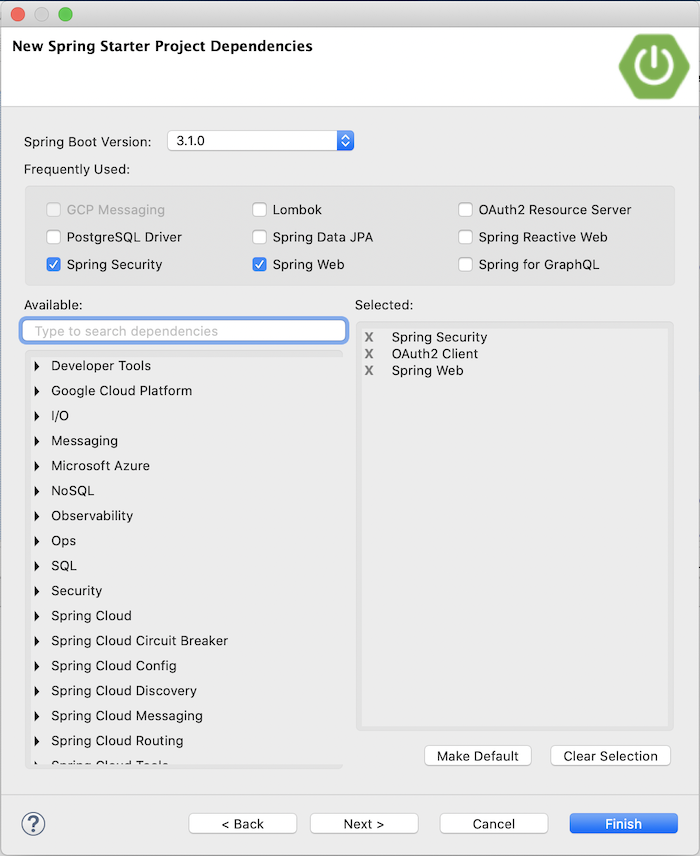
We will use Spring Security, Spring Web, and OAuth2 Client dependency as you can see!
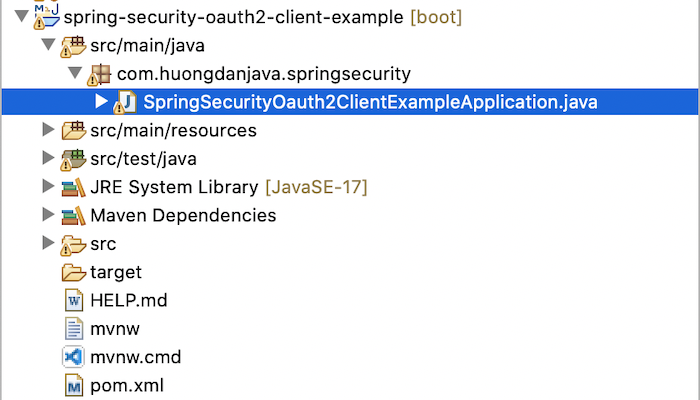
Result:

I will run this application using port 8082:
|
1 |
server.port=8082 |
I will create a new RESTful API for the user to pass “name” information as follows:
|
1 2 3 4 5 6 7 8 9 10 11 12 13 14 15 16 |
package com.huongdanjava.springsecurity; import org.springframework.web.bind.annotation.GetMapping; import org.springframework.web.bind.annotation.RequestParam; import org.springframework.web.bind.annotation.RestController; @RestController public class HelloController { @GetMapping("/hello") public String hello(@RequestParam String name) { String responseFromResourceServer = ""; return responseFromResourceServer + name; } } |
For this request, I don’t need the user to authenticate to make calls, so I will configure the Spring Security permit all as follows:
|
1 2 3 4 5 6 7 8 9 10 11 12 13 14 15 16 17 18 19 20 21 22 23 24 25 |
package com.huongdanjava.springsecurity; import org.springframework.context.annotation.Bean; import org.springframework.context.annotation.Configuration; import org.springframework.security.config.annotation.web.builders.HttpSecurity; import org.springframework.security.config.annotation.web.configuration.EnableWebSecurity; import org.springframework.security.web.SecurityFilterChain; @Configuration @EnableWebSecurity public class SpringSecurityConfiguration { @Bean SecurityFilterChain filterChain(HttpSecurity http) throws Exception { // @formatter:off http .authorizeHttpRequests((authz) -> authz .anyRequest().permitAll() ); // @formatter:on return http.build(); } } |
When the user requests this API, we will get the access token from the Authorization Server first. Then, will request to resource “/hello” of the Resource Server. The response returned from the Resource Server will be added with the name that the user transmits, to return to the user.
OK, now we will work with the Authorization Server first.
Spring Security OAuth2 Client library provides us with an interface called OAuth2AuthorizedClientManager to manage information of all clients that have been authorized with Authorization Server. We will initialize the bean for the object of this OAuth2AuthorizedClientManager class first.
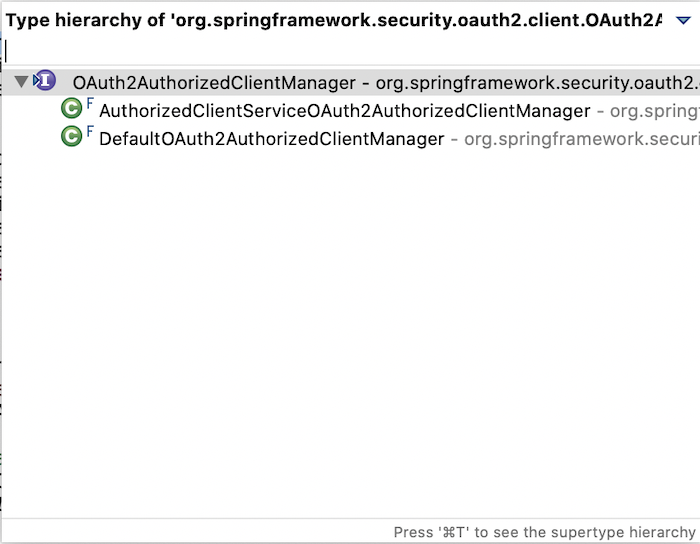
There are two implementations for this interface, DefaultOAuth2AuthorizedClientManager and AuthorizedClientServiceOAuth2AuthorizedClientManager:

The DefaultOAuth2AuthorizedClientManager class is used in the context of the web application, and the AuthorizedClientServiceOAuth2AuthorizedClientManager is used in the outside context of the web application like a scheduled/background thread! We will use the DefaultOAuth2AuthorizedClientManager implementation for this example.
I will create a new ApplicationConfiguration class to initialize the bean for the OAuth2AuthorizedClientManager class as follows:
|
1 2 3 4 5 6 7 8 9 10 11 12 13 14 15 16 17 18 19 20 21 22 23 24 25 26 27 28 29 30 31 32 33 34 35 36 37 |
package com.huongdanjava.springsecurity; import org.springframework.context.annotation.Bean; import org.springframework.context.annotation.Configuration; import org.springframework.security.oauth2.client.OAuth2AuthorizedClientManager; import org.springframework.security.oauth2.client.OAuth2AuthorizedClientProvider; import org.springframework.security.oauth2.client.OAuth2AuthorizedClientProviderBuilder; import org.springframework.security.oauth2.client.registration.ClientRegistrationRepository; import org.springframework.security.oauth2.client.web.DefaultOAuth2AuthorizedClientManager; import org.springframework.security.oauth2.client.web.OAuth2AuthorizedClientRepository; @Configuration public class AppConfiguration { @Bean OAuth2AuthorizedClientManager oauth2AuthorizedClientManager( ClientRegistrationRepository clientRegistrationRepository, OAuth2AuthorizedClientRepository oauth2AuthorizedClientRepository) { // @formatter:off OAuth2AuthorizedClientProvider authorizedClientProvider = OAuth2AuthorizedClientProviderBuilder.builder() .authorizationCode() .refreshToken() .clientCredentials() .build(); // @formatter:on DefaultOAuth2AuthorizedClientManager authorizedClientManager = new DefaultOAuth2AuthorizedClientManager(clientRegistrationRepository, oauth2AuthorizedClientRepository); authorizedClientManager.setAuthorizedClientProvider(authorizedClientProvider); return authorizedClientManager; } } |
To initialize the object for the DefaultOAuth2AuthorizedClientManager class, we need to use the objects of two other classes, as you can see, ClientRegistrationRepository and OAuth2AuthorizedClientRepository. The ClientRegistrationRepository class will contain the client information we will use and has been declared in the Authorization Server, and the OAuth2AuthorizedClientRepository will contain information about the authorized clients with the Authorization Server.
Another class, OAuth2AuthorizedClientProvider, will be responsible for authorizing or re-authorizing if our client has not been authorized. We will initialize this object with the grant types we need to authorize or re-authorize.
For our example, we need to declare client information that we will use, as in Authorization Server as follows:
|
1 2 3 4 5 6 7 8 9 10 11 12 13 14 15 |
@Bean ClientRegistrationRepository clientRegistrationRepository() { // @formatter:off ClientRegistration clientRegistration1 = ClientRegistration.withRegistrationId("huongdanjava1") .clientId("huongdanjava1") .clientSecret("{noop}123") .clientAuthenticationMethod(ClientAuthenticationMethod.CLIENT_SECRET_POST) .authorizationGrantType(AuthorizationGrantType.CLIENT_CREDENTIALS) .tokenUri("http://localhost:8080/oauth2/token") .scope("access-hello") .build(); // @formatter:on return new InMemoryClientRegistrationRepository(clientRegistration1); } |
You need to configure Uri to get the access token from the Authorization Server for this client!
To request the Resource Server with the resource we want, you can use the WebClient class.
You need to declare more WebFlux dependency as follows:
|
1 2 3 4 |
<dependency> <groupId>org.springframework</groupId> <artifactId>spring-webflux</artifactId> </dependency> |
The Spring Security OAuth2 Client library provides us with a class called ServletOAuth2AuthorizedClientExchangeFilterFunction that can be integrated with the WebClient class so that requests to the Resource Server using WebClient always include the access token of the authorized client. We can initialize the bean for the WebClient class to integrate with the ServletOAuth2AuthorizedClientExchangeFilterFunction class as follows:
|
1 2 3 4 5 6 7 8 9 10 11 |
@Bean WebClient webClient(OAuth2AuthorizedClientManager oauth2AuthorizedClientManager) { ServletOAuth2AuthorizedClientExchangeFilterFunction oauth2Client = new ServletOAuth2AuthorizedClientExchangeFilterFunction(oauth2AuthorizedClientManager); // @formatter:off return WebClient.builder() .apply(oauth2Client.oauth2Configuration()) .build(); // @formatter:on } |
As you can see, the ServletOAuth2AuthorizedClientExchangeFilterFunction class is initialized with an object parameter of the OAuth2AuthorizedClientManager class and attached to the WebClient object so that all requests using this WebClient object always have the access token.
Now we will modify our RESTful API to use WebClient to call the resource we want:
|
1 2 3 4 5 6 7 8 9 10 11 12 13 14 15 16 17 18 19 20 21 22 23 24 25 26 27 28 29 |
package com.huongdanjava.springsecurity; import static org.springframework.security.oauth2.client.web.reactive.function.client.ServletOAuth2AuthorizedClientExchangeFilterFunction.clientRegistrationId; import org.springframework.beans.factory.annotation.Autowired; import org.springframework.web.bind.annotation.GetMapping; import org.springframework.web.bind.annotation.RequestParam; import org.springframework.web.bind.annotation.RestController; import org.springframework.web.reactive.function.client.WebClient; @RestController public class HelloController { @Autowired private WebClient webClient; @GetMapping("/hello") public String hello(@RequestParam String name) { // @formatter:off String responseFromResourceServer = webClient.get() .uri("http://localhost:8081/hello") .attributes(clientRegistrationId("huongdanjava1")) .retrieve() .bodyToMono(String.class) .block(); // @formatter:on return String.format("%s %s", responseFromResourceServer, name); } } |
The static clientRegistrationId() method of the ServletOAuth2AuthorizedClientExchangeFilterFunction class will get the client’s access token with registrationId “huongdanjava1” to pass along with the request to the Resource Server of the WebClient object.
At this point, we have finished configuring our OAuth2 Client.
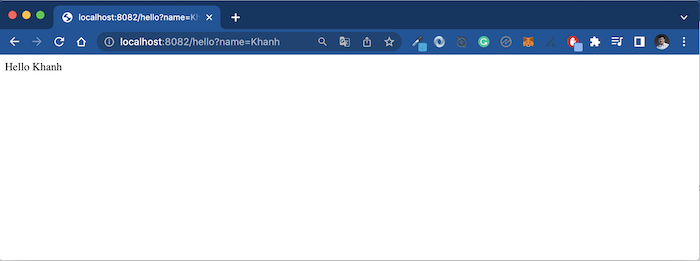
To check the results, please start this application, Resource Server and Authorization Server in the previous article. When requesting the address http://localhost:8082/hello?name=Khanh, you will see the following results:


