Trong bài viết Hiện thực OAuth Resource Server sử dụng Spring Security OAuth2 Resource Server, mình đã hướng dẫn các bạn làm thế nào protect các resources được quản lý bởi Resource Server sử dụng access token được issue bởi Authorization Server. Trong ví dụ của bài viết Hiện thực OAuth Resource Server sử dụng Spring Security OAuth2 Resource Server này, mình sử dụng Postman đóng vai trò là một Client Application, hay còn gọi là một OAuth2 Client, request tới các resources. Để hiện thực một OAuth2 Client sử dụng code, các bạn có thể sử dụng thư viện Spring Security OAuth2 Client. Cụ thể như thế nào? Chúng ta hãy cùng nhau tìm hiểu trong bài viết này các bạn nhé!
Để làm ví dụ, mình sẽ sử dụng lại Resource Server và Authorization Server mà mình đã xây dựng trong bài viết Hiện thực OAuth Resource Server sử dụng Spring Security OAuth2 Resource Server nha các bạn!
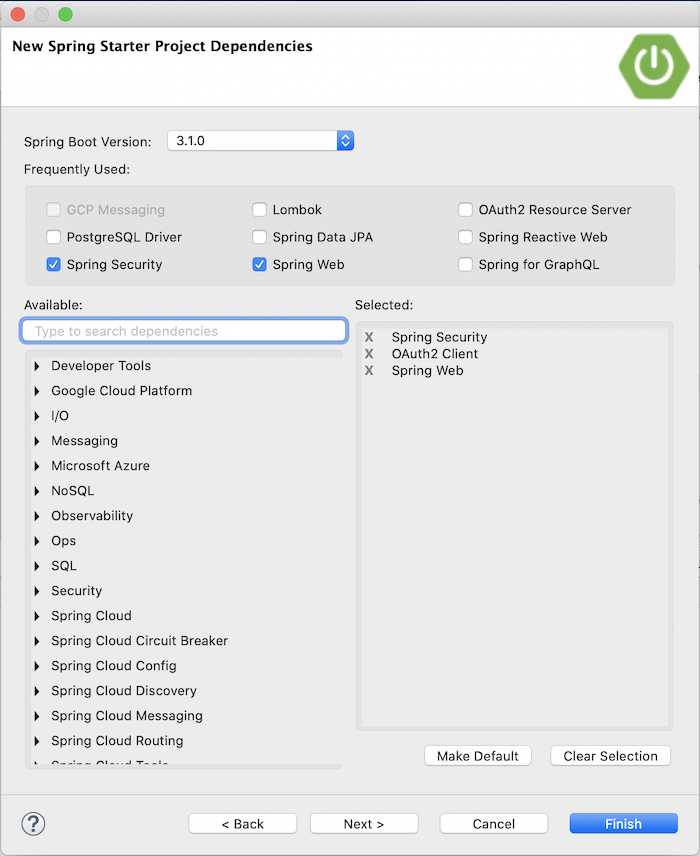
Giờ mình sẽ tạo mới một ứng dụng Spring Boot khác đóng vai trò là một OAuth2 Client, expose một API để user truyền tên, API này sẽ return lại dòng chữ “Hello Khanh” chẳng hạn:

Chúng ta sẽ sử dụng Spring Security, Spring Web và OAuth2 Client dependency như các bạn thấy!
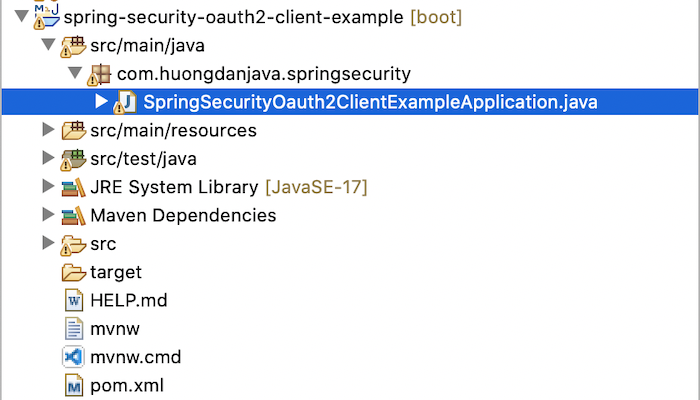
Kết quả:

Mình sẽ chạy ứng dụng này sử dụng port 8082:
|
1 |
server.port=8082 |
Mình sẽ tạo mới một RESTful API để user truyền thông tin tên lên như sau:
|
1 2 3 4 5 6 7 8 9 10 11 12 13 14 15 16 |
package com.huongdanjava.springsecurity; import org.springframework.web.bind.annotation.GetMapping; import org.springframework.web.bind.annotation.RequestParam; import org.springframework.web.bind.annotation.RestController; @RestController public class HelloController { @GetMapping("/hello") public String hello(@RequestParam String name) { String responseFromResourceServer = ""; return responseFromResourceServer + name; } } |
Cho request này, mình không cần user phải authenticate vẫn gọi tới được nên mình sẽ cấu hình Spring Security permit tất cả như sau:
|
1 2 3 4 5 6 7 8 9 10 11 12 13 14 15 16 17 18 19 20 21 22 23 24 25 |
package com.huongdanjava.springsecurity; import org.springframework.context.annotation.Bean; import org.springframework.context.annotation.Configuration; import org.springframework.security.config.annotation.web.builders.HttpSecurity; import org.springframework.security.config.annotation.web.configuration.EnableWebSecurity; import org.springframework.security.web.SecurityFilterChain; @Configuration @EnableWebSecurity public class SpringSecurityConfiguration { @Bean SecurityFilterChain filterChain(HttpSecurity http) throws Exception { // @formatter:off http .authorizeHttpRequests((authz) -> authz .anyRequest().permitAll() ); // @formatter:on return http.build(); } } |
Khi user request tới API này, chúng ta sẽ lấy access token từ Authorization Server trước. Sau đó, sẽ request tới resource “/hello” của Resource Server. Response trả về từ Resource Server sẽ được cộng với tên mà user truyền lên, để trả về cho user.
OK, bây giờ chúng ta sẽ làm việc với Authorization Server trước.
Thư viện Spring Security OAuth2 Client cung cấp cho chúng ta một interface là OAuth2AuthorizedClientManager để quản lý thông tin tất cả các client đã được authorize với Authorization Server. Chúng ta sẽ khởi tạo bean cho đối tượng của class OAuth2AuthorizedClientManager này trước.
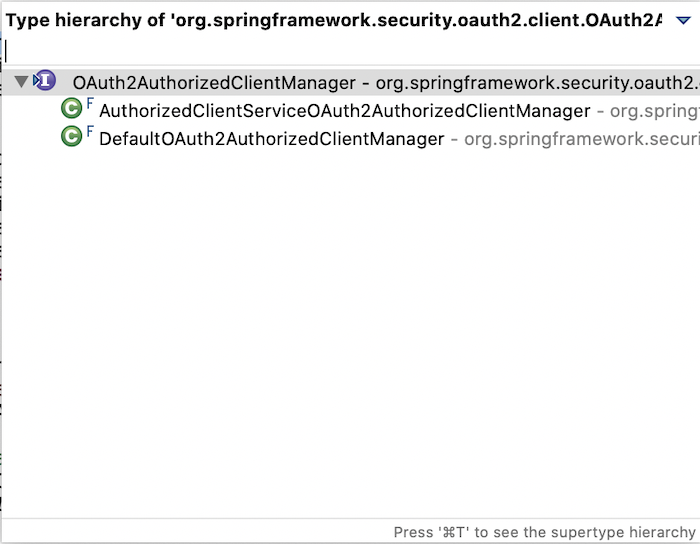
Có 2 implementation cho interface này là DefaultOAuth2AuthorizedClientManager và AuthorizedClientServiceOAuth2AuthorizedClientManager:

Class DefaultOAuth2AuthorizedClientManager thì được dùng trong context của web application còn AuthorizedClientServiceOAuth2AuthorizedClientManager thì được dùng outside context của web application như scheduled/background thread nha các bạn! Chúng ta sẽ sử dụng implementation DefaultOAuth2AuthorizedClientManager cho ví dụ này các bạn nhé!
Mình sẽ tạo mới class ApplicationConfiguration để khởi tạo bean cho class OAuth2AuthorizedClientManager như sau:
|
1 2 3 4 5 6 7 8 9 10 11 12 13 14 15 16 17 18 19 20 21 22 23 24 25 26 27 28 29 30 31 32 33 34 35 36 37 |
package com.huongdanjava.springsecurity; import org.springframework.context.annotation.Bean; import org.springframework.context.annotation.Configuration; import org.springframework.security.oauth2.client.OAuth2AuthorizedClientManager; import org.springframework.security.oauth2.client.OAuth2AuthorizedClientProvider; import org.springframework.security.oauth2.client.OAuth2AuthorizedClientProviderBuilder; import org.springframework.security.oauth2.client.registration.ClientRegistrationRepository; import org.springframework.security.oauth2.client.web.DefaultOAuth2AuthorizedClientManager; import org.springframework.security.oauth2.client.web.OAuth2AuthorizedClientRepository; @Configuration public class AppConfiguration { @Bean OAuth2AuthorizedClientManager oauth2AuthorizedClientManager( ClientRegistrationRepository clientRegistrationRepository, OAuth2AuthorizedClientRepository oauth2AuthorizedClientRepository) { // @formatter:off OAuth2AuthorizedClientProvider authorizedClientProvider = OAuth2AuthorizedClientProviderBuilder.builder() .authorizationCode() .refreshToken() .clientCredentials() .build(); // @formatter:on DefaultOAuth2AuthorizedClientManager authorizedClientManager = new DefaultOAuth2AuthorizedClientManager(clientRegistrationRepository, oauth2AuthorizedClientRepository); authorizedClientManager.setAuthorizedClientProvider(authorizedClientProvider); return authorizedClientManager; } } |
Để khởi tạo đối tượng cho class DefaultOAuth2AuthorizedClientManager, chúng ta cần sử dụng đối tượng của 2 class khác, như các bạn thấy, là ClientRegistrationRepository và OAuth2AuthorizedClientRepository. Class ClientRegistrationRepository sẽ chứa thông tin client chúng ta sẽ sử dụng và đã được khai báo trong Authorization Server còn OAuth2AuthorizedClientRepository sẽ chứa thông tin các client đã authorized với Authorization Server các bạn nhé.
Một class khác là OAuth2AuthorizedClientProvider, sẽ chịu trách nhiệm authorize hoặc re-authorize nếu client của chúng ta chưa được authorize. Chúng ta sẽ khởi tạo đối tượng này với các grant type mà chúng ta cần authorize hoặc re-authorize.
Cho ví dụ của mình, chúng ta cần khai báo thông tin client mà chúng ta sẽ sử dụng như trong Authorization Server như sau:
|
1 2 3 4 5 6 7 8 9 10 11 12 13 14 15 |
@Bean ClientRegistrationRepository clientRegistrationRepository() { // @formatter:off ClientRegistration clientRegistration1 = ClientRegistration.withRegistrationId("huongdanjava1") .clientId("huongdanjava1") .clientSecret("{noop}123") .clientAuthenticationMethod(ClientAuthenticationMethod.CLIENT_SECRET_POST) .authorizationGrantType(AuthorizationGrantType.CLIENT_CREDENTIALS) .tokenUri("http://localhost:8080/oauth2/token") .scope("access-hello") .build(); // @formatter:on return new InMemoryClientRegistrationRepository(clientRegistration1); } |
Các bạn cần phải cấu hình Uri lấy access token của Authorization Server cho client này các bạn nhé!
Để request tới Resource Server với resource mà chúng ta muốn, các bạn có thể sử dụng class WebClient.
Các bạn cần phải khai báo thêm WebFlux dependency nhé:
|
1 2 3 4 |
<dependency> <groupId>org.springframework</groupId> <artifactId>spring-webflux</artifactId> </dependency> |
Thư viện Spring Security OAuth2 Client cung cấp cho chúng ta một class là ServletOAuth2AuthorizedClientExchangeFilterFunction có thể tích hợp với class WebClient để các request tới Resource Server sử dụng WebClient luôn bao gồm access token của authorized client. Chúng ta có thể khởi tạo bean cho class WebClient để tích hợp với class ServletOAuth2AuthorizedClientExchangeFilterFunction như sau:
|
1 2 3 4 5 6 7 8 9 10 11 |
@Bean WebClient webClient(OAuth2AuthorizedClientManager oauth2AuthorizedClientManager) { ServletOAuth2AuthorizedClientExchangeFilterFunction oauth2Client = new ServletOAuth2AuthorizedClientExchangeFilterFunction(oauth2AuthorizedClientManager); // @formatter:off return WebClient.builder() .apply(oauth2Client.oauth2Configuration()) .build(); // @formatter:on } |
Như các bạn thấy, class ServletOAuth2AuthorizedClientExchangeFilterFunction được khởi tạo với tham số là đối tượng của class OAuth2AuthorizedClientManager và được gắn với đối tượng WebClient để tất cả các request sử dụng đối tượng WebClient này luôn có access token.
Bây giờ chúng ta sẽ modify RESTful API của chúng ta để sử dụng WebClient gọi tới resource mà chúng ta muốn:
|
1 2 3 4 5 6 7 8 9 10 11 12 13 14 15 16 17 18 19 20 21 22 23 24 25 26 27 28 29 |
package com.huongdanjava.springsecurity; import static org.springframework.security.oauth2.client.web.reactive.function.client.ServletOAuth2AuthorizedClientExchangeFilterFunction.clientRegistrationId; import org.springframework.beans.factory.annotation.Autowired; import org.springframework.web.bind.annotation.GetMapping; import org.springframework.web.bind.annotation.RequestParam; import org.springframework.web.bind.annotation.RestController; import org.springframework.web.reactive.function.client.WebClient; @RestController public class HelloController { @Autowired private WebClient webClient; @GetMapping("/hello") public String hello(@RequestParam String name) { // @formatter:off String responseFromResourceServer = webClient.get() .uri("http://localhost:8081/hello") .attributes(clientRegistrationId("huongdanjava1")) .retrieve() .bodyToMono(String.class) .block(); // @formatter:on return String.format("%s %s", responseFromResourceServer, name); } } |
Phương thức static clientRegistrationId() của class ServletOAuth2AuthorizedClientExchangeFilterFunction sẽ lấy access token của client có registrationId là huongdanjava1 để truyền cùng với request tới Resource Server của đối tượng WebClient.
Đến đây thì chúng ta đã hoàn thành việc cấu hình cho OAuth2 Client của chúng ta.
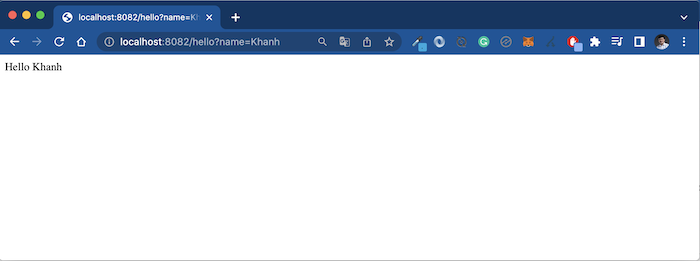
Để kiểm tra kết quả, các bạn hãy start ứng dụng này, Resource Server và Authorization Server trong bài viết trước lên. Khi request tới địa chỉ http://localhost:8082/hello?name=Khanh, các bạn sẽ thấy kết quả như sau:


