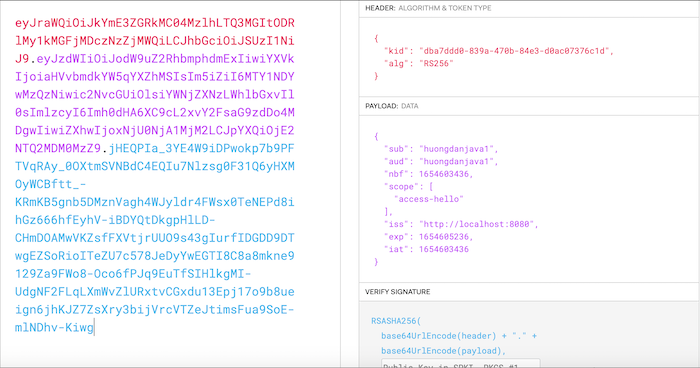
Resource Server trong OAuth2 được sử dụng để protect việc truy cập đến các resources, APIs. Nó sẽ validate access token được truyền bởi Client Application, với Authorization Server để quyết định xem liệu Client Application có quyền access tới các resources, APIs mà nó muốn hay không? Trong bài viết này, mình hướng dẫn các bạn cách hiện thực OAuth Resource Server sử dụng Spring Security OAuth2 Resource Server các bạn nhé!
Đầu tiên, mình sẽ tạo mới một Spring Boot project với Spring Web, Spring Security OAuth2 Resource Server để làm ví dụ:
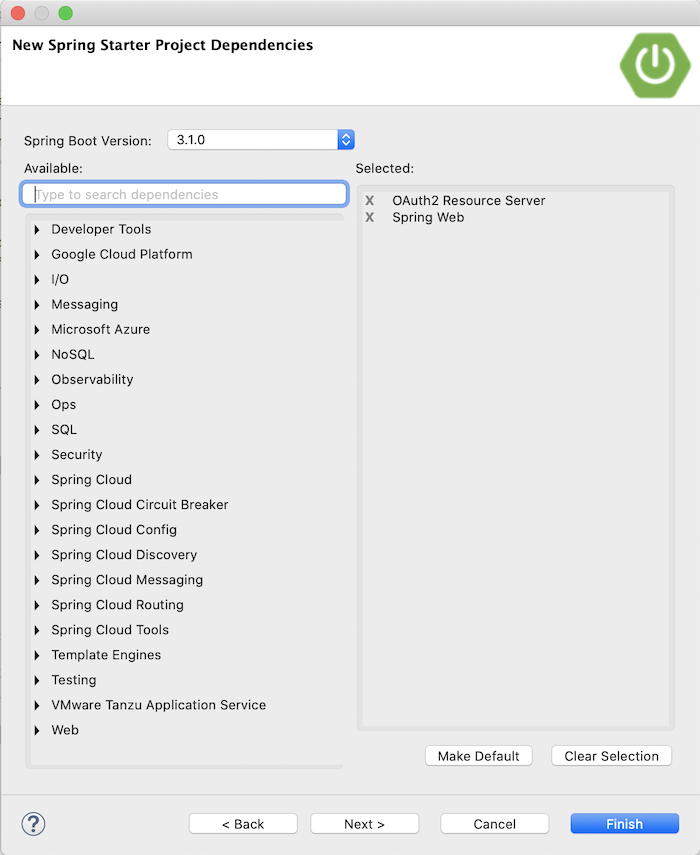
Kết quả:
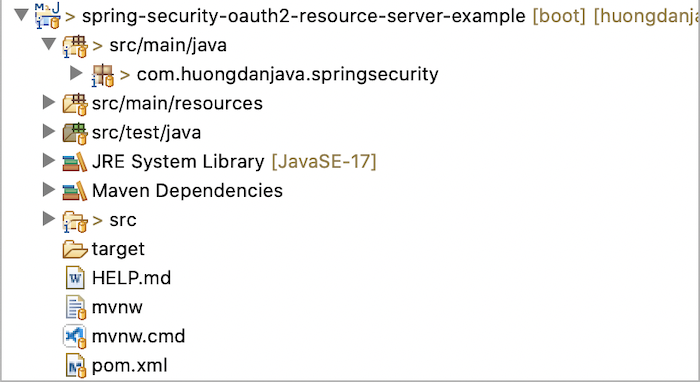
Đầu tiên, mình sẽ tạo mới một RESTful API đóng vai trò là resource mà chúng ta cần resource server protect. Nội dung của API này đơn giản như sau:
|
1 2 3 4 5 6 7 8 9 10 11 12 13 14 |
package com.huongdanjava.springsecurity; import org.springframework.web.bind.annotation.GetMapping; import org.springframework.web.bind.annotation.RestController; @RestController public class HelloController { @GetMapping("/hello") public String hello() { return "Hello"; } } |
Bây giờ mình sẽ tạo mới một class để cấu hình Spring Security protect cho RESTful API này với nội dung ban đầu như sau:
|
1 2 3 4 5 6 7 8 9 10 11 12 13 14 15 16 17 18 19 20 21 22 23 24 25 |
package com.huongdanjava.springsecurity; import org.springframework.context.annotation.Bean; import org.springframework.context.annotation.Configuration; import org.springframework.security.config.annotation.web.builders.HttpSecurity; import org.springframework.security.config.annotation.web.configuration.EnableWebSecurity; import org.springframework.security.web.SecurityFilterChain; @Configuration @EnableWebSecurity public class SpringSecurityConfiguration { @Bean public SecurityFilterChain filterChain(HttpSecurity http) throws Exception { // @formatter:off http .authorizeHttpRequests((authz) -> authz .anyRequest().authenticated() ); // @formatter:on return http.build(); } } |
Với cấu hình ở trên, chỉ có user đã đăng nhập thì mới access được đến tất cả các request của ứng dụng và thông tin đăng nhập của user được store trong memory hoặc một database system nào đó.
Chúng ta sẽ không thể request tới http://localhost:8080/hello lúc này:
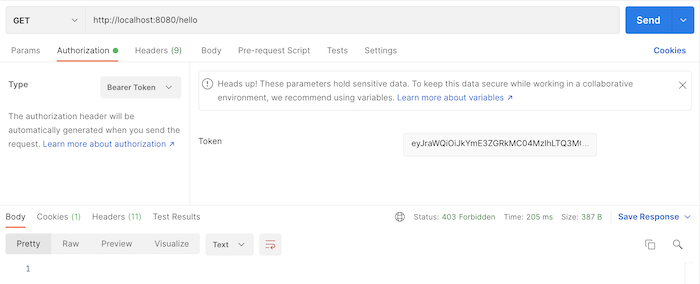
Nếu bây giờ các bạn cần implement Resource Server để authenticate tất cả các request tới ứng dụng của chúng ta sử dụng access token được issue bởi Authorization Server thì các bạn có thể thêm những dòng code sau:
|
1 2 3 4 5 6 7 8 9 10 11 12 13 14 15 16 17 18 19 20 21 22 23 24 25 26 27 28 29 |
package com.huongdanjava.springsecurity; import org.springframework.context.annotation.Bean; import org.springframework.context.annotation.Configuration; import org.springframework.security.config.Customizer; import org.springframework.security.config.annotation.web.builders.HttpSecurity; import org.springframework.security.config.annotation.web.configuration.EnableWebSecurity; import org.springframework.security.web.SecurityFilterChain; @Configuration @EnableWebSecurity public class SpringSecurityConfiguration { @Bean public SecurityFilterChain filterChain(HttpSecurity http) throws Exception { // @formatter:off http .authorizeHttpRequests((authz) -> authz .anyRequest().authenticated() ) .oauth2ResourceServer(oauth2 -> oauth2 .jwt(Customizer.withDefaults()) ); // @formatter:on return http.build(); } } |
Resource Server sẽ cần thông tin của Authorization Server để nó có thể check access token có phải do Authorization Server này issue hay không? Do đó, các bạn cần mở tập tin application.properties để cấu hình thông tin Aụthorization Server này.
Để làm ví dụ cho bài viết này, mình sẽ start Authorization Server được xây dựng sử dụng Spring Authorization Server trong bài viết này. Rồi mình sẽ cấu hình thông tin Authorization Server cho ví dụ này như sau:
|
1 2 3 |
server.port=8081 spring.security.oauth2.resourceserver.jwt.issuer-uri=http://localhost:8080 |
Mình cũng change port của ứng dụng ví dụ luôn, để khỏi bị conflict với port của Authorization Server.
Các bạn lưu ý là chúng ta cần enable OpenID Connect support cho Authorization Server bởi vì Resource Server, khi chúng ta cấu hình issuer-uri như trên, nó sẽ validate thông tin về OpenID Provider sử dụng URL http://localhost:8080/.well-known/openid-configuration. Các bạn có thể đọc thêm ở đây https://docs.spring.io/spring-security/reference/servlet/oauth2/resource-server/jwt.html#_specifying_the_authorization_server.
Các bạn enable OpenID Connect support cho Authorization Server của chúng ta bằng cách thêm đoạn code sau trong class AuthorizationServerConfiguration:
|
1 2 3 4 5 6 7 8 9 10 11 |
@Bean @Order(Ordered.HIGHEST_PRECEDENCE) public SecurityFilterChain authorizationServerSecurityFilterChain(HttpSecurity http) throws Exception { OAuth2AuthorizationServerConfiguration.applyDefaultSecurity(http); http.getConfigurer(OAuth2AuthorizationServerConfigurer.class) .oidc(Customizer.withDefaults()); return http.formLogin(Customizer.withDefaults()).build(); } |
Bây giờ, giả sử mình có một RegisteredClient trong Authorization Server như sau:
|
1 2 3 4 5 6 7 8 9 |
// @formatter:off RegisteredClient registeredClient1 = RegisteredClient.withId(UUID.randomUUID().toString()) .clientId("huongdanjava1") .clientSecret("{noop}123") .clientAuthenticationMethod(ClientAuthenticationMethod.CLIENT_SECRET_POST) .authorizationGrantType(AuthorizationGrantType.CLIENT_CREDENTIALS) .tokenSettings(tokenSettings()) .build(); // @formatter:on |
Lấy access token của RegisteredClient này:
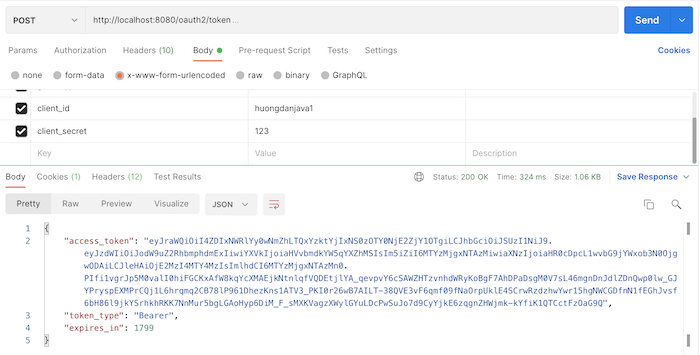
và request lại URL http://localhost:8081/hello với access token được truyền trong Authorization Bearer, các bạn sẽ thấy kết quả như sau:
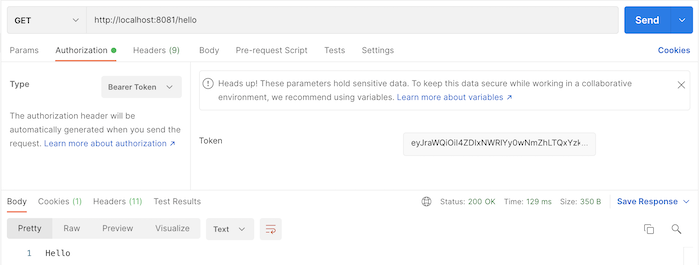
Nếu các bạn để ý thì, với cách cấu hình của Spring Security ở trên thì tất cả các access token được issue bởi Authorization Server đều có thể access tới các APIs. Trong thực tế, chúng ta sẽ không làm vậy.
Trong access token có một claim là tên là scope và chúng ta sẽ dùng nó để determine là với request URL này, access token phải có scope gì thì mới access được.
Nếu các bạn decode access token của RegisteredClient ở trên, các bạn sẽ thấy, hiện tại không có claim scope nào cả:
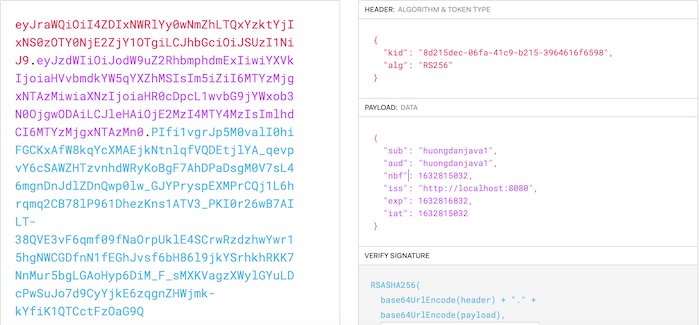
vì chúng ta không cấu hình scope cho RegisteredClient này.
Bây giờ, mình sẽ thay đổi cấu hình của Spring Security chỉ accept request có access token có scope là “access-hello” mới truy cập được “/hello”, như sau:
|
1 2 3 4 5 6 7 8 9 10 11 12 13 14 15 16 17 18 19 20 21 22 23 24 25 26 27 28 29 30 |
package com.huongdanjava.springsecurity; import org.springframework.context.annotation.Bean; import org.springframework.context.annotation.Configuration; import org.springframework.security.config.Customizer; import org.springframework.security.config.annotation.web.builders.HttpSecurity; import org.springframework.security.config.annotation.web.configuration.EnableWebSecurity; import org.springframework.security.web.SecurityFilterChain; @Configuration @EnableWebSecurity public class SpringSecurityConfiguration { @Bean public SecurityFilterChain filterChain(HttpSecurity http) throws Exception { // @formatter:off http .authorizeHttpRequests((authz) -> authz .requestMatchers("/hello").hasAuthority("SCOPE_access-hello") .anyRequest().authenticated() ) .oauth2ResourceServer(oauth2 -> oauth2 .jwt(Customizer.withDefaults()) ); // @formatter:on return http.build(); } } |
Chúng ta sẽ sử dụng phương thức hasAuthority() với requestMatchers cho request “/hello”. Tham số của phương thức hasAuthority() là một chuỗi bắt đầu với SCOPE và tiếp theo đó là tên scope mà trong access token của RegisteredClient phải có.
Lúc này, nếu restart lại ứng dụng ví dụ, và request tới “/hello” với access token của RegisteredClient ở trên, các bạn sẽ thấy lỗi 401 Forbidden như sau:
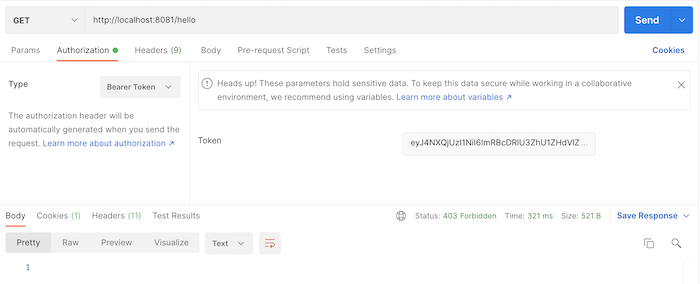
Để cấu hình thêm scope cho RegisteredClient ví dụ trên, mình sẽ sửa code như sau:
|
1 2 3 4 5 6 7 8 9 10 |
// @formatter:off RegisteredClient registeredClient1 = RegisteredClient.withId(UUID.randomUUID().toString()) .clientId("huongdanjava1") .clientSecret("{noop}123") .clientAuthenticationMethod(ClientAuthenticationMethod.CLIENT_SECRET_POST) .authorizationGrantType(AuthorizationGrantType.CLIENT_CREDENTIALS) .tokenSettings(tokenSettings()) .scope("access-hello") .build(); // @formatter:on |
Như các bạn thấy, chúng ta sẽ sử dụng phương thức scope() để làm điều này.
Restart Authorization Server, lấy lại access token cho RegisteredClient này rồi request lại tới “http://localhost:8081/hello”, các bạn sẽ thấy kết quả “Hello ” được trả về.
Decode access token, các bạn sẽ thấy kết quả như sau:
