Trong bài viết trước, mình đã giới thiệu với các bạn tổng quan về JPA Query Language để thao tác với các loại database sử dụng các entity. Mỗi khi các bạn cần thông tin gì từ database, các bạn sẽ sử dụng các câu lệnh SELECT hoặc UPDATE hoặc DELETE cùng với tên entity để build thành câu query, sau đó sẽ lấy đối tượng Query từ Entity Manager sử dụng câu query này, và cuối cùng là gọi một phương thức thích hợp tuỳ theo nhu cầu của các bạn từ đối tượng Query này để lấy kết quả mà các bạn mong muốn. Rất nhiều bước cần phải làm phải không các bạn? Nếu các bạn sử dụng JPA cùng với Spring framework trong dự án của mình thì hãy thử sử dụng Spring Data JPA nhé! Nó sẽ giúp các bạn giảm thiểu các công việc phải làm trong một số trường hợp. Cụ thể như thế nào? Trong bài viết này, chúng ta hãy cùng nhau tìm hiểu về Spring Data JPA các bạn nhé!
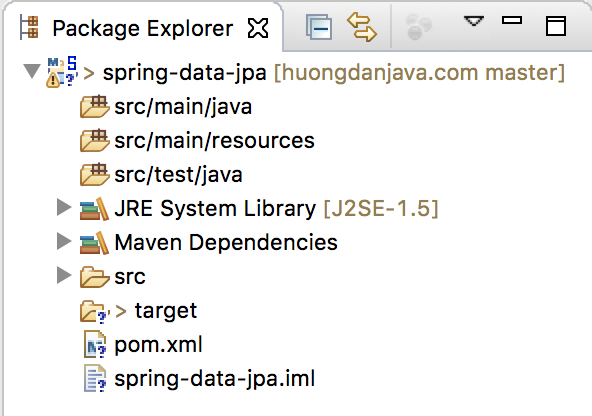
Đầu tiên, mình sẽ tạo mới một Maven project để làm ví dụ:

Chúng ta sẽ sử dụng Java 17 cho ví dụ này:
|
1 2 3 4 |
<properties> <maven.compiler.source>17</maven.compiler.source> <maven.compiler.target>17</maven.compiler.target> </properties> |
Spring Data JPA dependency:
|
1 2 3 4 5 |
<dependency> <groupId>org.springframework.data</groupId> <artifactId>spring-data-jpa</artifactId> <version>3.1.1</version> </dependency> |
Ở đây, mình sẽ sử dụng JPA với implementation của Hibernate nên mình sẽ thêm Hibernate dependency như sau:
|
1 2 3 4 5 |
<dependency> <groupId>org.hibernate</groupId> <artifactId>hibernate-core</artifactId> <version>6.2.6.Final</version> </dependency> |
Project Lombok:
|
1 2 3 4 5 6 |
<dependency> <groupId>org.projectlombok</groupId> <artifactId>lombok</artifactId> <version>1.18.28</version> <scope>provided</scope> </dependency> |
Trong bài viết này, mình sẽ sử dụng MySQL database:
|
1 2 3 4 5 |
<dependency> <groupId>mysql</groupId> <artifactId>mysql-connector-java</artifactId> <version>8.0.33</version> </dependency> |
Để đơn giản, mình chỉ định nghĩa 1 table chứa thông tin sinh viên với 2 cột như sau:
|
1 2 3 4 5 |
CREATE TABLE `student` ( `id` bigint(20) NOT NULL AUTO_INCREMENT, `name` varchar(50) DEFAULT NULL, PRIMARY KEY (`id`) ) ENGINE=InnoDB AUTO_INCREMENT=2 DEFAULT CHARSET=latin1; |
Entity của table này:
|
1 2 3 4 5 6 7 8 9 10 11 12 13 14 15 16 17 18 19 20 21 22 23 24 25 26 27 |
package com.huongdanjava.springdatajpa; import jakarta.persistence.Column; import jakarta.persistence.Entity; import jakarta.persistence.GeneratedValue; import jakarta.persistence.Id; import jakarta.persistence.Table; import java.io.Serializable; import lombok.Getter; import lombok.Setter; @Table(name = "student") @Entity @Getter @Setter public class Student implements Serializable { private static final long serialVersionUID = 1L; @Id @GeneratedValue private Long id; @Column private String name; } |
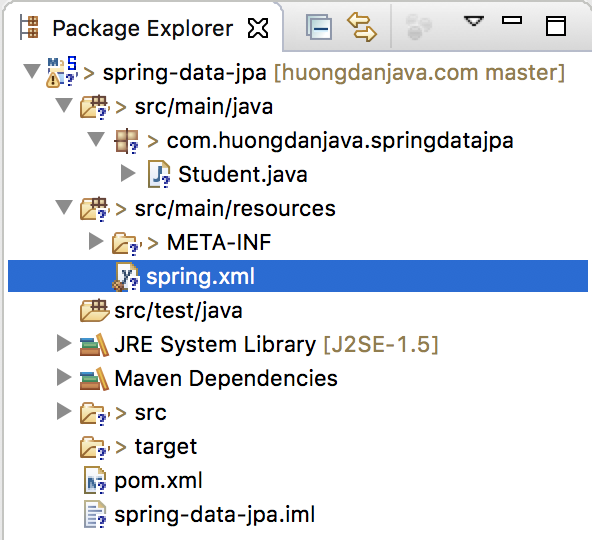
Để làm việc với JPA, chúng ta cần có một tập tin cấu hình persistence.xml cho nó. Các bạn hãy tạo mới tập tin persistence.xml nằm trong thư mục /src/main/resources/META-INF các bạn nhé!
Nội dung của tập tin này như sau:
|
1 2 3 4 5 6 7 8 9 10 11 12 13 14 15 16 17 18 |
<?xml version="1.0" encoding="UTF-8" standalone="no"?> <persistence version="2.1" xmlns="http://xmlns.jcp.org/xml/ns/persistence" xmlns:xsi="http://www.w3.org/2001/XMLSchema-instance" xsi:schemaLocation="http://xmlns.jcp.org/xml/ns/persistence http://xmlns.jcp.org/xml/ns/persistence/persistence_2_1.xsd"> <persistence-unit name="springdataPU" transaction-type="RESOURCE_LOCAL"> <provider>org.hibernate.jpa.HibernatePersistenceProvider</provider> <class>com.huongdanjava.springdatajpa.Student</class> <exclude-unlisted-classes/> <properties> <property name="hibernate.show_sql" value="true"/> <property name="hibernate.format_sql" value="false"/> <property name="hibernate.dialect" value="org.hibernate.dialect.MySQLDialect"/> <property name="hibernate.connection.driver_class" value="com.mysql.cj.jdbc.Driver"/> <property name="javax.persistence.validation.mode" value="none"/> </properties> </persistence-unit> </persistence> |
Khai báo EntityManagerFactory trong Spring container:
|
1 2 3 4 5 6 7 |
<bean id="entityManagerFactory" class="org.springframework.orm.jpa.LocalContainerEntityManagerFactoryBean"> <property name="dataSource" ref="dataSource" /> <property name="persistenceUnitName" value="springdataPU" /> <property name="jpaVendorAdapter"> <bean class="org.springframework.orm.jpa.vendor.HibernateJpaVendorAdapter" /> </property> </bean> |
với datasource:
|
1 2 3 4 5 6 |
<bean id="dataSource" class="org.springframework.jdbc.datasource.DriverManagerDataSource"> <property name="driverClassName" value="com.mysql.cj.jdbc.Driver" /> <property name="url" value="jdbc:mysql://localhost:3306/jpa_example" /> <property name="username" value="root" /> <property name="password" value="123456" /> </bean> |
OK, vậy là đã chuẩn bị mọi thứ xong rồi đó các bạn:

Các bạn có thể tham khảo thêm bài viết về JPA và Spring framework tại đây nhé!
Giờ chúng ta đi vào chủ đề chính của bài viết này thôi.
Điều đầu tiên, các bạn cần phải biết là Spring Data JPA là một module nhỏ trong một project lớn gọi là Spring Data project. Mục đích của Spring Data project là giảm thiểu các đoạn code lặp đi lặp lại liên quan đến phần thao tác với các hệ thống quản trị data khi phát triển các ứng dụng có sử dụng Spring framework. Ngoài Spring Data JPA hỗ trợ cho JPA giảm thiểu code để truy cập và thao tác với các hệ thống quản trị cơ cở dữ liệu, chúng ta còn có Spring Data JDBC (cũng giống như Spring Data JPA), Spring Data LDAP (hỗ trợ Spring LDAP), Spring Data MongoDB (hỗ trợ cho MongoDB),… Các bạn có thể tìm thấy đầy đủ các module của Spring Data tại đây.
Để đạt được mục đích giảm thiểu code như mình đã nói, Spring Data định nghĩa một interface chính tên là Repository nằm trong module Spring Data Common, module này sẽ được sử dụng cho tất cả các module còn lại trong Spring Data project. Nội dung của interface này đơn giản như sau:
|
1 2 3 4 5 6 7 8 |
package org.springframework.data.repository; import org.springframework.stereotype.Indexed; @Indexed public interface Repository<T, ID> { } |
Interface này sử dụng 2 generic type:
- T là domain class mà repository sẽ quản lý
- ID là kiểu dữ liệu của ID của domain class mà repository quản lý.
Vì interface này đơn giản như vậy nên chắc chắn nó phải có những interface khác extend nó để thể hiện Spring Data project làm được những gì phải không các bạn? 😀
Ở đây, chúng ta sẽ có nhiều interface khác extend từ interface repository tuỳ thuộc vào module mà chúng ta sử dụng nhưng do chúng ta đang thảo luận về Spring Data JPA nên mình sẽ chỉ liệt kê ở đây một interface duy nhất extend interface Repository mà Spring Data JPA đang sử dụng. Đó chính là interface CrudRepository.
Interface CrudRepository với ý nghĩa create, read, update, delete cho phép chúng ta thực hiện các thao tác cơ bản đến với các hệ thống data, hệ thống data ở đây các bạn phải hiểu theo nghĩa rộng nghĩa là nó không chỉ là database đâu nhé các bạn.
Để hỗ trợ việc phân trang và sắp xếp cho Spring Data JPA, chúng ta còn phải nói đến một interface khác là PagingAndSortingRepository.
Tất cả các interface mà mình vừa kể trên đều nằm trong module Spring Data Common nhé các bạn.
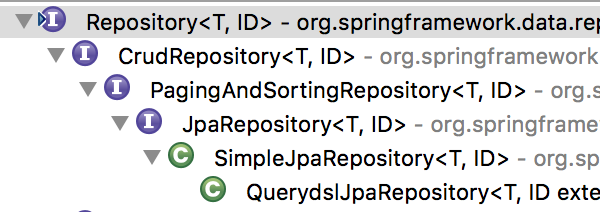
Trong Spring Data JPA, ở đây, chúng ta chỉ có duy nhất một interface là JpaRepository kế thừa interface PagingAndSortingRepository. Với việc extend từ interface PagingAndSortingRepository, các bạn cũng có thể hình dung là Spring Data JPA có thể giúp chúng ta giảm thiểu code cho các thao tác nào liên quan đến database rồi phải không các bạn? Có thể kể ra đây là: create, read, update, delete, paging và sort. 😀
Các bạn có thể thấy rõ cấu trúc extend cho những interface trên bằng hình ảnh sau:

OK, vậy giờ hãy cùng mình làm một ví dụ với interface JpaRepository xem nó hoạt động như thế nào nhé các bạn.
Bây giờ mình sẽ tạo mới một interface tên là HelloRepository extend từ Jpa Repository với nội dung như sau:
|
1 2 3 4 5 6 7 |
package com.huongdanjava.springdatajpa; import org.springframework.data.jpa.repository.JpaRepository; public interface HelloRepository extends JpaRepository<Student, Long> { } |
Domain class ở đây chính là tên entity Student còn Long chính là kiểu dữ liệu của properties trong entity Student mapping với column primary key trong table student nha các bạn.
Giờ chúng ta sẽ khai báo interface này trong Spring container như sau:
|
1 2 3 4 5 6 7 8 9 10 11 12 13 14 15 16 17 18 19 20 21 22 23 24 25 26 27 28 29 |
<beans xmlns="http://www.springframework.org/schema/beans" xmlns:xsi="http://www.w3.org/2001/XMLSchema-instance" xmlns:jpa="http://www.springframework.org/schema/data/jpa" xmlns:context="http://www.springframework.org/schema/context" xsi:schemaLocation="http://www.springframework.org/schema/beans http://www.springframework.org/schema/beans/spring-beans.xsd http://www.springframework.org/schema/data/jpa http://www.springframework.org/schema/data/jpa/spring-jpa.xsd http://www.springframework.org/schema/context https://www.springframework.org/schema/context/spring-context.xsd"> <jpa:repositories base-package="com.huongdanjava.springdatajpa"/> <context:annotation-config/> <bean id="entityManagerFactory" class="org.springframework.orm.jpa.LocalContainerEntityManagerFactoryBean"> <property name="dataSource" ref="dataSource"/> <property name="persistenceUnitName" value="springdataPU"/> <property name="jpaVendorAdapter"> <bean class="org.springframework.orm.jpa.vendor.HibernateJpaVendorAdapter"/> </property> </bean> <bean id="dataSource" class="org.springframework.jdbc.datasource.DriverManagerDataSource"> <property name="driverClassName" value="com.mysql.cj.jdbc.Driver"/> <property name="url" value="jdbc:mysql://localhost:3306/jpa_example"/> <property name="username" value="root"/> <property name="password" value="123456"/> </bean> </beans> |
Ở đây, mình sử dụng namespace jpa:repositories với base package là com.huongdanjava.springdatajpa để scan HelloRepository interface. Với khai báo như trên, Spring Data JPA sẽ tự động lấy đối tượng implement cho interface HelloRepository là SimpleJpaRepository như các bạn thấy trong hình ảnh ở trên để khởi tạo trong Spring container.
Một điểm mà các bạn lưu ý là chúng ta cần khai báo tag <context:annotation-config/> như mình đã làm ở trên để Spring cấu hình đối tượng của class EntityPathResolver khi khởi tạo bean cho class JpaRepositoryFactoryBean nhé! Nếu không thì sẽ bị lỗi “EntityPathResolver must not be null”. Các bạn có thể xem phương thức setEntityPathResolver() với annotation @Autowired trong class JpaRepositoryFactoryBean để hiểu rõ thêm chỗ này.
Vì đối tượng implement SimpleJpaRepository sử dụng transaction nên các bạn cần phải khai báo thêm bean transactionManager vào Spring container các bạn nhé.
|
1 2 3 4 5 6 7 8 9 10 11 12 13 14 15 16 17 18 19 20 21 22 23 24 25 26 27 28 29 30 31 32 33 34 35 36 37 38 |
<beans xmlns="http://www.springframework.org/schema/beans" xmlns:xsi="http://www.w3.org/2001/XMLSchema-instance" xmlns:jpa="http://www.springframework.org/schema/data/jpa" xmlns:tx="http://www.springframework.org/schema/tx" xmlns:context="http://www.springframework.org/schema/context" xsi:schemaLocation="http://www.springframework.org/schema/beans http://www.springframework.org/schema/beans/spring-beans.xsd http://www.springframework.org/schema/data/jpa http://www.springframework.org/schema/data/jpa/spring-jpa.xsd http://www.springframework.org/schema/tx http://www.springframework.org/schema/tx/spring-tx.xsd http://www.springframework.org/schema/context https://www.springframework.org/schema/context/spring-context.xsd"> <jpa:repositories base-package="com.huongdanjava.springdatajpa"/> <context:annotation-config/> <bean id="entityManagerFactory" class="org.springframework.orm.jpa.LocalContainerEntityManagerFactoryBean"> <property name="dataSource" ref="dataSource"/> <property name="persistenceUnitName" value="springdataPU"/> <property name="jpaVendorAdapter"> <bean class="org.springframework.orm.jpa.vendor.HibernateJpaVendorAdapter"/> </property> </bean> <bean id="dataSource" class="org.springframework.jdbc.datasource.DriverManagerDataSource"> <property name="driverClassName" value="com.mysql.cj.jdbc.Driver"/> <property name="url" value="jdbc:mysql://localhost:3306/jpa_example"/> <property name="username" value="root"/> <property name="password" value="123456"/> </bean> <tx:annotation-driven proxy-target-class="true" transaction-manager="transactionManager"/> <bean id="transactionManager" class="org.springframework.jdbc.datasource.DataSourceTransactionManager"> <property name="dataSource" ref="dataSource"/> </bean> </beans> |
OK, đến đây là chúng ta đã hoàn thành những phần cấu hình cần thiết. Giờ chạy ví dụ thử nhé các bạn.
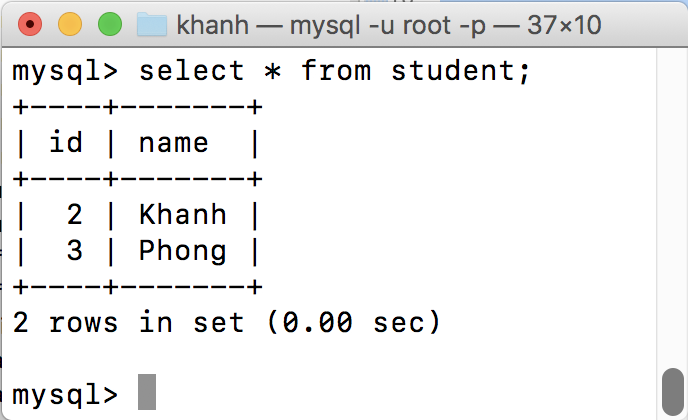
Giả sử trong database mình đang có những dữ liệu sau đây:

thì khi chạy ví dụ sau đây:
|
1 2 3 4 5 6 7 8 9 10 11 12 13 14 15 16 |
package com.huongdanjava.springdatajpa; import org.springframework.context.ApplicationContext; import org.springframework.context.support.ClassPathXmlApplicationContext; public class Application { public static void main(String[] args) { ApplicationContext ac = new ClassPathXmlApplicationContext("spring.xml"); HelloRepository helloRepository = (HelloRepository) ac.getBean("helloRepository"); Student student = helloRepository.findById(new Long(2)).get(); System.out.println(student.getName()); } } |
Kết quả sẽ là:

Giả sử giờ chúng ta thêm một phương thức trong interface HelloRepository có nội dung như sau:
|
1 2 3 4 5 6 7 8 9 |
package com.huongdanjava.springdatajpa; import org.springframework.data.jpa.repository.JpaRepository; public interface HelloRepository extends JpaRepository<Student, Long> { public Student findByName(String name); } |
thì khi chạy ví dụ sau:
|
1 2 3 4 5 6 7 8 9 10 11 12 13 14 15 16 17 |
package com.huongdanjava.springdatajpa; import org.springframework.context.ApplicationContext; import org.springframework.context.support.ClassPathXmlApplicationContext; public class Application { public static void main(String[] args) { ApplicationContext ac = new ClassPathXmlApplicationContext("spring.xml"); HelloRepository helloRepository = (HelloRepository) ac.getBean("helloRepository"); Student student = helloRepository.findByName("Phong"); System.out.println(student.getId()); } } |
kết quả sẽ là:

Như các bạn thấy, mặc dù không có bất kỳ class nào implement interface HelloRepository nhưng chúng ta vẫn truy vấn table student theo column name được. Giảm được rất nhiều code mà chúng ta cần phải làm phải không các bạn?


Vũ Hội
Em chào Anh !
1. Theo như e hiểu thì JPA là một 1 đặc tả của ORM. Nó bảo gồm các Interface không triển khai. Hay nói cách khác JPA định nghĩa các đặc tả cần thiết và không có code thực thi những đặc tả đó. Còn Hibernate sẽ thực hiện chi tiết các đặc tả của JPA. Nếu coi JPA là 1 Interface thì Hibernate sẽ Implement nó. Em hiểu như vậy có đúng không ạ ?
2. Spring Data JPA là gì ? A có thể giải thích giúp e được không ạ ? E đọc mà vẫn thấy mơ hồ về nó !
Khanh Nguyen
1. Đúng rồi đó em. Bổ sung thêm là Hibernate còn có một implementation riêng của nó để thao tác với database.
2. Spring Data JPA là một framework giúp chúng ta dễ dàng, nhanh chóng cấu hình các thông tin cần thiết để kết nối và thao tác với database, như các query method chẳng hạn,…
namns
trong jpa có sẵn các crud, còn hibernate sẽ có thêm nhiều phương thức hơn. Như vậy nói chỉ gồm các interface không có code thực thi hình như là sai!
hibernate là thể hiện mở rộng hơn của JPA
nguyễn tuyên hoàng
anh ơi. các column thì có phải khai báo tên tương ứng vs database ko a. Ví dụ như sau @Id em thêm @column(name=”id”) có đc ko a.
Khanh Nguyen
Em đọc thêm về JPA nhé https://huongdanjava.com/vi/java-persistence-api
Nhan
a !.. cho e xin fb hay zì dó e hỏi a chi tiết phần spring JPA vs ạ . thanks a
Khanh Nguyen
Post câu hỏi vào này nè e https://www.facebook.com/groups/721409674679531/?ref=bookmarks
Java
lam sao de spring hieu dc ham findByName trong HelloRespository ban nhi
Java
import org.springframework.data.annotation.Id; trong Student co ve bi sai.minh thay the bang import javax.persistence.*; thi ok
lam
anh cho em hỏi trong JpaRepository có phương thức getOne() nhưng em dùng thì nó báo lỗi, còn findById() thì dùng bình thường, thế khi nào thì dùng getOne() ạ ?
Khanh Nguyen
getOne() chỉ nên được sử dụng nếu em chỉ cần check xem record với thông tin em đang truyền có tồn tại trong database hay không? Nó ko query xuống database mà chỉ check trong EntityManager có entity với thông tin mà em đang truyền hay không? Sử dụng getOne() khi em ko cần đọc thông tin của entity nhé!
Tuân
Lúc lưu thì làm sao a nhỉ? Em dùng hàm save mà nó báo lỗi “Incorrect syntax near ‘hibernate_sequence’.”
Khanh Nguyen
Anh nghĩ em đang khai báo entity bị sai đó? Check lại thử.
Hau pham
hi a,
e lam theo huong dan cua anh, cai entity cua no bao loi nhu vay
Invocation of init method failed; nested exception is java.lang.IllegalArgumentException: Not a managed type: class com.pdhau.springdatajpa.Shape
khong biet fix nhu the nao mong a giup
Hau pham
voi lai e dau thay cho nao create cai bean “helloRepository” dau? ma sao minh co the get bean ra duoc t context vay a?
Khanh Nguyen
Implementation của interface HelloRepository là class SimpleJpaRepository đó em.
Khanh Nguyen
Code của em ra sao nhỉ? Anh nghĩ phải có khác gì đó.
meomun
hi anh public interface BookRepository extends CrudRepository{
}
public interface BookRepository extends jpaRepository{
}
hai interface trên đều cho kết quả giống nhau vậy nó có khác nhau ko anh
Khanh Nguyen
Khác chứ em 😀
Cái CrudRepository là interface dùng chung cho các Spring Data project, còn JpaRepository là cho Spring Data JPA. Em xem nội dung của những interface này để thấy rõ nhé.