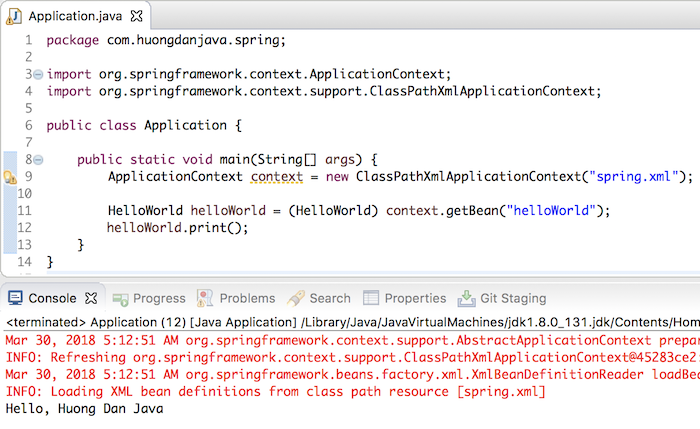
I’ve introduced you to reading the properties of files in Spring using the PropertyPlaceholderConfigurer object, the util namespace, the context namespace. All of the above, we need to declare in Spring’s configuration file. In this tutorial, I introduce you all to another way to read the properties file in Spring: that is, using the @PropertySource annotation. How is it in detail? Please read on.
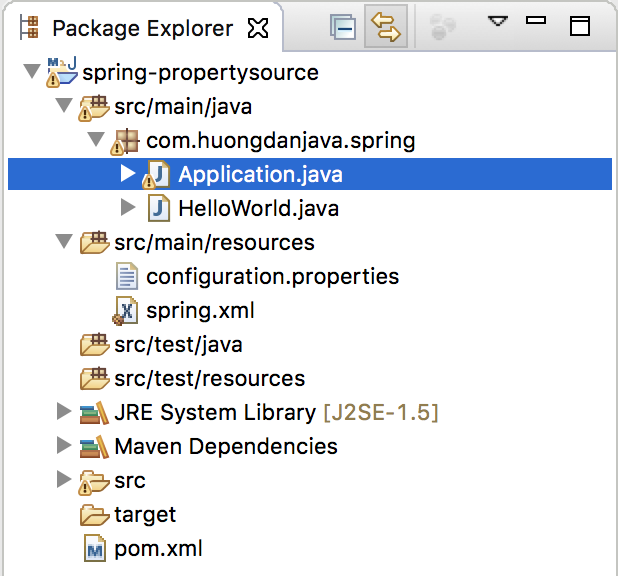
First, I will create a Maven project as an example:
I will use Java 17 for this example:
|
1 2 3 4 |
<properties> <maven.compiler.source>17</maven.compiler.source> <maven.compiler.target>17</maven.compiler.target> </properties> |
Spring framework dependency:
|
1 2 3 4 5 |
<dependency> <groupId>org.springframework</groupId> <artifactId>spring-context</artifactId> <version>6.0.3</version> </dependency> |
Class Application has the following content:
|
1 2 3 4 5 6 7 8 9 10 11 12 |
package com.huongdanjava.spring; import org.springframework.context.ApplicationContext; import org.springframework.context.support.ClassPathXmlApplicationContext; public class Application { public static void main(String[] args) { ApplicationContext context = new ClassPathXmlApplicationContext("spring.xml"); } } |
The HelloWorld class is the class that will use the properties declared in the configuration.properties file, which has the following content:
|
1 2 3 4 5 6 7 8 9 10 11 12 13 14 15 16 17 18 |
package com.huongdanjava.spring; public class HelloWorld { private String name; public void print() { System.out.print("Hello, " + name); } public String getName() { return name; } public void setName(String name) { this.name = name; } } |
In my example, the spring.xml file is the Spring configuration file and the configuration.properties file is the application configuration file. The contents of these files are as follows:
spring.xml
|
1 2 3 4 5 |
<beans xmlns="http://www.springframework.org/schema/beans" xmlns:xsi="http://www.w3.org/2001/XMLSchema-instance" xsi:schemaLocation="http://www.springframework.org/schema/beans http://www.springframework.org/schema/beans/spring-beans.xsd"> </beans> |
configuration.properties
|
1 |
app.author=Khanh Nguyen |
Now, I will use the @PropertySource annotation to read the properties in the configuration.properties file, then the HelloWorld class will use them.
First, we need to use Spring’s auto component scan function to declare the HelloWorld object in the Spring container.
To do this, we need to declare the context:component-scan tag in the Spring configuration file with the com.huongdanjava.spring base package as follows:
|
1 2 3 4 5 6 7 8 |
<beans xmlns="http://www.springframework.org/schema/beans" xmlns:xsi="http://www.w3.org/2001/XMLSchema-instance" xmlns:context="http://www.springframework.org/schema/context" xsi:schemaLocation="http://www.springframework.org/schema/beans http://www.springframework.org/schema/beans/spring-beans.xsd http://www.springframework.org/schema/context http://www.springframework.org/schema/context/spring-context.xsd"> <context:component-scan base-package="com.huongdanjava.spring" /> </beans> |
and declare the @Component annotation in the HelloWorld class:
|
1 2 3 4 5 6 7 8 9 10 11 12 13 14 15 16 17 18 19 20 21 |
package com.huongdanjava.spring; import org.springframework.stereotype.Component; @Component public class HelloWorld { private String name; public void print() { System.out.print("Hello, " + name); } public String getName() { return name; } public void setName(String name) { this.name = name; } } |
Now I will use the @PropertySource annotation to read the configuration.properties file, by declaring it in the HelloWorld class as follows:
|
1 2 3 4 5 6 7 8 9 10 11 12 13 14 15 16 17 18 19 20 21 22 23 |
package com.huongdanjava.spring; import org.springframework.context.annotation.PropertySource; import org.springframework.stereotype.Component; @Component @PropertySource("classpath:configuration.properties") public class HelloWorld { private String name; public void print() { System.out.print("Hello, " + name); } public String getName() { return name; } public void setName(String name) { this.name = name; } } |
With this declaration, Spring will use the path as the value of the @PropertySource annotation to find the properties file and read all the properties contained in this file. In my above declaration, I used the classpath variable, which corresponds to the /src/ main/resources path, and then the file name.
Now we can use the @Value annotation to inject the value of the “app.author” property into the value of the name attribute in the HelloWorld object.
|
1 2 3 4 5 6 7 8 9 10 11 12 13 14 15 16 17 18 19 20 21 22 23 24 25 |
package com.huongdanjava.spring; import org.springframework.beans.factory.annotation.Value; import org.springframework.context.annotation.PropertySource; import org.springframework.stereotype.Component; @Component @PropertySource("classpath:configuration.properties") public class HelloWorld { @Value("${app.author}") private String name; public void print() { System.out.print("Hello, " + name); } public String getName() { return name; } public void setName(String name) { this.name = name; } } |
Use the HelloWorld object in the application:
|
1 2 3 4 5 6 7 8 9 10 11 12 13 14 |
package com.huongdanjava.spring; import org.springframework.context.ApplicationContext; import org.springframework.context.support.ClassPathXmlApplicationContext; public class Application { public static void main(String[] args) { ApplicationContext context = new ClassPathXmlApplicationContext("spring.xml"); HelloWorld helloWorld = (HelloWorld) context.getBean("helloWorld"); helloWorld.print(); } } |
you will see the following results:
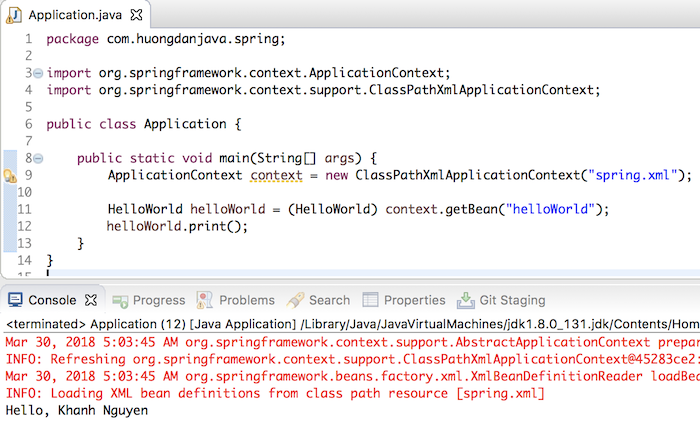
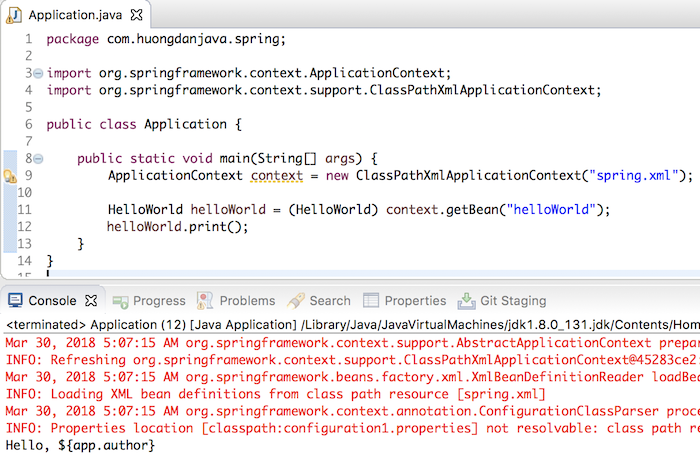
Annotation @PropertySource also supports us ignoreResourceNotFound, so that in case the properties file does not exist, no error occurs, declare the following:
|
1 2 3 4 5 6 7 8 9 10 11 12 13 14 15 16 17 18 19 20 21 22 23 24 25 |
package com.huongdanjava.spring; import org.springframework.beans.factory.annotation.Value; import org.springframework.context.annotation.PropertySource; import org.springframework.stereotype.Component; @Component @PropertySource(value = "classpath:configuration1.properties", ignoreResourceNotFound = true) public class HelloWorld { @Value("${app.author}") private String name; public void print() { System.out.print("Hello, " + name); } public String getName() { return name; } public void setName(String name) { this.name = name; } } |
Result:
In case you have multiple properties files to use in your application, you can use the @PropertySources annotation with multiple annotation declarations @PropertySource.
For example, you have an app.properties file as below:
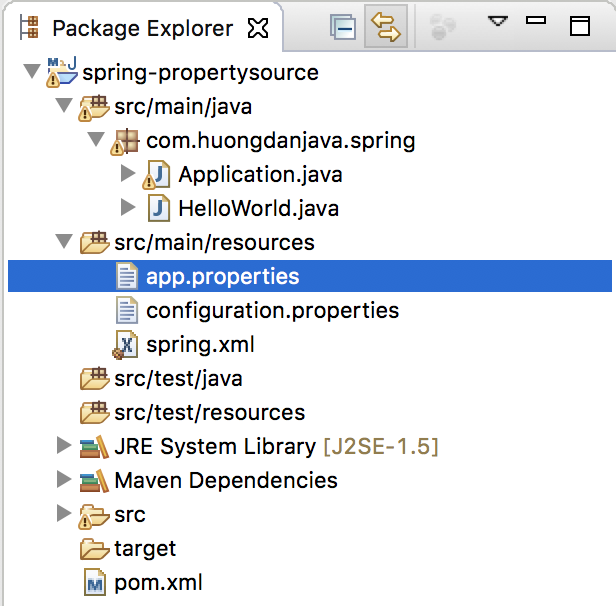
with the following content:
|
1 |
app.author=Huong Dan Java |
Then, I can declare the @PropertySources annotation in the HelloWorld class as follows:
|
1 2 3 4 5 6 7 8 9 10 11 12 13 14 15 16 17 18 19 20 21 22 23 24 25 26 27 28 |
package com.huongdanjava.spring; import org.springframework.beans.factory.annotation.Value; import org.springframework.context.annotation.PropertySource; import org.springframework.context.annotation.PropertySources; import org.springframework.stereotype.Component; @Component @PropertySources({ @PropertySource(value = "classpath:configuration.properties", ignoreResourceNotFound = true), @PropertySource(value = "classpath:app.properties", ignoreResourceNotFound = true)}) public class HelloWorld { @Value("${app.author}") private String name; public void print() { System.out.print("Hello, " + name); } public String getName() { return name; } public void setName(String name) { this.name = name; } } |
Of course, any property declared later will be used.
Result:
