The Database connector in Mule ESB is a connector that help us easy to connect and manipulate different types of databases. In this tutorial, I will guide to you all how to configure this connector in Anypoint Studio.
OK, now suppose you have dragged the Database connector into the Anypoint Studio Editor.
You can put this connector in the Source or Process are both.
If you put it in the Source, you should put in in a Poll component. When running the Mule ESB application, the connection and operation with the database will occur immediately.

If it is put to the Process part, only when the trigger calls, it will run.
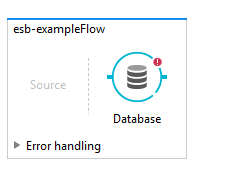
In this post, suppose you put it in the Source part.
When you click on the Database connector, at the bottom of the Editor, you will see a tab named Database to configure for it.

In the Database tab, under Basic Settings, you will see the field Connector configuration. This is the field for us to configure the necessary information to connect to a database.
Now, let click the Add button to open the Choose Global Type window:
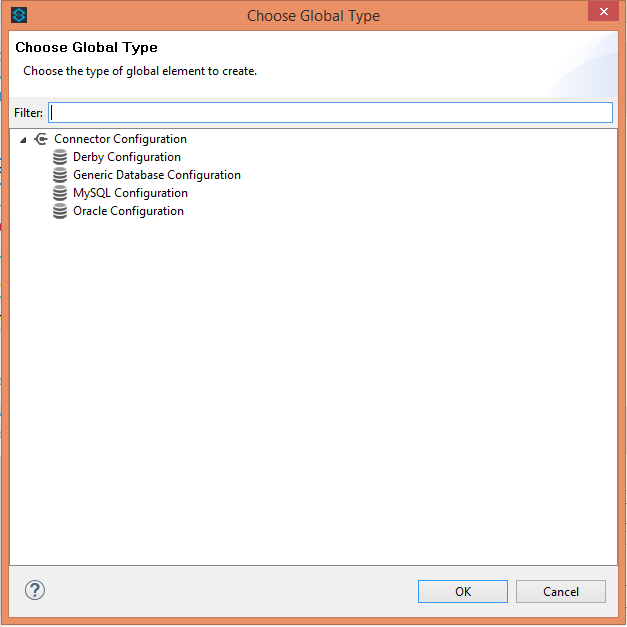
In this example, I will use the MySQL database, so I will select the MySQL Configuration item and then click OK.
At this point, the MySQL Configuration window will appear.
There are 3 ways to configure MySQL database with Database connector in Anypoint Studio. Here, I will show the first way, by default: Database configuration parameters.
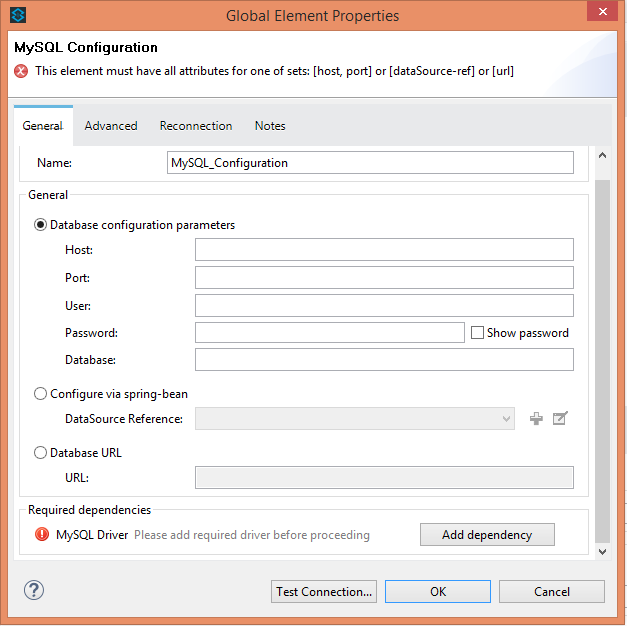
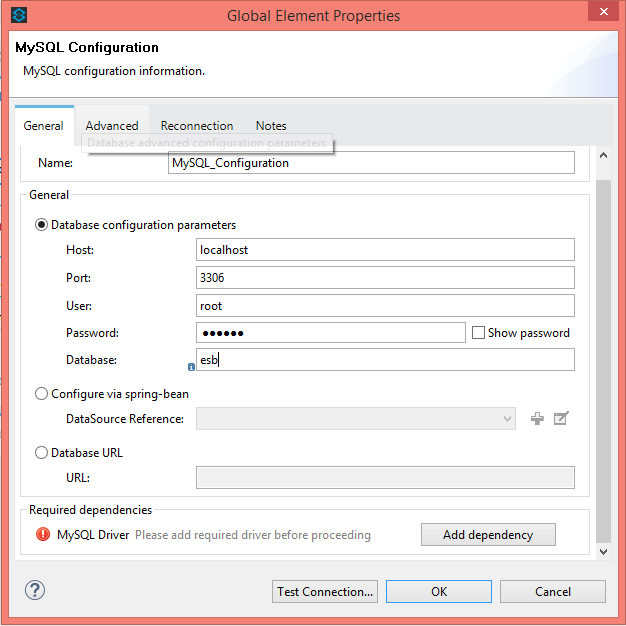
By default, the information, we need to declare, is: Host, Port, User, Password and Database name. My database information is as follows:
And of course, for any Java-related database application, we have to add the JDBC Driver to it.
To add MySQL Driver, click the Add dependency button. Anypoint Studio will open a window for Maven dependency. You can add MySQL dependencies as follows:
Then click Finish.
Go back to the MySQL Configuration window, at this point if you press the Test Connection button … the result is as follows:
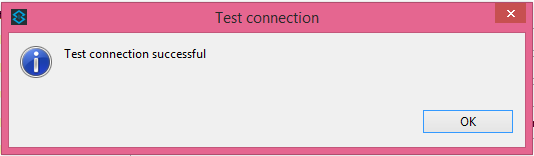
Then we have configured successfully!
Click OK again to close the MySQL Configuration window.
Now, in the Database tab, you need select the operation to do with the database in the Operation field. Here, we have all 7 operations:
- Select: for data query.
- Insert: Used to add new data to the database.
- Update,
Delete, - Stored Procedure,
- Bulk Execute,
- Execute DDL.
In this example, I will select the Select operation.
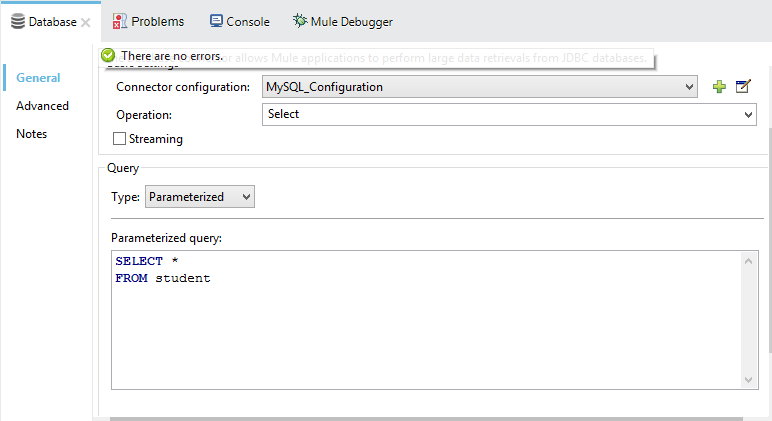
At the bottom of the Database tab, a Query information form is used to configure the Type of the query and the SQL statement that you are going to perform with the database.
There are 3 different types:
- Parameterized
- Dynamic
- From Template
Here, I choose Parameterized. The remaining two, I never used then I do not know how to use them. ????
Assuming, my esb database has a student table structured like as below:
|
1 2 3 4 5 |
CREATE TABLE `student` ( `id` INT(11) NOT NULL AUTO_INCREMENT, `name` VARCHAR(50), PRIMARY KEY (`id`) ); |
Now, I will write the SQL query that retrieves all student data in the Parameterized query as follows:
OK, now you can save your changes, add the Logger component in the Process section and run our example Mule ESB application.