In the tutorial Overview about Spring Data JPA, I introduced you to Spring Data JPA and how to configure it using XML files. There is another way to configure Spring Data JPA which is to use the annotations it supports such as the @EnableJpaRepositories annotation. How is it in detail? Let’s find out together in this tutorial!
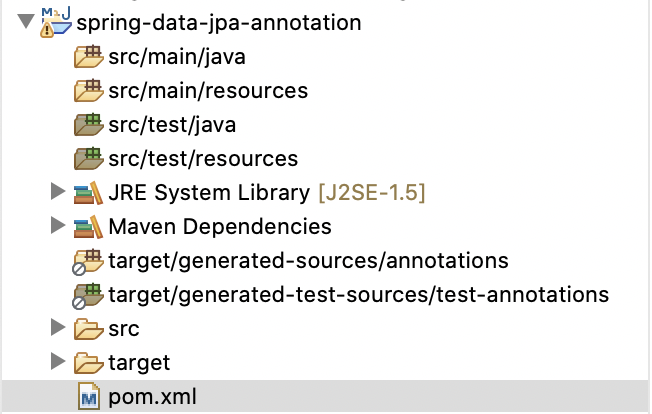
First, I will create a new Maven project as an example:

Spring Data JPA and Hibernate implementation dependencies are as follows:
|
1 2 3 4 5 6 7 8 9 10 11 |
<dependency> <groupId>org.springframework.data</groupId> <artifactId>spring-data-jpa</artifactId> <version>3.2.0</version> </dependency> <dependency> <groupId>org.hibernate</groupId> <artifactId>hibernate-core</artifactId> <version>6.3.1.Final</version> </dependency> |
I will use the MySQL database as an example:
|
1 2 3 4 5 |
<dependency> <groupId>com.mysql</groupId> <artifactId>mysql-connector-j</artifactId> <version>8.2.0</version> </dependency> |
And Project Lombok:
|
1 2 3 4 5 6 |
<dependency> <groupId>org.projectlombok</groupId> <artifactId>lombok</artifactId> <version>1.18.30</version> <scope>provided</scope> </dependency> |
As an example and for simplicity, I define a table in the database containing student information with 2 columns as follows:
|
1 2 3 4 5 |
CREATE TABLE `student` ( `id` bigint(20) NOT NULL AUTO_INCREMENT, `name` varchar(50) DEFAULT NULL, PRIMARY KEY (`id`) ) ENGINE=InnoDB AUTO_INCREMENT=0 DEFAULT CHARSET=latin1; |
The entity of this table:
|
1 2 3 4 5 6 7 8 9 10 11 12 13 14 15 16 17 18 19 20 21 22 23 24 25 26 |
package com.huongdanjava.springdatajpa.entity; import jakarta.persistence.Column; import jakarta.persistence.Entity; import jakarta.persistence.GeneratedValue; import jakarta.persistence.Id; import jakarta.persistence.Table; import java.io.Serializable; import lombok.Getter; import lombok.Setter; @Table(name = "student") @Entity @Getter @Setter public class Student implements Serializable { private static final long serialVersionUID = 1L; @Id @GeneratedValue private Long id; @Column private String name; } |
and Repository class for it:
|
1 2 3 4 5 6 7 8 |
package com.huongdanjava.springdatajpa.repository; import org.springframework.data.jpa.repository.JpaRepository; import com.huongdanjava.springdatajpa.entity.Student; public interface StudentRepository extends JpaRepository<Student, Long> { } |
Now, I will create a new class to configure the application’s database manipulation using Spring Data JPA’s Repository classes with the @EnableJpaRepositories annotation as follows:
|
1 2 3 4 5 6 7 8 9 10 |
package com.huongdanjava.springdatajpa; import org.springframework.context.annotation.Configuration; import org.springframework.data.jpa.repository.config.EnableJpaRepositories; @Configuration @EnableJpaRepositories(basePackages = {"com.huongdanjava.springdatajpa.repository"}) public class DatabaseConfiguration { } |
Spring when scanning and encountering this @EnableJpaRepositories annotation will automatically initialize the necessary objects so that we can use Spring Data JPA’s Repository.
The basePackages property will define the package in which we have defined the Repositories. There are two other properties of the @EnableJpaRepositories annotation that we need to configure: entityManagerFactoryRef and transactionManagerRef. The values of these properties are the bean names created in the Spring container, for classes of EntityManagerFactory and TransactionManager respectively. The default values of these two properties are entityManagerFactory and transactionManager, respectively.
For EntityManagerFactory, you can use the implementation of class LocalContainerEntityManagerFactoryBean like me as follows:
|
1 2 3 4 5 6 7 8 9 10 |
@Bean public EntityManagerFactory entityManagerFactory() { LocalContainerEntityManagerFactoryBean factory = new LocalContainerEntityManagerFactoryBean(); factory.setJpaVendorAdapter(new HibernateJpaVendorAdapter()); factory.setPackagesToScan("com.huongdanjava.springdatajpa.entity"); factory.setDataSource(dataSource()); factory.afterPropertiesSet(); return factory.getObject(); } |
The setPackagesToScan() method declares the package that will contain the application’s JPA entities. In my example, it is package com.huongdanjava.springdatajpa.entity.
The setDataSource() method will configure the DataSource information to connect to the database, you can declare a DataSource bean with the implementation of the DriverManagerDataSource class as follows:
|
1 2 3 4 5 6 7 8 9 10 |
@Bean public DataSource dataSource() { DriverManagerDataSource dataSource = new DriverManagerDataSource(); dataSource.setDriverClassName("com.mysql.cj.jdbc.Driver"); dataSource.setUrl("jdbc:mysql://localhost:3306/jpa_example"); dataSource.setUsername("root"); dataSource.setPassword("123456"); return dataSource; } |
The database information in the configuration of the DataSource you should get from the properties file. Here, for simplicity, I hardcoded this information.
Bean for TransactionManager, you can declare as follows:
|
1 2 3 4 5 6 7 |
@Bean public TransactionManager transactionManager() { DataSourceTransactionManager transactionManager = new DataSourceTransactionManager(); transactionManager.setDataSource(dataSource()); return transactionManager; } |
At this point, we have configured Spring Data JPA for our application.
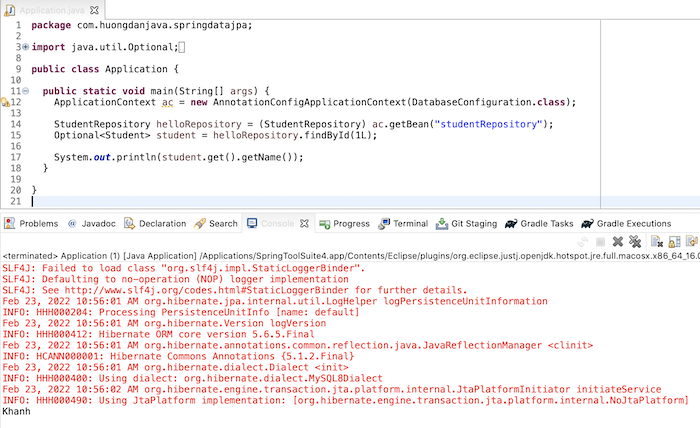
To check the results, I will write a class with the main() method with the following content:
|
1 2 3 4 5 6 7 8 9 10 11 12 13 14 15 16 17 18 19 20 |
package com.huongdanjava.springdatajpa; import java.util.Optional; import org.springframework.context.ApplicationContext; import org.springframework.context.annotation.AnnotationConfigApplicationContext; import com.huongdanjava.springdatajpa.entity.Student; import com.huongdanjava.springdatajpa.repository.StudentRepository; public class Application { public static void main(String[] args) { ApplicationContext ac = new AnnotationConfigApplicationContext(DatabaseConfiguration.class); StudentRepository helloRepository = (StudentRepository) ac.getBean("studentRepository"); Optional<Student> student = helloRepository.findById(1L); System.out.println(student.get().getName()); } } |
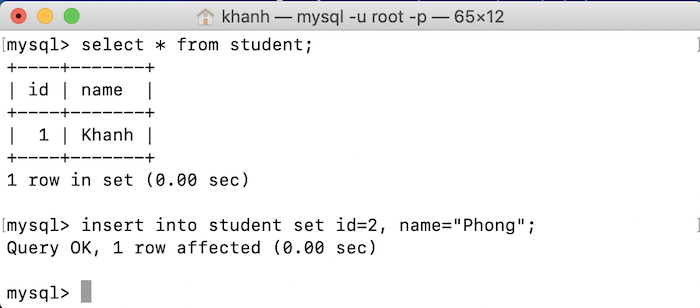
Suppose in the database, I have the following information:

Then the output when running the application will be as follows:


