The Spring Boot Dashboard is a function of the Spring Tool Suite which allows us to manage all applications that use Spring Boot in our workspace. Using the Spring Boot Dashboard, in addition to starting and stopping one or more Spring Boot applications, it also allows us to deploy Spring Boot applications to a particular Cloud Foundry Provider. In this tutorial, I will show you how to deploy the Spring Boot application to Cloud Foundry using the Spring Boot Dashboard in Spring Tool Suite (STS)!
The Cloud Foundry Provider which I will use, it is Pivotal Cloud Foundry.
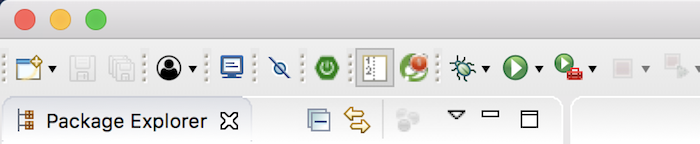
First, let’s open the Spring Boot Dashboard in the STS.
To do this, you can click the Boot Dashboard button on the STS toolbar.
Or go to Window → Show View → Other → Spring → Boot Dashboard.
Then, the Boot Dashboard interface will appear as follows:

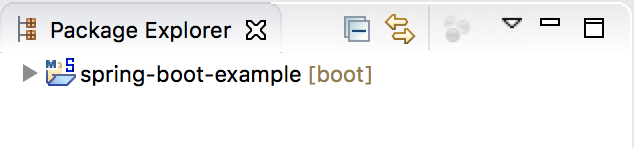
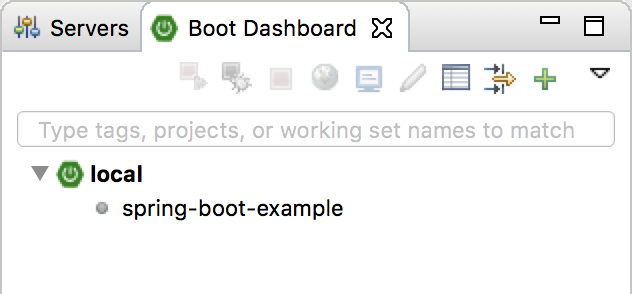
As you can see, we have an item called “local” in the Spring Boot Dashboard. This item is a group of all applications that use Spring Boot in the current workspace of the STS. In my current workspace, I have a project that uses Spring Boot:
Therefore, if you expand this “local” item, you will see the following:
OK, now we’re going to go into the main topic.
Now, click on the Cloud Foundry configuration button in the Spring Boot Dashboard. A window that allows us to add a new Cloud Foundry Target will appear.
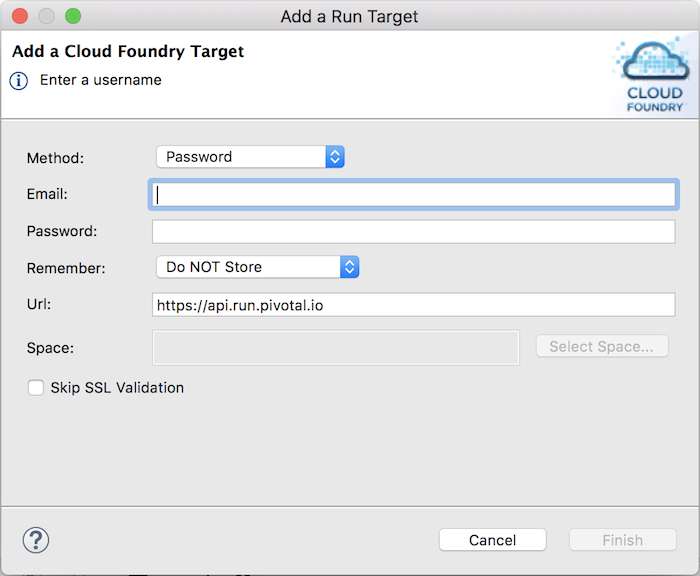
In this window, we will enter information about the Cloud Foundry Provider, here I am using Pivotal Cloud Foundry, including:
- Password
- Cloud Foundry Space.
In this example, I would fill as follows:
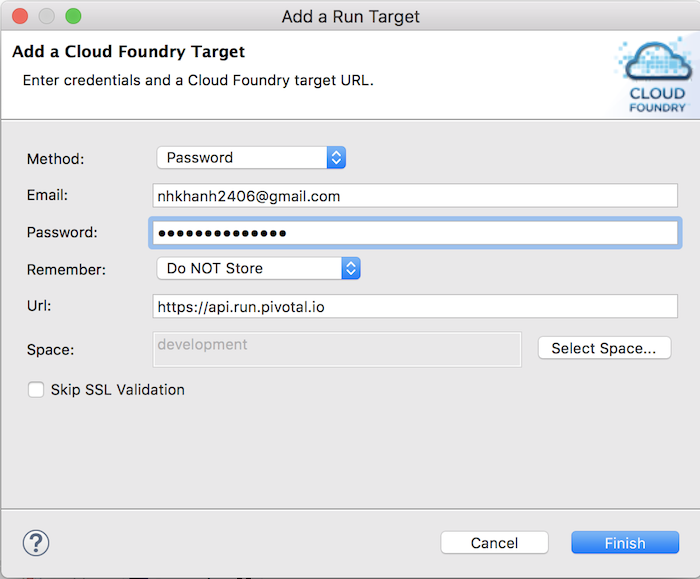
Click the Finish button to finish.
At this point, you will see the Spring Boot Dashboard as follows:
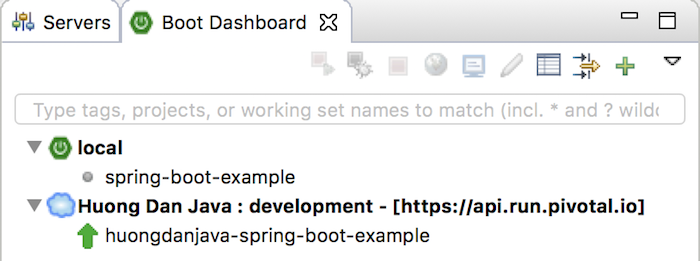
Now, we will try to deploy spring-boot-example in my STS workspace to Pivotal Cloud Foundry.
To do this, drag the spring-boot-example in the “local” item and drop it into the Cloud Foundry item, here’s “Huong Dan Java: development”.
The following window will appear:
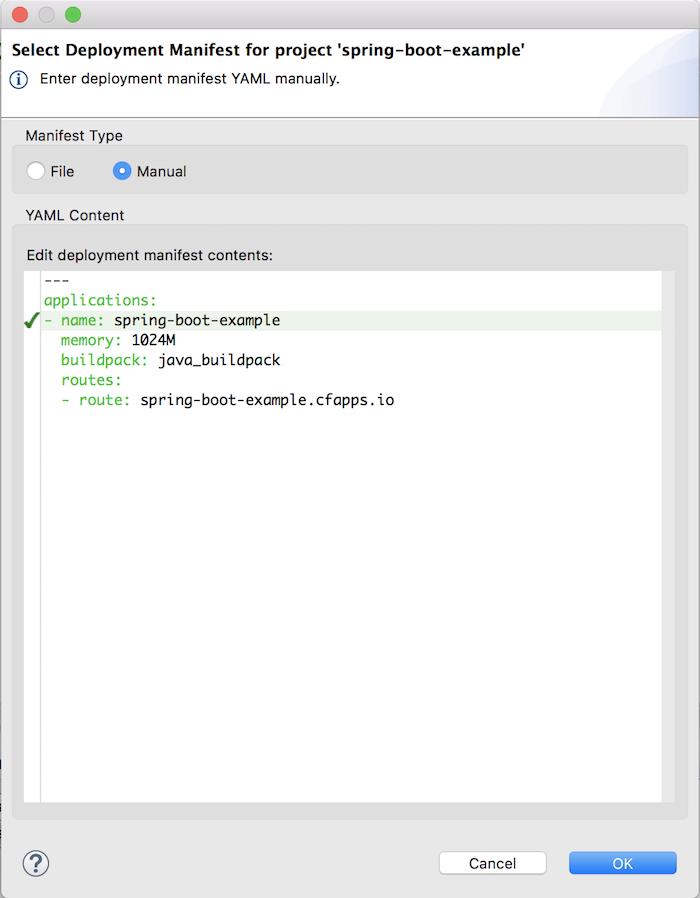
This is the window containing the configuration that will be used to deploy an application to Cloud Foundry. Here, we have configured the application name, memory and URL to run after being deployed. Remember that the URL must be unique on the Cloud Foundry Provider’s system.
I will revise the URL configuration a bit like this:
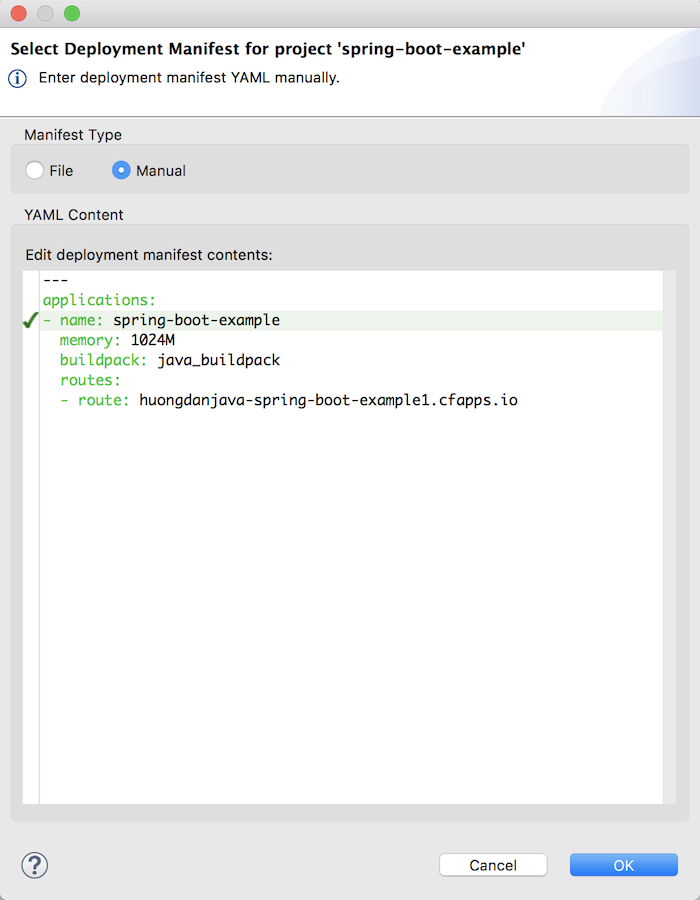
Click OK to finish.
At this point, our application will automatically be deployed into Cloud Foundry. You will see the console log as follows:
|
1 2 3 4 5 6 7 8 9 10 11 12 13 14 15 16 17 18 19 20 21 22 23 24 25 26 27 28 29 30 31 32 33 34 35 36 37 38 39 40 41 42 43 44 45 46 47 48 49 50 51 52 53 54 55 56 57 58 59 60 61 62 63 64 65 66 67 68 69 70 71 72 73 74 75 76 |
[Aug 31, 2017 4:20:45 AM - Boot Dashboard] - Pushing project 'spring-boot-example' Updated app with guid 23624bf7-a5f5-4f5b-99c5-71e20c07ba02 ({"state"=>"STOPPED"}) Updated app with guid 23624bf7-a5f5-4f5b-99c5-71e20c07ba02 ({"environment_json"=>"PRIVATE DATA HIDDEN"}) Updated app with guid 23624bf7-a5f5-4f5b-99c5-71e20c07ba02 ({"route"=>"5e2b5ea4-08e0-4354-82ac-a2657213afed", :verb=>"add", :relation=>"routes", :related_guid=>"5e2b5ea4-08e0-4354-82ac-a2657213afed"}) Creating build for app with guid 23624bf7-a5f5-4f5b-99c5-71e20c07ba02 Updated app with guid 23624bf7-a5f5-4f5b-99c5-71e20c07ba02 ({"state"=>"STARTED"}) Downloading java_buildpack... Downloaded java_buildpack Creating container Successfully created container Downloading app package... Downloaded app package (12.3M) -----> Java Buildpack v4.5 (offline) | https://github.com/cloudfoundry/java-buildpack.git#ffeefb9 -----> Downloading Jvmkill Agent 1.10.0_RELEASE from https://java-buildpack.cloudfoundry.org/jvmkill/trusty/x86_64/jvmkill-1.10.0_RELEASE.so (found in cache) -----> Downloading Open Jdk JRE 1.8.0_141 from https://java-buildpack.cloudfoundry.org/openjdk/trusty/x86_64/openjdk-1.8.0_141.tar.gz (found in cache) Expanding Open Jdk JRE to .java-buildpack/open_jdk_jre (1.2s) -----> Downloading Open JDK Like Memory Calculator 3.9.0_RELEASE from https://java-buildpack.cloudfoundry.org/memory-calculator/trusty/x86_64/memory-calculator-3.9.0_RELEASE.tar.gz (found in cache) Loaded Classes: 12836, Threads: 300 -----> Downloading Client Certificate Mapper 1.2.0_RELEASE from https://java-buildpack.cloudfoundry.org/client-certificate-mapper/client-certificate-mapper-1.2.0_RELEASE.jar (found in cache) -----> Downloading Container Customizer 1.3.0_RELEASE from https://java-buildpack.cloudfoundry.org/container-customizer/container-customizer-1.3.0_RELEASE.jar (found in cache) -----> Downloading Container Security Provider 1.8.0_RELEASE from https://java-buildpack.cloudfoundry.org/container-security-provider/container-security-provider-1.8.0_RELEASE.jar (found in cache) -----> Downloading Spring Auto Reconfiguration 1.12.0_RELEASE from https://java-buildpack.cloudfoundry.org/auto-reconfiguration/auto-reconfiguration-1.12.0_RELEASE.jar (found in cache) Exit status 0 Uploading droplet, build artifacts cache... Uploading build artifacts cache... Uploading droplet... Uploaded build artifacts cache (129B) Creating droplet for app with guid 23624bf7-a5f5-4f5b-99c5-71e20c07ba02 Uploaded droplet (58.7M) Uploading complete Stopping instance 7ce251f9-e8fb-420c-8c17-6ce99b416ff2 Destroying container Successfully destroyed container Creating container Successfully created container Starting health monitoring of container JVM Memory Configuration: -Xss1M -Xmx377887K -XX:MaxDirectMemorySize=10M -XX:MaxMetaspaceSize=90414K -XX:ReservedCodeCacheSize=240M -XX:CompressedClassSpaceSize=17074K . ____ _ __ _ _ /\\ / ___'_ __ _ _(_)_ __ __ _ \ \ \ \ ( ( )\___ | '_ | '_| | '_ \/ _` | \ \ \ \ \\/ ___)| |_)| | | | | || (_| | ) ) ) ) ' |____| .__|_| |_|_| |_\__, | / / / / =========|_|==============|___/=/_/_/_/ :: Spring Boot :: (v1.5.6.RELEASE) 2017-08-30 21:21:48.564 INFO 28 --- [ main] pertySourceApplicationContextInitializer : Adding 'cloud' PropertySource to ApplicationContext 2017-08-30 21:21:48.651 INFO 28 --- [ main] nfigurationApplicationContextInitializer : Adding cloud service auto-reconfiguration to ApplicationContext 2017-08-30 21:21:48.710 INFO 28 --- [ main] c.h.s.SpringBootExampleApplication : Starting SpringBootExampleApplication on 3020375c-bfc5-400d-7e33-08f1 with PID 28 (/home/vcap/app/WEB-INF/classes started by vcap in /home/vcap/app) 2017-08-30 21:21:48.710 INFO 28 --- [ main] c.h.s.SpringBootExampleApplication : The following profiles are active: cloud 2017-08-30 21:21:48.809 INFO 28 --- [ main] ationConfigEmbeddedWebApplicationContext : Refreshing org.springframework.boot.context.embedded.AnnotationConfigEmbeddedWebApplicationContext@20ad9418: startup date [Wed Aug 30 21:21:48 UTC 2017]; root of context hierarchy 2017-08-30 21:21:50.234 INFO 28 --- [ main] urceCloudServiceBeanFactoryPostProcessor : Auto-reconfiguring beans of type javax.sql.DataSource 2017-08-30 21:21:50.238 INFO 28 --- [ main] urceCloudServiceBeanFactoryPostProcessor : No beans of type javax.sql.DataSource found. Skipping auto-reconfiguration. 2017-08-30 21:21:51.177 INFO 28 --- [ main] s.b.c.e.t.TomcatEmbeddedServletContainer : Tomcat initialized with port(s): 8080 (http) 2017-08-30 21:21:51.196 INFO 28 --- [ main] o.apache.catalina.core.StandardService : Starting service [Tomcat] 2017-08-30 21:21:51.198 INFO 28 --- [ main] org.apache.catalina.core.StandardEngine : Starting Servlet Engine: Apache Tomcat/8.5.16 [Aug 31, 2017 4:21:55 AM - Boot Dashboard] - Pushing project 'spring-boot-example' SUCCEEDED! 2017-08-30 21:21:51.416 INFO 28 --- [ost-startStop-1] o.a.c.c.C.[Tomcat].[localhost].[/] : Initializing Spring embedded WebApplicationContext 2017-08-30 21:21:51.417 INFO 28 --- [ost-startStop-1] o.s.web.context.ContextLoader : Root WebApplicationContext: initialization completed in 2613 ms 2017-08-30 21:21:51.594 INFO 28 --- [ost-startStop-1] o.s.b.w.servlet.FilterRegistrationBean : Mapping filter: 'clientCertificateMapper' to: [/*] 2017-08-30 21:21:51.595 INFO 28 --- [ost-startStop-1] o.s.b.w.servlet.FilterRegistrationBean : Mapping filter: 'characterEncodingFilter' to: [/*] 2017-08-30 21:21:51.595 INFO 28 --- [ost-startStop-1] o.s.b.w.servlet.FilterRegistrationBean : Mapping filter: 'hiddenHttpMethodFilter' to: [/*] 2017-08-30 21:21:51.595 INFO 28 --- [ost-startStop-1] o.s.b.w.servlet.FilterRegistrationBean : Mapping filter: 'httpPutFormContentFilter' to: [/*] 2017-08-30 21:21:51.595 INFO 28 --- [ost-startStop-1] o.s.b.w.servlet.FilterRegistrationBean : Mapping filter: 'requestContextFilter' to: [/*] 2017-08-30 21:21:51.596 INFO 28 --- [ost-startStop-1] o.s.b.w.servlet.ServletRegistrationBean : Mapping servlet: 'dispatcherServlet' to [/] 2017-08-30 21:21:52.219 INFO 28 --- [ main] s.w.s.m.m.a.RequestMappingHandlerAdapter : Looking for @ControllerAdvice: org.springframework.boot.context.embedded.AnnotationConfigEmbeddedWebApplicationContext@20ad9418: startup date [Wed Aug 30 21:21:48 UTC 2017]; root of context hierarchy 2017-08-30 21:21:52.363 INFO 28 --- [ main] s.w.s.m.m.a.RequestMappingHandlerMapping : Mapped "{[/]}" onto public org.springframework.http.ResponseEntity<java.lang.String> com.huongdanjava.springbootexample.HelloController.hello() 2017-08-30 21:21:52.368 INFO 28 --- [ main] s.w.s.m.m.a.RequestMappingHandlerMapping : Mapped "{[/error],produces=[text/html]}" onto public org.springframework.web.servlet.ModelAndView org.springframework.boot.autoconfigure.web.BasicErrorController.errorHtml(javax.servlet.http.HttpServletRequest,javax.servlet.http.HttpServletResponse) 2017-08-30 21:21:52.368 INFO 28 --- [ main] s.w.s.m.m.a.RequestMappingHandlerMapping : Mapped "{[/error]}" onto public org.springframework.http.ResponseEntity<java.util.Map<java.lang.String, java.lang.Object>> org.springframework.boot.autoconfigure.web.BasicErrorController.error(javax.servlet.http.HttpServletRequest) 2017-08-30 21:21:52.398 INFO 28 --- [ main] o.s.w.s.handler.SimpleUrlHandlerMapping : Mapped URL path [/webjars/**] onto handler of type [class org.springframework.web.servlet.resource.ResourceHttpRequestHandler] 2017-08-30 21:21:52.398 INFO 28 --- [ main] o.s.w.s.handler.SimpleUrlHandlerMapping : Mapped URL path [/**] onto handler of type [class org.springframework.web.servlet.resource.ResourceHttpRequestHandler] 2017-08-30 21:21:52.442 INFO 28 --- [ main] o.s.w.s.handler.SimpleUrlHandlerMapping : Mapped URL path [/**/favicon.ico] onto handler of type [class org.springframework.web.servlet.resource.ResourceHttpRequestHandler] 2017-08-30 21:21:52.712 INFO 28 --- [ main] o.s.j.e.a.AnnotationMBeanExporter : Registering beans for JMX exposure on startup 2017-08-30 21:21:52.895 INFO 28 --- [ main] s.b.c.e.t.TomcatEmbeddedServletContainer : Tomcat started on port(s): 8080 (http) 2017-08-30 21:21:52.903 INFO 28 --- [ main] c.h.s.SpringBootExampleApplication : Started SpringBootExampleApplication in 5.718 seconds (JVM running for 6.363) Container became healthy |
At this point, you will see the Spring Boot Dashboard window as follows:
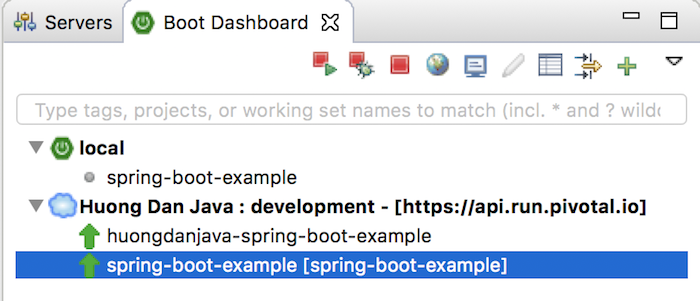
You can examine the results by right-clicking on the item “spring-boot-example [spring-boot-example]” and selecting your Open Web Browser: