When working with applications that need security, it is imperative that you have to know 2 concepts of authentication and authorization. In other words, authentication is related to who can use the application and authorization is related to which resources, which parts of the application you are allowed to use. For web applications that use Spring framework, you can use Spring Security to implement these two concepts. How is it in detail? We will begin to learn about Spring Security in this tutorial!
First, I will create a Spring MVC application as an example:

To work with Spring Security, you need to declare spring-security-web and spring-security-config dependencies as follows:
|
1 2 3 4 5 6 7 8 9 10 |
<dependency> <groupId>org.springframework.security</groupId> <artifactId>spring-security-web</artifactId> <version>${org.springframework.security-version}</version> </dependency> <dependency> <groupId>org.springframework.security</groupId> <artifactId>spring-security-config</artifactId> <version>${org.springframework.security-version}</version> </dependency> |
with:
|
1 2 3 4 |
<properties> ... <org.springframework.security-version>6.4.2</org.springframework.security-version> </properties> |
Now when you run the application, you’ll see the following result:

As an example for the authentication part with Spring Security, I will add code to force users, who want to see the above page, they must login using the username and password.
But first, I need to tell you: we have two ways to implement Spring Security, one is to use the XML configuration file and the second is to use the Java annotation that Spring Security supports.
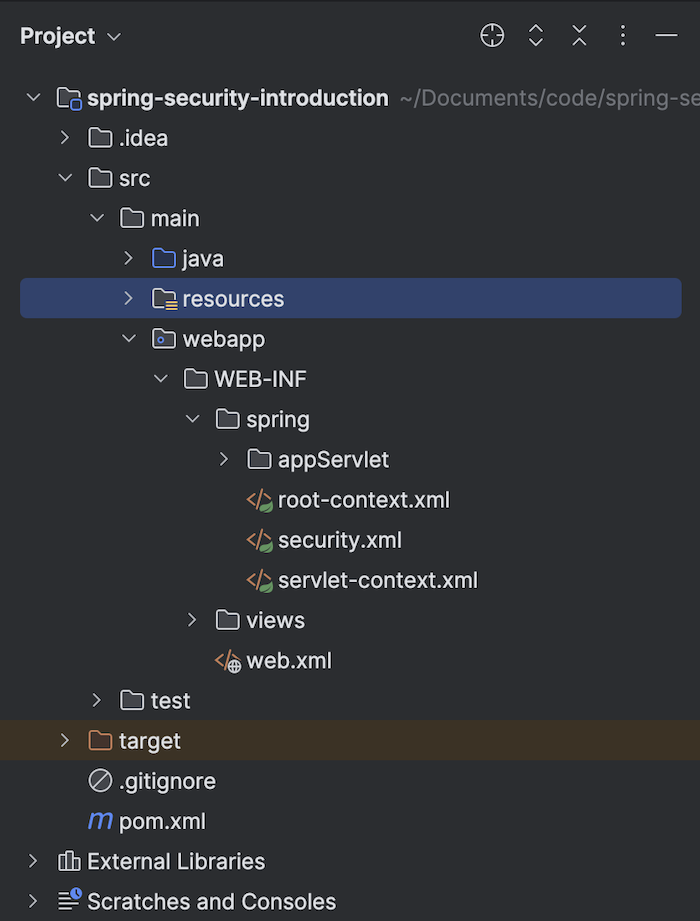
Ok, come back to our example, I will use the configuration file to implement Spring Security. To do this, please create a Spring Security configuration file named security.xml located in src/main/webapp/WEB-INF/spring directory. This file will define the necessary beans for Spring Security in the Spring container. The content of this file is as follows:
|
1 2 3 4 5 6 7 8 9 10 11 12 13 14 |
<beans:beans xmlns="http://www.springframework.org/schema/security" xmlns:beans="http://www.springframework.org/schema/beans" xmlns:xsi="http://www.w3.org/2001/XMLSchema-instance" xsi:schemaLocation="http://www.springframework.org/schema/beans https://www.springframework.org/schema/beans/spring-beans.xsd http://www.springframework.org/schema/security https://www.springframework.org/schema/security/spring-security.xsd"> <http auto-config="true"> <intercept-url pattern="/**" access="authenticated"/> </http> <user-service> <user name="khanh" password="{noop}123456" authorities="ROLE_USER"/> </user-service> </beans:beans> |
Declaring <http> is an important declaration, Spring will create necessary beans for Spring Security based on the declaration of this tag!
The “auto-config=true” attribute of the <http> tag will specify that Spring Security displays the login page with basic authentication, username and password, if the user does not have access to the request.
The <intercept-url> tag inside the <http> tag will define which request and what permission the user has to access that request. As I defined above, it means: only users who have logged in can access all requests of that application! There must be at least one declaration for this <intercept-url> tag!
There are many other configurations related to this <http> tag. Here, in this example, because I only need to enable Spring Security’s authentication function for the application, so to keep it simple, I only need to declare it like that!
The <user-service> declaration allows us to create an in-memory new user, which is used to authenticate into our application. We can declare user information using a .properties file or use the <user> tag as in our example to create in-memory users. Of course, we can also declare to get user information from other sources such as a database. For simplicity, I used an in-memory user to introduce to you in this tutorial.
In the user information declaration, as you can see, we will also need to declare the role of the user using the “authorities” attribute, which is used for authorization. The password part, actually the password I declare is only “123456”, the word “{noop}” has another meaning related to the encoder password, which I will mention more clearly in the incoming tutorial!
So we have the basic configuration file required by a Spring Security application. We need to declare this configuration file with the web servlet in the application’s web.xml file.
Please open the web.xml file and add the following lines:
|
1 2 3 4 5 6 7 8 9 10 |
<!-- Spring Security Filter --> <filter> <filter-name>springSecurityFilterChain</filter-name> <filter-class>org.springframework.web.filter.DelegatingFilterProxy</filter-class> </filter> <filter-mapping> <filter-name>springSecurityFilterChain</filter-name> <url-pattern>/*</url-pattern> </filter-mapping> |
I have declared the <filter> tag, the purpose of this declaration is to act as an interceptor for user requests to our application. Only requests that pass the interceptor can access the application. You can learn more about the <filter> tag in the web.xml file to understand more! The org.springframework.web.filter.DelegatingFilterProxy class of Spring Security will be the class that handles requests to ensure that they satisfy the conditions we define in the security.xml file.
In addition, you also need to update the configuration of Spring MVC to integrate with Spring Security. We will move the servlet-context.xml file in the src/main/webapp/WEB-INF/spring/appServlet folder outside the src/main/webapp/WEB-INF/spring folder:
and edit the appServlet and contextConfigLocation configuration as follows:
|
1 2 3 4 5 6 7 8 9 10 |
<!-- Processes application requests --> <servlet> <servlet-name>appServlet</servlet-name> <servlet-class>org.springframework.web.servlet.DispatcherServlet</servlet-class> <init-param> <param-name>contextConfigLocation</param-name> <param-value></param-value> </init-param> <load-on-startup>1</load-on-startup> </servlet> |
and:
|
1 2 3 4 5 |
<!-- All Spring Configuration (both MVC and Security) are in /WEB-INF/spring/ --> <context-param> <param-name>contextConfigLocation</param-name> <param-value>/WEB-INF/spring/*.xml</param-value> </context-param> |
Now, if you run the application again, you will see our application will now redirect to a login page, where we must log in as follows:
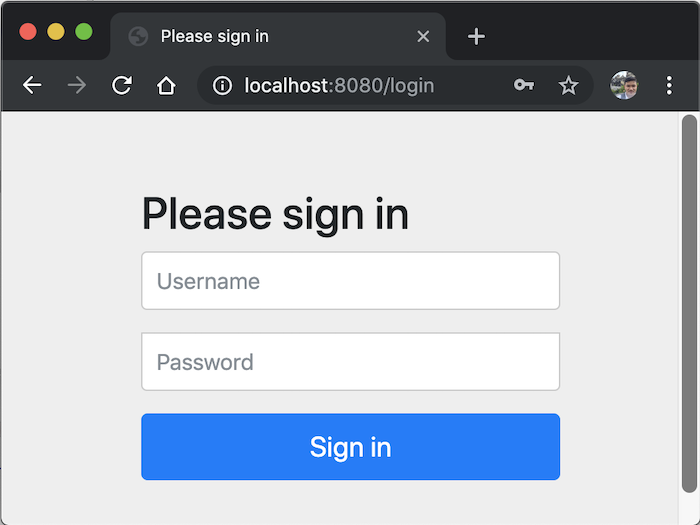
This is Spring Security’s default page! Enter the information we have declared in the security.xml file, then click “Sign in”, you will access to our application.
So that’s all for the authentication section!
To enable the authorization function, you need to modify the file security.xml to add some other configurations as follows:
|
1 2 3 4 5 6 7 8 9 10 11 12 13 14 15 |
<beans:beans xmlns="http://www.springframework.org/schema/security" xmlns:beans="http://www.springframework.org/schema/beans" xmlns:xsi="http://www.w3.org/2001/XMLSchema-instance" xsi:schemaLocation="http://www.springframework.org/schema/beans https://www.springframework.org/schema/beans/spring-beans.xsd http://www.springframework.org/schema/security https://www.springframework.org/schema/security/spring-security.xsd"> <http auto-config="true"> <intercept-url pattern="/**" access="hasRole('ROLE_USER')"/> </http> <user-service> <user name="khanh" password="{noop}123456" authorities="ROLE_USER" /> <user name="thanh" password="{noop}123456" authorities="ROLE_GUEST" /> </user-service> </beans:beans> |
Here, I added another user “thanh” with the role of ROLE_GUEST and I modified the access attribute of the <intercept-url> tag to configure the request to the address “http://localhost:8080/” for users with ROLE_USER only. This means that only the user with the role ROLE_USER will have access to the address “http://localhost:8080/”.
If now, you run the application again and log in with the “thanh” user with the information mentioned above, you will see the following result:
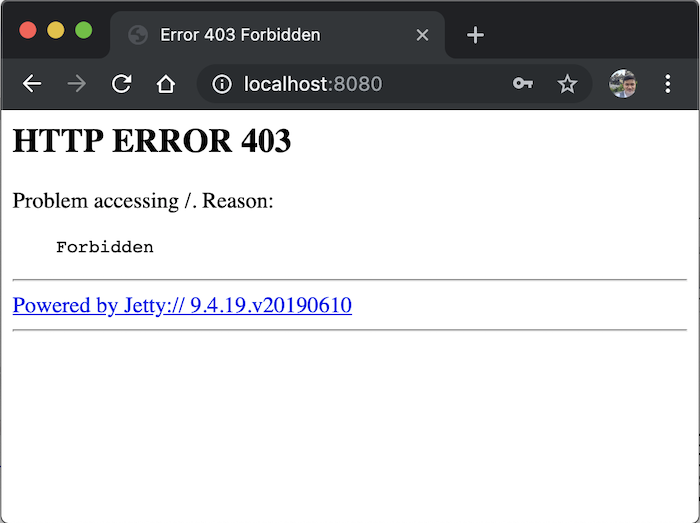
As you can see, although the “thanh” user has access to our application but for the resource with the “/” path, this user has no access.
Try again with the “khanh” user, you will see accessing to the “http://localhost:8080/” page is normal for this user.