In Kubernetes, the Deployment object is the main object responsible for deploying and managing our application. It allows us to deploy Pods, update Pods, rollback Pods, and ReplicaSets. How is it in detail? We will find out together in this tutorial!
First thing, to create a new Deployment object, we need to define information for it using a YAML file.
You can define the information of a Deployment using a YAML file with the following basic content:
|
1 2 3 4 5 6 7 8 9 10 11 12 13 14 15 16 17 18 19 |
apiVersion: apps/v1 kind: Deployment metadata: name: <name> spec: replicas: <replicas-number> selector: matchLabels: <label> template: metadata: labels: <label> spec: containers: - name: <container_name> image: <container_image> - name: <container_name> image: <container_image> |
With:
- <name> is the name of the Deployment
- <replicas-number> is the number of Pods that we want the Deployment to guarantee.
- <label> defines the label for the Pod, you can define the label as you like.
- <container_name> is the name of the container in the Pod after initialization
- <container_image> is the name of the Image used to create the container.
We define the name of the Deployment using the field metadata.name.
To define the number of replicas, the number of Pods that this Deployment manages, we will use the spec.replicas field.
The field spec.selector is used to define how the Deployment finds Pods to manage. Here, we are using the matchLabels property to do this. Any Pod with a label defined as “<label>” will be selected and managed by Deployment. We can also use the matchExpressions property to do this.
The field spec.template is used to define information about the Pod we want to run. You can use the metadata.labels attribute in this spec.template field to label the Pod.
We use the spec.containers property to define all the containers that the Pod will have. Each container will have at least the container name and the Image used to create the container.
For example, now I need to run a Deployment to deploy the node-hello application from the image “gcr.io/google–samples/node–hello:1.0”, I can define the content of the YAML file with the following content:
|
1 2 3 4 5 6 7 8 9 10 11 12 13 14 15 16 17 |
apiVersion: apps/v1 kind: Deployment metadata: name: node-hello spec: replicas: 1 selector: matchLabels: app: node-hello template: metadata: labels: app: node-hello spec: containers: - name: node-hello image: gcr.io/google-samples/node-hello:1.0 |
Run the command “apply” with this configuration file:
|
1 |
kubectl apply -f k8s.yaml |
You will see the following result:

You can check all the Deployments in the Kubernetes cluster using the command:
|
1 |
kubectl get deployments |
My results are as follows:

Check the Pod, you will see the following results:

In general, the Deployment will manage the ReplicaSet and the ReplicaSet will manage the Pods to run the applications. The Deployment will create ReplicaSets to ensure the number of Pods for our application.
When our application is deployed with the Deployment object, it is only accessible within the cluster.
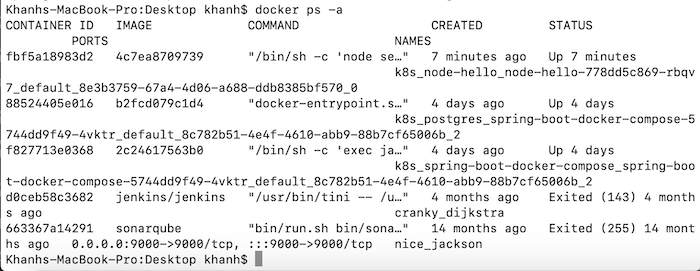
So if you want to check the results of this deployment, you need to login to one of the Pods that have deployed the application. For example, to check the results of the above example, first we need to know the Container ID of the Pod with the command:
|
1 |
docker ps -a |

then access this Container to check the results:
|
1 |
docker exec -it <container-id> /bin/bash |

As you can see, my example application has been deployed on port 8080 and the result when accessing this application is “Hello Kubernetes!”.
To delete a Deployment, you can use the command:
|
1 |
kubectl delete deployment <deloyment-name> |
For example, I can delete my Deployment node-hello as follows:
|
1 |
kubectl delete deployment node-hello |
Result:


