The Node Package Manager (NPM) is a tool used to manage dependencies in Node.js. In this tutorial, through some basic operations, I introduce to you all overview of Node Package Manager in Node.js.
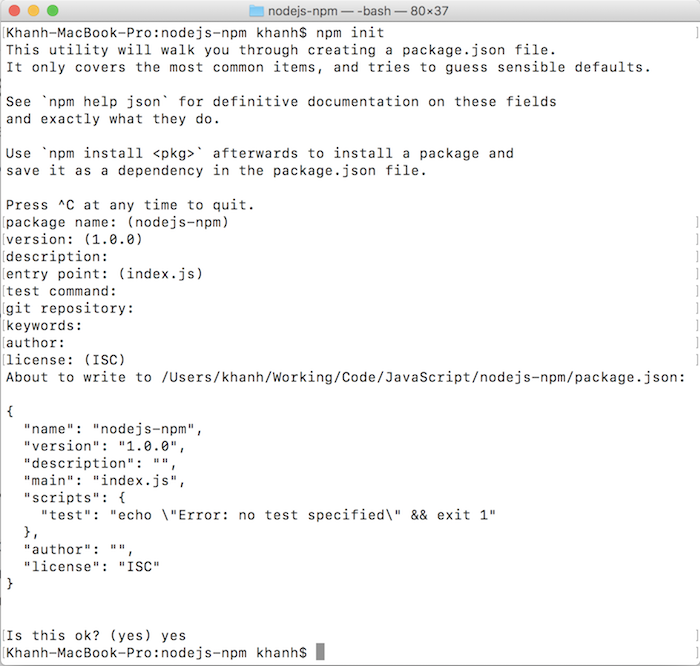
To envision, I will create a new Node.js project as an example:
The first thing you need to know is that in Node.js, we have multiple Node.js modules and each Node.js module can be depended on one or more other Node.js modules.
For example, if you have a Jquery Selecton module https://www.npmjs.com/package/jquery-selecton depend on the JQuery module https://www.npmjs.com/package/jquery.
Using NPM to manage modules in Node.js will help us not to have to worry about dependencies that a Node.js module needs, NPM will manage that for us.
We use the Node Package Manager with a command-line tool called npm
To add a new Node.js module to the Node.js project, we can use structured statements like this:
|
1 |
npm install <module_name>@<version> |
Inside:
- module_name is the name of the Node.js module you need to use
- version is the version of the Node.js module. If you want to install the latest version of the module then you can remove the “@ <version>”.
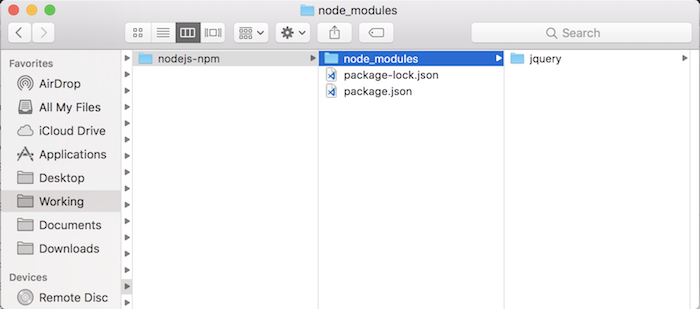
Then a new directory named node_modules will be created in our project and contain the Node.js module we want to add.
For example, now I need to install the latest JQuery module, I run the following command:
|
1 |
npm install jquery |
Result:
In case, you want to use a module Node.js in the command-line, always add the parameter -g (global meaning) in the command above:
|
1 |
npm install -g <module_name>@<version> |
As such, the Node.js module will be added to the node_modules directory in the “/usr/local/lib/” directory on macOS (other OS will be similar). And you can use it in command-line at all, no need to create new Node.js project anymore.
In a Node.js project, NPM manages dependencies through a file named package.json.
As I mentioned in the tutorial Create Node.js project using Node Package Manager, the result after we created the new Node.js project was a package.json file. And we can use this file to manage the dependencies in Node.js.
The contents of the package.json file in the project we created above are as follows:
|
1 2 3 4 5 6 7 8 9 10 11 |
{ "name": "nodejs-npm", "version": "1.0.0", "description": "", "main": "index.js", "scripts": { "test": "echo \"Error: no test specified\" && exit 1" }, "author": "", "license": "ISC" } |
You can either declare the module Node.js manually or use the “npm install <module_name>” command with a parameter “–save” or “–save-dev”. The difference between “–save” and “–save-dev” is “–save” is used for the modules that need to be used on the production environment and the rest for the modules for development purposes.
The entire statement would be:
|
1 |
npm install <module_name> --save |
Or:
|
1 |
npm install <module_name> --save-dev |
For example, if I want to add the latest JQuery module for the production environment, then I will run the following command:
|
1 |
npm install jquery --save |
Then, the contents of the package.json file will be:
|
1 2 3 4 5 6 7 8 9 10 11 12 13 14 |
{ "name": "nodejs-npm", "version": "1.0.0", "description": "", "main": "index.js", "scripts": { "test": "echo \"Error: no test specified\" && exit 1" }, "author": "", "license": "ISC", "dependencies": { "jquery": "^3.3.1" } } |
If you run the following command:
|
1 |
npm install jquery --save-dev |
The result would be:
|
1 2 3 4 5 6 7 8 9 10 11 12 13 14 15 |
{ "name": "nodejs-npm", "version": "1.0.0", "description": "", "main": "index.js", "scripts": { "test": "echo \"Error: no test specified\" && exit 1" }, "author": "", "license": "ISC", "dependencies": {}, "devDependencies": { "jquery": "^3.3.1" } } |
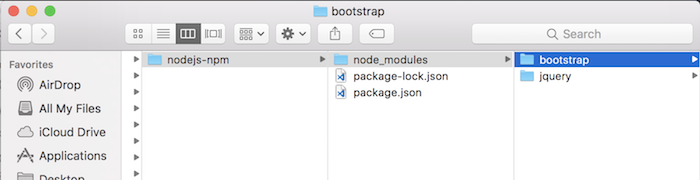
In case, you add Node.js module manually, then after adding, run “npm install” command to NPM download module Node.js. For example, we added to our package.json file a Node.js module named bootstrap https://www.npmjs.com/package/bootstrap as follows:
|
1 2 3 4 5 6 7 8 9 10 11 12 13 14 15 16 17 |
{ "name": "nodejs-npm", "version": "1.0.0", "description": "", "main": "index.js", "scripts": { "test": "echo \"Error: no test specified\" && exit 1" }, "author": "", "license": "ISC", "dependencies": { "bootstrap": "4.1.1" }, "devDependencies": { "jquery": "^3.3.1" } } |
then run the “npm install”, the result will be:
If you notice the way to declare the version of the Node.js module in different cases will be different, there will be more characters like “>”, “^”, … Each character will have the different meanings, as follows:
| Version | Meaning |
| 4.1.1 | Correct 4.1.1 version |
| >4.1.1 | Larger than 4.1.1 version |
| >=4.1.1 | Greater than or equal to 4.1.1 version |
| <4.1.1 | Less than 4.1.1 version |
| <=4.1.1 | Less than or equal to 4.1.1 version |
| ~4.1.1 | Approximate to 4.1.1 version |
| ^4.1.1 | Compatible with 4.1.1 version |
| 4.1.x | Any version starting with 4.1. |
| * | Any version is fine |