The first part of the Questions Management application that we need to implement is the section that governs which categories the questions belong to. So, in this tutorial, I will start by adding an interface for the management of these Categories. This interface will allow us to add, edit, delete, update Categories easily. OK, let’s get started!
For ease of management, all things related to the question, I will group them in the menu item Questions in the left sidebar.
To do this, I will edit the sidebar.component.html file to add to the following code:
|
1 2 3 |
<li> <a routerLink="/dashboard"><i class="fa fa-dashboard fa-fw"></i> Dashboard</a> </li> |
an HTML code is as follows:
|
1 2 3 4 5 6 7 8 9 |
<li> <a href="#"><i class="fa fa-question fa-fw"></i> Questions<span class="fa arrow"></span></a> <ul class="nav nav-second-level"> <li> <a href="#">Categories</a> </li> </ul> <!-- /.nav-second-level --> </li> |
In the code above, I added a menu item called Questions that acts as the root of another menu item named Categories. In the future, I will add some other menu items within this Question menu.
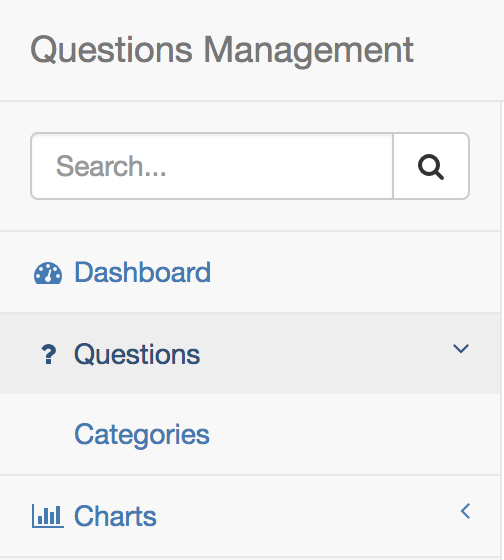
At this point, if you run the application, you will see the results of the left menu as follows:

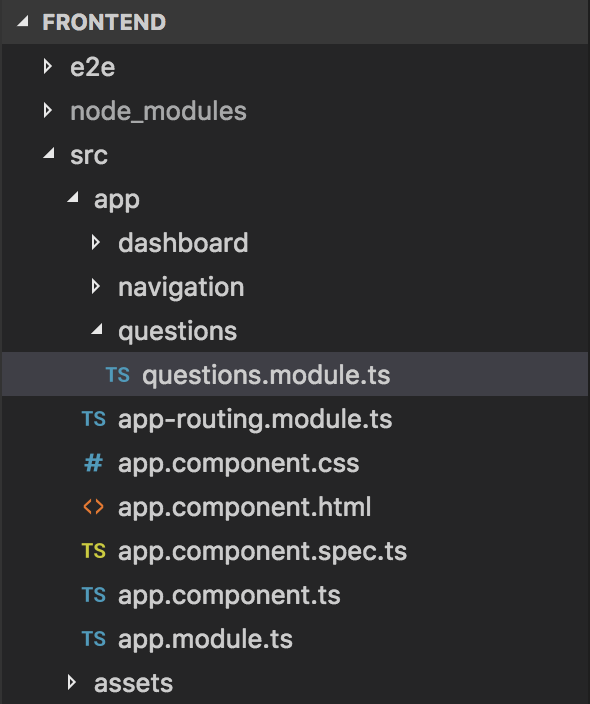
Next, I will add a module named QuestionsModule located in the src/app/questions directory:

This QuestionsModule module will manage all the questions related to the question, and the first thing it will manage is the Categories. To use this module, we need to import it into the AppModule as follows:
|
1 2 3 4 5 6 7 8 9 10 11 12 13 14 15 16 17 18 19 20 21 22 23 24 25 26 |
import { BrowserModule } from '@angular/platform-browser'; import { NgModule } from '@angular/core'; import { AppComponent } from './app.component'; import { NavigationModule } from './navigation/navigation.module'; import { DashboardModule } from './dashboard/dashboard.module'; import { AppRoutingModule } from './app-routing.module'; import { QuestionsModule } from './questions/questions.module'; @NgModule({ declarations: [ AppComponent ], imports: [ BrowserModule, AppRoutingModule, NavigationModule, DashboardModule, QuestionsModule ], providers: [], bootstrap: [ AppComponent ] }) export class AppModule { } |
To build the interface for Categories, you will first add some libraries that you will use to build this interface first.
These are the libraries:
- Datatables.net: 1.10.12
- Datatables.net Bootstrap: 1.10.12
- Datatables.net Responsive: 2.1.0
Although these libraries have newer versions, I only use older versions that are compatible with the template we are using, SB Admin 2.
To add these libraries to our Questions Management application, we will run the following commands:
|
1 2 3 |
npm install datatables.net@1.10.12 --save npm install datatables.net-bs@1.10.12 --save npm install datatables.net-responsive@2.1.0 --save |
then, it will be declared in the scripts section of the angular.json file in the root directory of the Angular project of these libraries:
|
1 2 3 4 5 6 7 8 9 10 11 12 |
"scripts": [ "node_modules/jquery/dist/jquery.min.js", "node_modules/bootstrap/dist/js/bootstrap.min.js", "node_modules/metismenu/dist/metisMenu.min.js", "node_modules/raphael/raphael.min.js", "node_modules/morris.js/morris.min.js", "node_modules/datatables.net/js/jquery.dataTables.js", "node_modules/datatables.net-bs/js/dataTables.bootstrap.js", "node_modules/datatables.net-responsive/js/dataTables.responsive.js", "src/assets/js/sb-admin-2.min.js", "src/assets/js/morris-data.js" ] |
In the style.css file in the src directory, I also declare the CSS file of the Datatables.net Bootstrap library as follows:
|
1 2 3 4 5 6 |
/* You can add global styles to this file, and also import other style files */ @import '~bootstrap/dist/css/bootstrap.min.css'; @import '~metismenu/dist/metisMenu.min.css'; @import '~font-awesome/css/font-awesome.min.css'; @import '~morris.js/morris.css'; @import '~datatables.net-bs/css/dataTables.bootstrap.css'; |
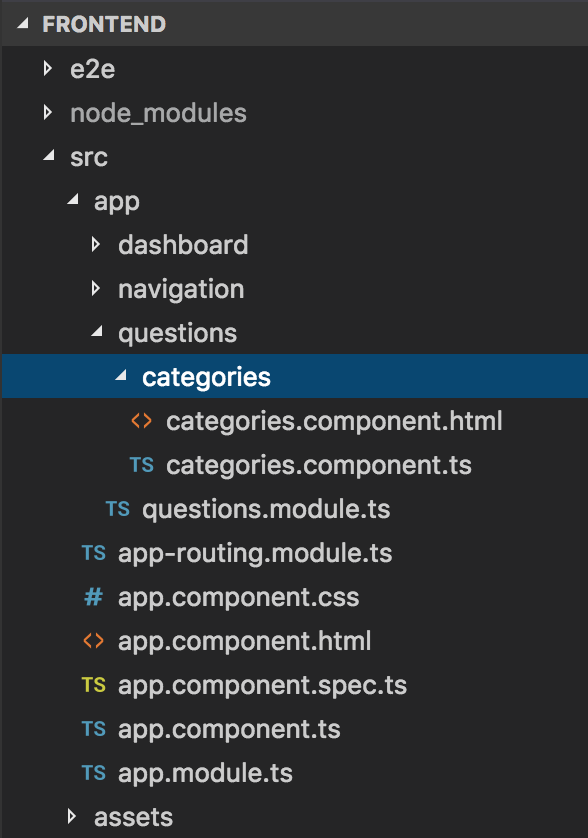
Next, I will create a new component named CategoriesComponent located in the src/ app/questions/categories directory:

The content of the CategoriesComponent will look like this:
|
1 2 3 4 5 6 7 8 9 10 11 12 13 14 15 16 17 |
import { Component, AfterViewInit } from "@angular/core"; declare var $: any; @Component({ selector: 'qm-body', templateUrl: './categories.component.html' }) export class CategoriesComponent implements AfterViewInit { ngAfterViewInit(): void { $('#dataTables-categories').DataTable({ responsive: true }); } } |
with the categories.component.html file built using the Datatables.net libraries, Bootstrap as I said above as follows:
|
1 2 3 4 5 6 7 8 9 10 11 12 13 14 15 16 17 18 19 20 21 22 23 24 25 26 27 28 29 30 31 32 33 34 35 36 37 38 39 40 41 42 43 44 45 46 47 48 49 50 51 52 53 54 55 56 57 58 59 60 61 62 63 64 65 66 67 68 69 70 71 72 73 74 75 76 77 |
<div id="page-wrapper"> <div class="row"> <div class="col-lg-12"> <h1 class="page-header">Categories</h1> </div> <!-- /.col-lg-12 --> </div> <div> <div class="row"> <div class="col-lg-12"> <div class="panel panel-default"> <div class="panel-body"> <div class="col-lg-6"> <table width="100%" class="table table-striped table-bordered table-hover" id="dataTables-categories"> <thead> <tr> <th>Name</th> <th>Code</th> <th>Description</th> <th>Actions</th> </tr> </thead> <tbody> <tr class="odd gradeX"> <td>Trident</td> <td>Trident</td> <td>Internet Explorer 4.0</td> <td> <button type="button" class="btn btn-warning btn-circle"><i class="fa fa-edit"></i></button> <button type="button" class="btn btn-danger btn-circle"><i class="fa fa-trash"></i></button> </td> </tr> <tr class="even gradeC"> <td>Trident</td> <td>Trident</td> <td>Internet Explorer 5.0</td> <td> <button type="button" class="btn btn-warning btn-circle"><i class="fa fa-edit"></i></button> <button type="button" class="btn btn-danger btn-circle"><i class="fa fa-trash"></i></button> </td> </tr> </tbody> </table> <!-- /.table-responsive --> </div> <div class="col-lg-6"> <h3>Add New Category</h3> <form role="form"> <div class="form-group"> <label>Name</label> <input class="form-control"> <p class="help-block">The name of the category.</p> </div> <div class="form-group"> <label>Code</label> <input class="form-control"> <p class="help-block">The code of this category.</p> </div> <div class="form-group"> <label>Description</label> <textarea class="form-control" rows="3"></textarea> <p class="help-block">The description about this category.</p> </div> <button type="submit" class="btn btn-primary">Add New Category</button> </form> </div> </div> <!-- /.panel-body --> </div> <!-- /.panel --> </div> <!-- /.col-lg-12 --> </div> <!-- /.row --> </div> </div> |
Now we will declare the CategoriesComponent into the QuestionsModule:
|
1 2 3 4 5 6 7 8 9 10 11 12 13 14 |
import { NgModule } from "@angular/core"; import { CategoriesComponent } from "./categories/categories.component"; @NgModule({ declarations: [ CategoriesComponent ], exports: [ CategoriesComponent ] }) export class QuestionsModule { } |
with the Routing declaration for it:
|
1 2 3 4 5 6 7 8 9 10 11 12 13 14 15 16 17 18 19 20 21 |
import { NgModule } from '@angular/core'; import { RouterModule, Routes } from '@angular/router'; import { DashboardComponent } from './dashboard/dashboard.component'; import { CategoriesComponent } from './questions/categories/categories.component'; const routes: Routes = [ { path: '', component: DashboardComponent }, { path: 'dashboard', component: DashboardComponent }, { path: 'categories', component: CategoriesComponent }, { path: '**', pathMatch: 'full', redirectTo: '/' } ] @NgModule({ imports: [ RouterModule.forRoot(routes) ], exports: [ RouterModule ] }) export class AppRoutingModule { } |
The last step we need to do is to edit the left menu for the item menu using the Angular routerLink directive so that we can navigate to the Categories page.
We will fix this as follows:
|
1 2 3 4 5 6 7 8 9 |
<li> <a href="#"><i class="fa fa-question fa-fw"></i> Questions<span class="fa arrow"></span></a> <ul class="nav nav-second-level"> <li> <a routerLink="/categories">Categories</a> </li> </ul> <!-- /.nav-second-level --> </li> |
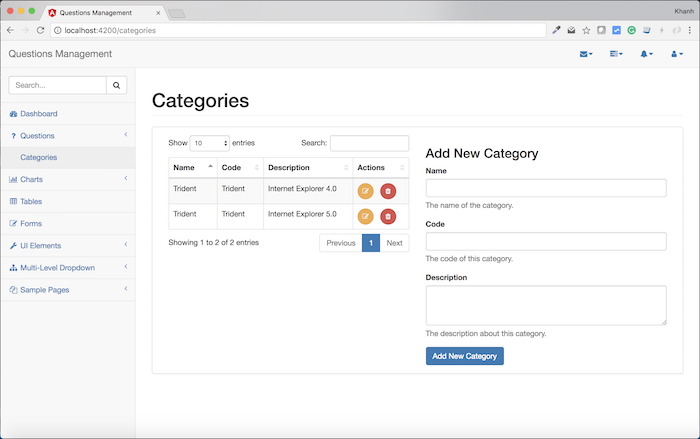
Now, if you run the application again and go to the Categories page, you will see the following results:


