Phần đầu tiên trong ứng dụng Questions Management mà chúng ta cần hiện thực đó là phần quản lý những Categories mà các câu hỏi sẽ thuộc về. Do đó, trong bài viết này mình sẽ bắt đầu với việc thêm giao diện cho phần quản lý các Categories này. Giao diện này sẽ cho phép chúng ta thêm, chỉnh sửa, xóa, cập nhập Categories một cách dễ dàng. OK, bắt đầu nào các bạn!
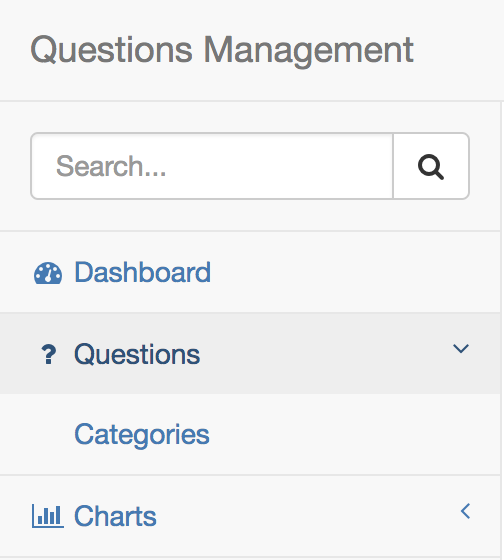
Để dễ quản lý, tất cả những thứ liên quan đến câu hỏi, mình sẽ group chúng lại trong menu item Questions ở phần sidebar bên trái.
Để làm được điều này, mình sẽ sửa tập tin sidebar.component.html để thêm vào sau đoạn code:
|
1 2 3 |
<li> <a routerLink="/dashboard"><i class="fa fa-dashboard fa-fw"></i> Dashboard</a> </li> |
một đoạn code HTML như sau:
|
1 2 3 4 5 6 7 8 9 |
<li> <a href="#"><i class="fa fa-question fa-fw"></i> Questions<span class="fa arrow"></span></a> <ul class="nav nav-second-level"> <li> <a href="#">Categories</a> </li> </ul> <!-- /.nav-second-level --> </li> |
Trong đoạn code trên, mình đã thêm một menu item tên là Questions đóng vai trò là root của một menu item khác tên là Categories. Trong tương lai mình sẽ thêm một số menu item khác bên trong menu Questions này.
Lúc này, nếu các bạn chạy lại ứng dụng, các bạn sẽ thấy kết quả của phần menu bên trái như sau:

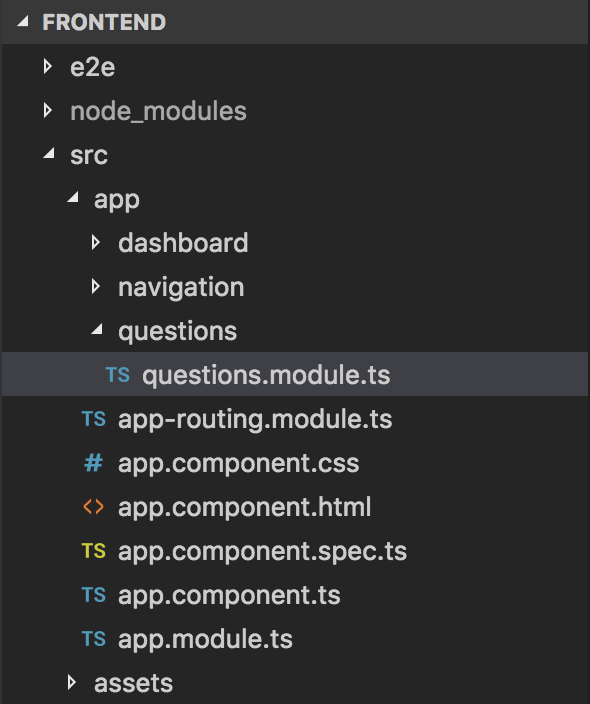
Tiếp theo, mình sẽ thêm mới một module tên là QuestionsModule nằm trong thư mục src/app/questions:

Module QuestionsModule này sẽ quản lý tất cả những phần liên quan đến câu hỏi và cái đầu tiên mà nó sẽ quản lý đó là các Categories. Để sử dụng module này, chúng ta cần import nó vào AppModule như sau:
|
1 2 3 4 5 6 7 8 9 10 11 12 13 14 15 16 17 18 19 20 21 22 23 24 25 26 |
import { BrowserModule } from '@angular/platform-browser'; import { NgModule } from '@angular/core'; import { AppComponent } from './app.component'; import { NavigationModule } from './navigation/navigation.module'; import { DashboardModule } from './dashboard/dashboard.module'; import { AppRoutingModule } from './app-routing.module'; import { QuestionsModule } from './questions/questions.module'; @NgModule({ declarations: [ AppComponent ], imports: [ BrowserModule, AppRoutingModule, NavigationModule, DashboardModule, QuestionsModule ], providers: [], bootstrap: [ AppComponent ] }) export class AppModule { } |
Để xây dựng phần giao diện cho Categories, đầu tiên mình sẽ thêm một số thư viện mà mình sẽ sử dụng để xây dựng giao diện này trước.
Đó là các thư viện:
- Datatables.net: 1.10.12
- Datatables.net Bootstrap: 1.10.12
- Datatables.net Responsive: 2.1.0
Mặc dù những thư viện này có các phiên bản mới hơn nhưng mình chỉ sử dụng những phiên bản cũ phù hợp với template mà chúng ta đang sử dụng là SB Admin 2.
Để thêm các thư viện này vào ứng dụng Questions Management của chúng ta, mình sẽ chạy những câu lệnh sau:
|
1 2 3 |
npm install datatables.net@1.10.12 --save npm install datatables.net-bs@1.10.12 --save npm install datatables.net-responsive@2.1.0 --save |
sau đó, sẽ khai báo trong phần scripts của tập tin angular.json ở thư mục root của project Angular các thư viện này:
|
1 2 3 4 5 6 7 8 9 10 11 12 |
"scripts": [ "node_modules/jquery/dist/jquery.min.js", "node_modules/bootstrap/dist/js/bootstrap.min.js", "node_modules/metismenu/dist/metisMenu.min.js", "node_modules/raphael/raphael.min.js", "node_modules/morris.js/morris.min.js", "node_modules/datatables.net/js/jquery.dataTables.js", "node_modules/datatables.net-bs/js/dataTables.bootstrap.js", "node_modules/datatables.net-responsive/js/dataTables.responsive.js", "src/assets/js/sb-admin-2.min.js", "src/assets/js/morris-data.js" ] |
Trong tập tin style.css ở thư mục src mình cũng khai báo thêm tập tin CSS của thư viện Datatables.net Bootstrap như sau:
|
1 2 3 4 5 6 |
/* You can add global styles to this file, and also import other style files */ @import '~bootstrap/dist/css/bootstrap.min.css'; @import '~metismenu/dist/metisMenu.min.css'; @import '~font-awesome/css/font-awesome.min.css'; @import '~morris.js/morris.css'; @import '~datatables.net-bs/css/dataTables.bootstrap.css'; |
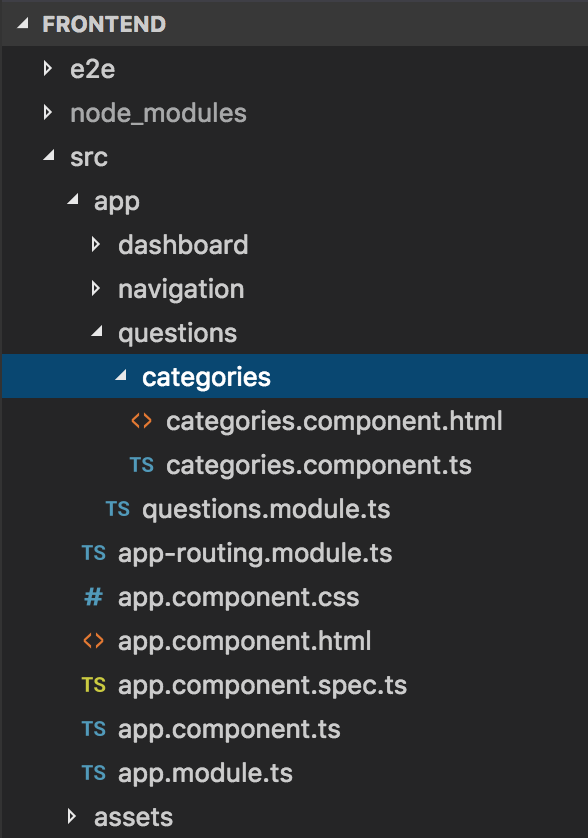
Tiếp theo, mình sẽ tạo mới một component tên là CategoriesComponent nằm trong thư mục src/app/questions/categories:

Nội dung của CategoriesComponent sẽ như sau:
|
1 2 3 4 5 6 7 8 9 10 11 12 13 14 15 16 17 |
import { Component, AfterViewInit } from "@angular/core"; declare var $: any; @Component({ selector: 'qm-body', templateUrl: './categories.component.html' }) export class CategoriesComponent implements AfterViewInit { ngAfterViewInit(): void { $('#dataTables-categories').DataTable({ responsive: true }); } } |
với tập tin categories.component.html được xây dựng sử dụng các thư viện Datatables.net, Bootstrap như mình đã nói ở trên như sau:
|
1 2 3 4 5 6 7 8 9 10 11 12 13 14 15 16 17 18 19 20 21 22 23 24 25 26 27 28 29 30 31 32 33 34 35 36 37 38 39 40 41 42 43 44 45 46 47 48 49 50 51 52 53 54 55 56 57 58 59 60 61 62 63 64 65 66 67 68 69 70 71 72 73 74 75 76 77 |
<div id="page-wrapper"> <div class="row"> <div class="col-lg-12"> <h1 class="page-header">Categories</h1> </div> <!-- /.col-lg-12 --> </div> <div> <div class="row"> <div class="col-lg-12"> <div class="panel panel-default"> <div class="panel-body"> <div class="col-lg-6"> <table width="100%" class="table table-striped table-bordered table-hover" id="dataTables-categories"> <thead> <tr> <th>Name</th> <th>Code</th> <th>Description</th> <th>Actions</th> </tr> </thead> <tbody> <tr class="odd gradeX"> <td>Trident</td> <td>Trident</td> <td>Internet Explorer 4.0</td> <td> <button type="button" class="btn btn-warning btn-circle"><i class="fa fa-edit"></i></button> <button type="button" class="btn btn-danger btn-circle"><i class="fa fa-trash"></i></button> </td> </tr> <tr class="even gradeC"> <td>Trident</td> <td>Trident</td> <td>Internet Explorer 5.0</td> <td> <button type="button" class="btn btn-warning btn-circle"><i class="fa fa-edit"></i></button> <button type="button" class="btn btn-danger btn-circle"><i class="fa fa-trash"></i></button> </td> </tr> </tbody> </table> <!-- /.table-responsive --> </div> <div class="col-lg-6"> <h3>Add New Category</h3> <form role="form"> <div class="form-group"> <label>Name</label> <input class="form-control"> <p class="help-block">The name of the category.</p> </div> <div class="form-group"> <label>Code</label> <input class="form-control"> <p class="help-block">The code of this category.</p> </div> <div class="form-group"> <label>Description</label> <textarea class="form-control" rows="3"></textarea> <p class="help-block">The description about this category.</p> </div> <button type="submit" class="btn btn-primary">Add New Category</button> </form> </div> </div> <!-- /.panel-body --> </div> <!-- /.panel --> </div> <!-- /.col-lg-12 --> </div> <!-- /.row --> </div> </div> |
Bây giờ chúng ta sẽ khai báo CategoriesComponent vào QuestionsModule:
|
1 2 3 4 5 6 7 8 9 10 11 12 13 14 |
import { NgModule } from "@angular/core"; import { CategoriesComponent } from "./categories/categories.component"; @NgModule({ declarations: [ CategoriesComponent ], exports: [ CategoriesComponent ] }) export class QuestionsModule { } |
với khai báo Routing cho nó:
|
1 2 3 4 5 6 7 8 9 10 11 12 13 14 15 16 17 18 19 20 21 |
import { NgModule } from '@angular/core'; import { RouterModule, Routes } from '@angular/router'; import { DashboardComponent } from './dashboard/dashboard.component'; import { CategoriesComponent } from './questions/categories/categories.component'; const routes: Routes = [ { path: '', component: DashboardComponent }, { path: 'dashboard', component: DashboardComponent }, { path: 'categories', component: CategoriesComponent }, { path: '**', pathMatch: 'full', redirectTo: '/' } ] @NgModule({ imports: [ RouterModule.forRoot(routes) ], exports: [ RouterModule ] }) export class AppRoutingModule { } |
Bước cuối cùng chúng ta cần làm là sửa phần menu bên trái cho menu item Categories sử dụng directive routerLink của Angular để chúng ta có thể navigate tới trang Categories này.
Chúng ta sẽ sửa như sau:
|
1 2 3 4 5 6 7 8 9 |
<li> <a href="#"><i class="fa fa-question fa-fw"></i> Questions<span class="fa arrow"></span></a> <ul class="nav nav-second-level"> <li> <a routerLink="/categories">Categories</a> </li> </ul> <!-- /.nav-second-level --> </li> |
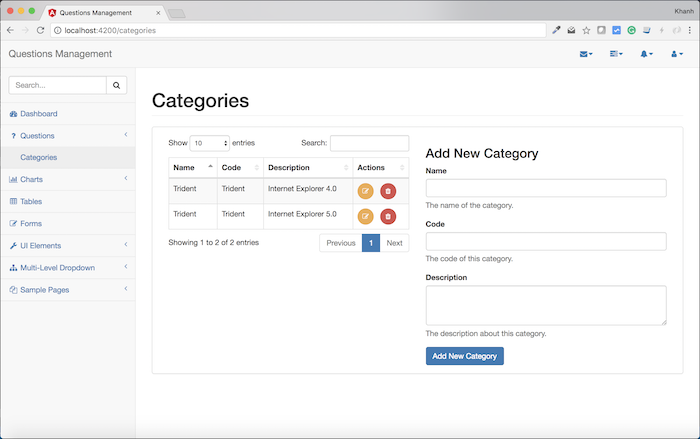
Bây giờ, nếu các bạn chạy lại ứng dụng và đi đến trang Categories, các bạn sẽ thấy kết quả như sau:


