Our Questions Management application will have many pages, each page will have some common sections for all pages and specific sections for this page. Therefore, splitting our template using Component and Module in Angular is essential. In this tutorial, I will guide you all how we split our SB Admin 2 template.
First, look at the current Question Management interface:
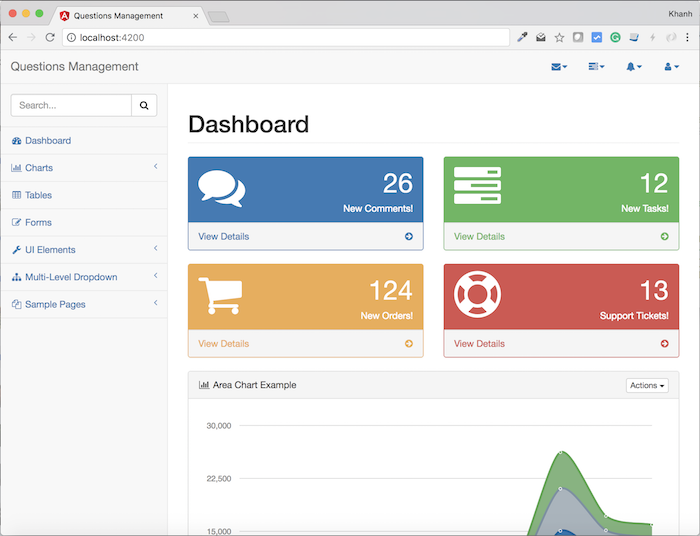
You will see the left navigation menu and the navigation section at the top of the page are common to all pages of our application. Only the middle part of the “Dashboard” will change as we move between different pages.
If you look at the contents of the app.component.html file, you will see inside the root tag with the id wrapper, we have two sections for navigation and page-wrapper, as follows:
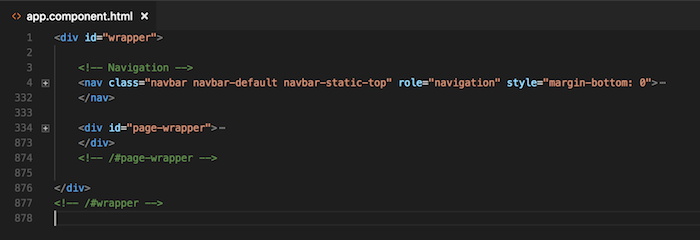
The navigation section is the left menu and the top navigation, while the page-wrapper is the Dashboard.
Now I will create two directories dashboard and navigation in the corresponding src/app directory for each of the above:
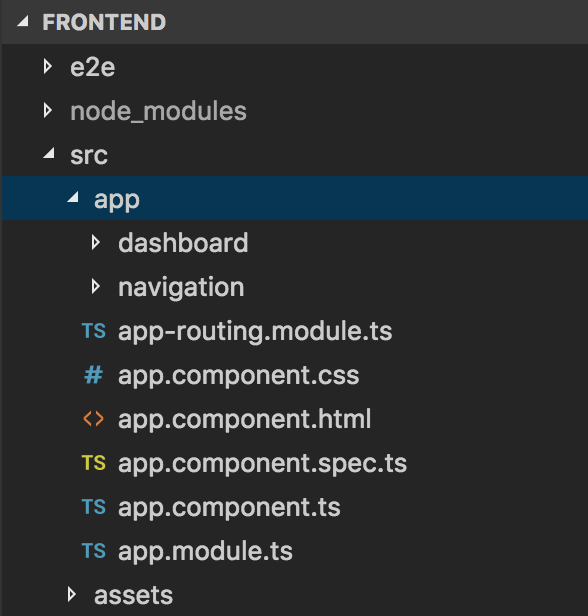
Talking first about the dashboard, the content of the Dashboard page will contain a lot of different information. Each information will be a component in the Angular so I will create a DashboardModule class to compile these sections. I will now create 3 files: dashboard.module.ts, dashboard.component.ts, dashboard.component.html.
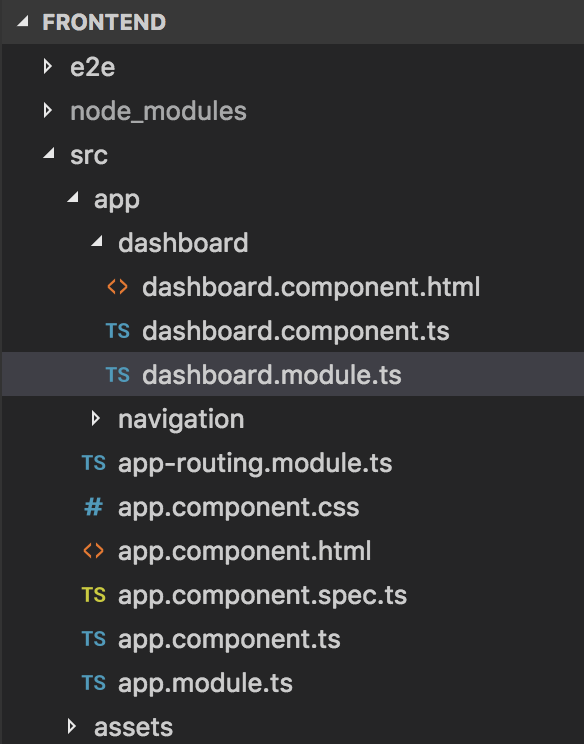
The contents of the dashboard.component.html file will be copied from the page-wrapper section of the app.component.html file. Content is a lot so I will not copy this here, but one thing is that we will replace the contents of the page-wrapper in the file app.component.html to “<qm-body> </ qm-body>”.
Now the contents of the DashboardModule class and the DashboardComponent class are as follows:
DashboardComponent:
|
1 2 3 4 5 6 7 8 9 |
import { Component } from "@angular/core"; @Component({ selector: 'qm-body', templateUrl: './dashboard.component.html' }) export class DashboardComponent { } |
DashboardModule:
|
1 2 3 4 5 6 7 8 9 10 11 12 13 14 |
import { NgModule } from "@angular/core"; import { DashboardComponent } from "./dashboard.component"; @NgModule({ declarations: [ DashboardComponent ], exports: [ DashboardComponent ] }) export class DashboardModule { } |
Next, we will talk about navigation.
As I said, this navigation consists of two navigation menus on the left and navigation at the top. Look at the HTML content of the app.component.html file at the moment, you will see this clearly:
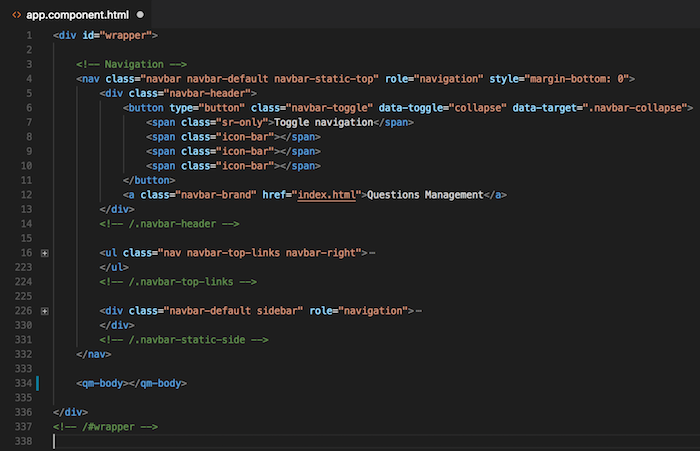
The top navigation is the <ul> tag in the above image, while the left menu is the <div> tag with the navigation role.
To split the template for this navigation, I will create a module is NavigationModule with two components is NavbarTopComponent and SidebarComponent as follows:
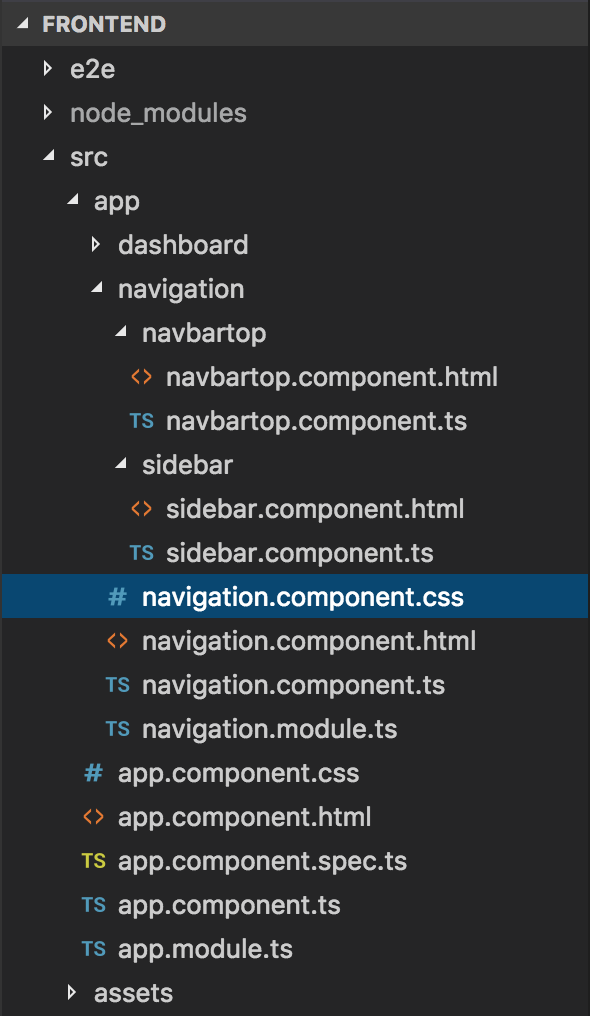
As you can see, we created two directories sidebar and navbartop in the src/app/ navigation directory.
The sidebar will define the SidebarComponent component to define the content of the left menu. The contents of the sidebar.component.html file will be copied from the <div> tag with the navigation role in the app.component.html file. The content of the SidebarComponent class will be as follows:
|
1 2 3 4 5 6 7 8 9 |
import { Component } from "@angular/core"; @Component({ selector: 'nav-sidebar', templateUrl: './sidebar.component.html' }) export class SidebarComponent { } |
The navbartop directory defines the NavbarTopComponent component to define the content of the navigation at the top. The contents of the file navbartop.component.html will be copied from the <ul> tag in the app.component.html file. The content of the NavbarTopComponent class is as follows:
|
1 2 3 4 5 6 7 8 9 |
import { Component } from "@angular/core"; @Component({ selector: 'nav-top', templateUrl: './navbartop.component.html' }) export class NavbarTopComponent { } |
In these two component classes, you see that the selector in the @Component decorator is defined with the values nav-sidebar and nav-top, which are the HTML tags defined in the navigation.component.html file.
The content of the navigation.component.html file is copied from the navigation section of the app.component.html file with the left menu replaced by the <nav-sidebar> tag and the navigation section at the top is replaced by the < nav-top>. The contents of the file navigation.component.html are now as follows:
|
1 2 3 4 5 6 7 8 9 10 11 12 13 14 15 16 17 |
<!-- Navigation --> <nav class="navbar navbar-default navbar-static-top" role="navigation" style="margin-bottom: 0"> <div class="navbar-header"> <button type="button" class="navbar-toggle" data-toggle="collapse" data-target=".navbar-collapse"> <span class="sr-only">Toggle navigation</span> <span class="icon-bar"></span> <span class="icon-bar"></span> <span class="icon-bar"></span> </button> <a class="navbar-brand" href="index.html">Questions Management</a> </div> <!-- /.navbar-header --> <nav-top></nav-top> <nav-sidebar></nav-sidebar> </nav> |
Now, the contents of the NavigationComponent and NavigationModule classes are defined as follows:
NavigationModule:
|
1 2 3 4 5 6 7 8 9 10 11 12 13 14 15 16 17 18 19 20 |
import { NgModule } from "@angular/core"; import { NavigationComponent } from "./navigation.component"; import { SidebarComponent } from "./sidebar/sidebar.component"; import { NavbarTopComponent } from "./navbartop/navbartop.component"; @NgModule({ declarations: [ NavigationComponent, SidebarComponent, NavbarTopComponent ], exports: [ NavigationComponent, SidebarComponent, NavbarTopComponent ], }) export class NavigationModule { } |
NavigationComponent:
|
1 2 3 4 5 6 7 8 9 10 11 12 |
import { Component } from "@angular/core"; @Component({ selector: 'qm-nav', templateUrl: './navigation.component.html', styles: [ './navigation.component.css' ] }) export class NavigationComponent { } |
In the selector section of NavigationComponent above, as you see, I have defined the value “qm-nav”. This is an HTML tag that has been replaced by the content of the navigation section in app.component.html.
And because of this, the content of the app.component.html file is now as simple as this:
|
1 2 3 4 5 6 7 8 |
<div id="wrapper"> <qm-nav></qm-nav> <qm-body></qm-body> </div> <!-- /#wrapper --> |
OK, here we have basically finished splitting the SB Admin 2 template into small parts. At this point, you run the application, the results are still similar.


