I don’t want to introduce you all to what is Spring framework because there are a lot of tutorials about it. In this tutorial, I only focus on showing you all how we can ask Spring to say “Hello world” 😀
Spring takes the Dependency Injection to implement its framework. That is the reason why I have a tutorial about Dependency Injection first. You should read this tutorial.
As you know, the idea of Dependency Injection that is: you don’t depend on anyone, when you need someone, you will call them. But the question here: someone who you will call, where are they from? Closely to Java programming, the object which you need, where are they from?
In the Spring framework, Spring will have a container to contain all objects which we need. When you need some objects, you just only call Spring to provide the objects.
OK, now I will show you a demo to ask Spring to say “Hello world”, to help you all can understand what I just said.
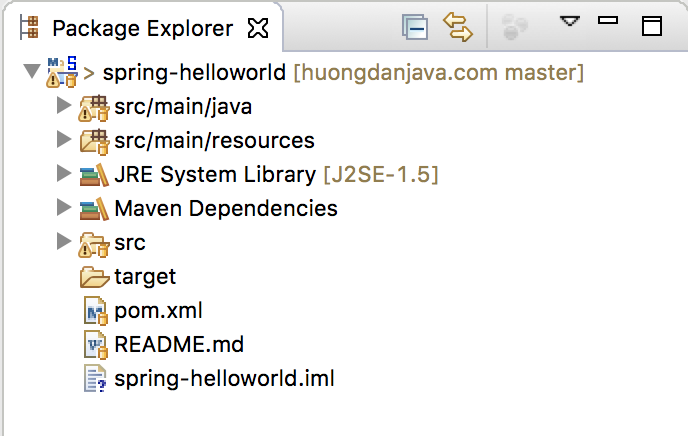
The first thing, we need a project to work on. Let’s create a Maven project as below:

I will use Java 25 for this project:
|
1 2 3 4 |
<properties> <maven.compiler.target>25</maven.compiler.target> <maven.compiler.source>25</maven.compiler.source> </properties> |
To enable the Spring framework in our project, we need to add its dependency. Let open the pom.xml file in our project then add some lines as below:
|
1 2 3 4 5 6 7 8 9 10 11 12 13 14 15 |
<project xmlns="http://maven.apache.org/POM/4.0.0" xmlns:xsi="http://www.w3.org/2001/XMLSchema-instance" xsi:schemaLocation="http://maven.apache.org/POM/4.0.0 http://maven.apache.org/xsd/maven-4.0.0.xsd"> <modelVersion>4.0.0</modelVersion> <groupId>com.huongdanjava.spring</groupId> <artifactId>spring-helloworld</artifactId> <version>0.0.1-SNAPSHOT</version> <dependencies> <dependency> <groupId>org.springframework</groupId> <artifactId>spring-context</artifactId> <version>7.0.1</version> </dependency> </dependencies> </project> |
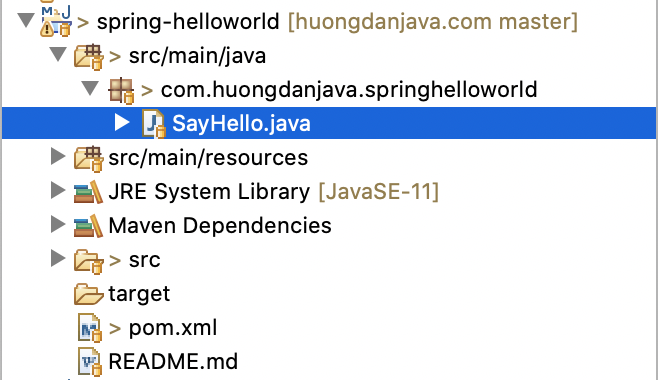
Now, in order to Spring can say “Hello world”, we need an object that can do that first.

The content of the SayHello class is as below:
|
1 2 3 4 5 6 7 8 |
package com.huongdanjava.springhelloworld; public class SayHello { public void say() { System.out.println("Hello World!"); } } |
Then, we will add this object to the Spring container.
Spring manages the objects in 2 ways: by an XML file and by Annotations. In this tutorial, I just use an XML file. In the future, I will have some other tutorials using Annotation.
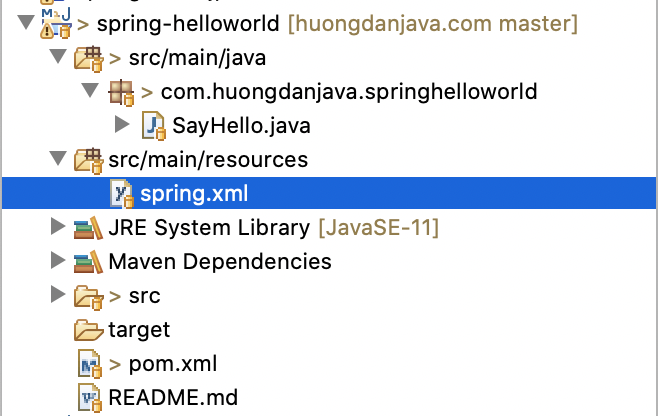
OK, now, let’s create an XML file in /src/main/resources folder of our project. The Spring configuration files should be here.
 The content of the spring.xml file as below:
|
1 2 3 4 5 6 7 8 9 |
<beans xmlns="http://www.springframework.org/schema/beans" xmlns:xsi="http://www.w3.org/2001/XMLSchema-instance" xsi:schemaLocation="http://www.springframework.org/schema/beans http://www.springframework.org/schema/beans/spring-beans.xsd"> <bean id="hello" class="com.huongdanjava.springhelloworld.SayHello"> </bean> </beans> |
With the above declaration, Spring will create a new object for SayHello class, assign it to an id and store this object in the Spring container automatically.
As you see, Spring considers our object as beans, each bean has an id and we will use this id to call the object which we need.
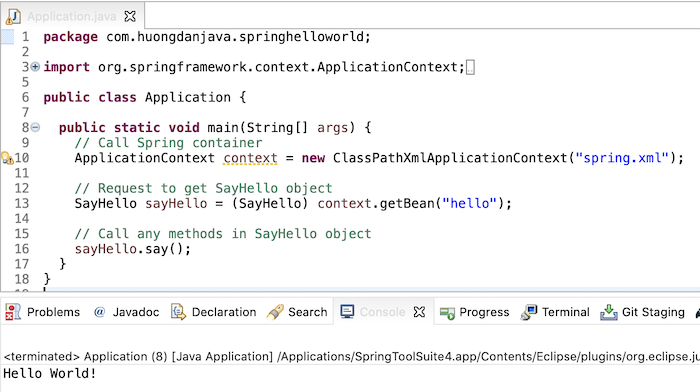
Let’s see how Spring can say “Hello world”:
|
1 2 3 4 5 6 7 8 9 10 11 12 13 14 15 16 17 18 |
package com.huongdanjava.springhelloworld; import org.springframework.context.ApplicationContext; import org.springframework.context.support.ClassPathXmlApplicationContext; public class Application { public static void main(String[] args) { // Call Spring container ApplicationContext context = new ClassPathXmlApplicationContext("spring.xml"); // Request to get SayHello object SayHello sayHello = (SayHello) context.getBean("hello"); // Call any methods in SayHello object sayHello.say(); } } |
Result:

You can watch the video here:


