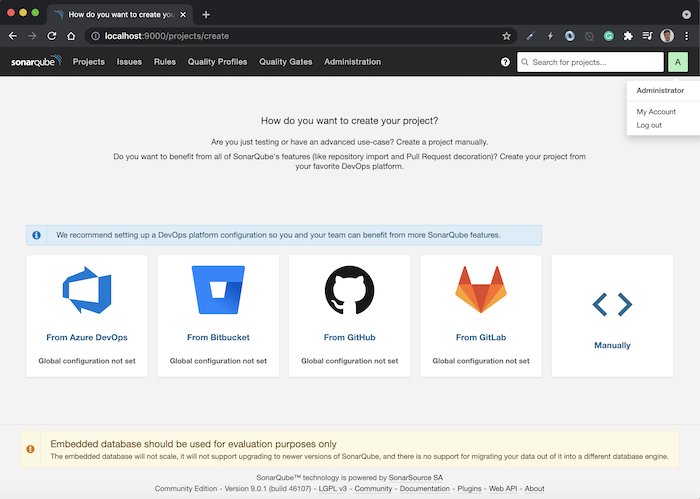
In my previous post, I showed you how to install SonarQube Scanner. Now is the time, we will try to use this tool to analyze our code.
Create a new user token
In order for the SonarQube Scanner to submit the report to the SonarQube server, we need to use a user token or user password information to authenticate with the SonarQube server. In this tutorial, I will use a user token. The steps to create a new user token are as follows!
You log in to SonarQube, then click on the user icon in the right corner:
Select My Account, then select Security.
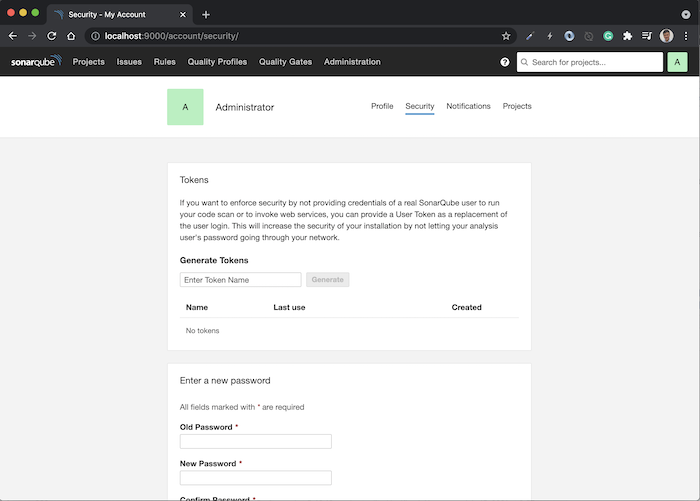
You can generate a new user token by entering the Token Name information, then clicking the Generate button. Result:
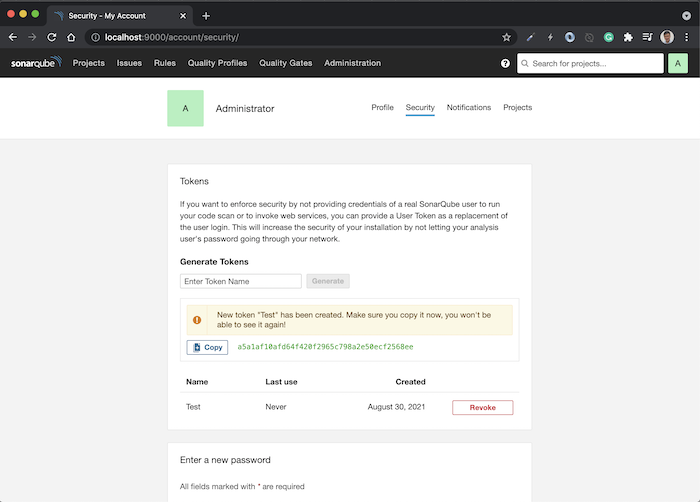
You need to copy this token and save it somewhere. Tokens cannot be viewed once this window is closed.
Project configuration
As an example for this tutorial, I will take the example project in the tutorial Using JPA in Spring MVC as an example.
Note that because the SonarQube Scanner will use the bytecode of the Java class to analyze Java code, so you need to run “mvn compile” in this project to compile our Java source code into class files.
I’m running SonarQube at the address: http://localhost:9000/ so I don’t need to edit the SonarQube server information in the file /conf/sonar-scanner.properties of SonarQube Scanner.
To configure this project with SonarQube Scanner, you need to create a new file called sonar-project.properties, the content of this file will basically look like this:
|
1 2 3 4 5 6 7 |
sonar.projectKey=spring-mvc:jpa sonar.projectName=Spring MVC JPA sonar.projectVersion=1.0 sonar.sources=. sonar.java.binaries=target/classes |
Inside, the properties “sonar.projectkey”, “sonar.projectName”, “sonar.projectVersion” are properties that define the information about our project. Note that the property “sonar.projectKey” is used to identify different projects in the SonarQube system, so the value of this property must not be the same for other projects.
The “sonar.sources” property defines the location of the sonar-project.properties file. Currently, I put this file in the project directory so I set its value to “.”.
The “sonar.java.binaries” property, as I said above, defines the path to the Java bytecode files.
Analyze code
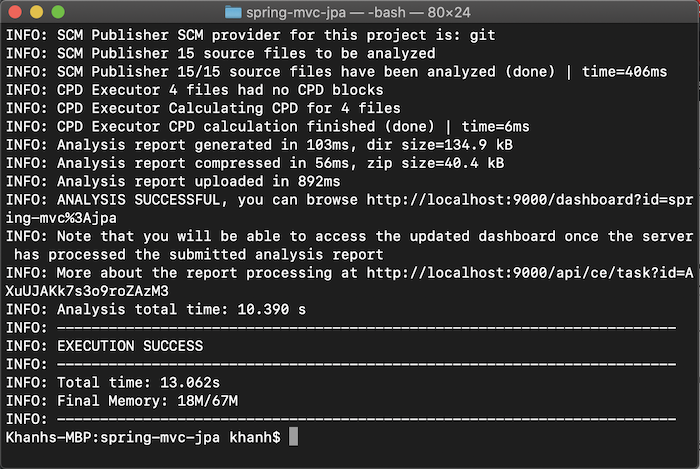
At this point, we can use SonarQube Scanner to scan the code.
Please open Terminal on macOS and Linux or Console on Windows and then go to the project directory spring-mvc-jpa.
We just need to call the following command line:
|
1 |
sonar-scanner -Dsonar.login=a5a1af10afd64f420f2965c798a2e50ecf2568ee |
with the value of the -Dsonar.login parameter being the user token we just created above, the SonarQube Scanner will automatically scan our project and analyze its code.
Result:
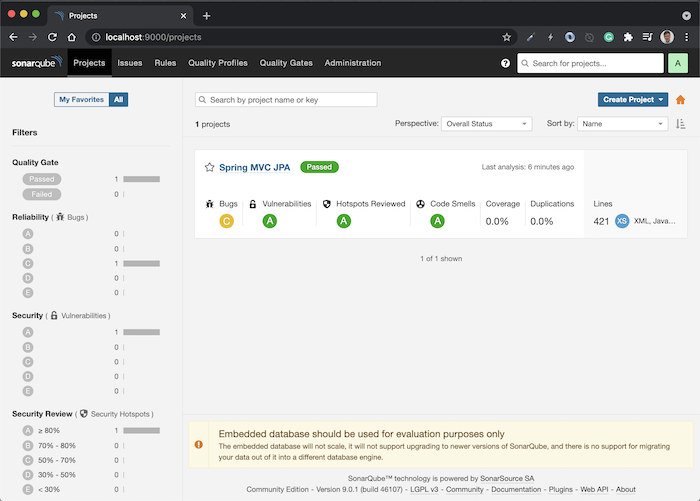
 Now, if you refresh the SonarQube system, you will see our project displayed here:
 You need to click inside the project to see the detailed results.
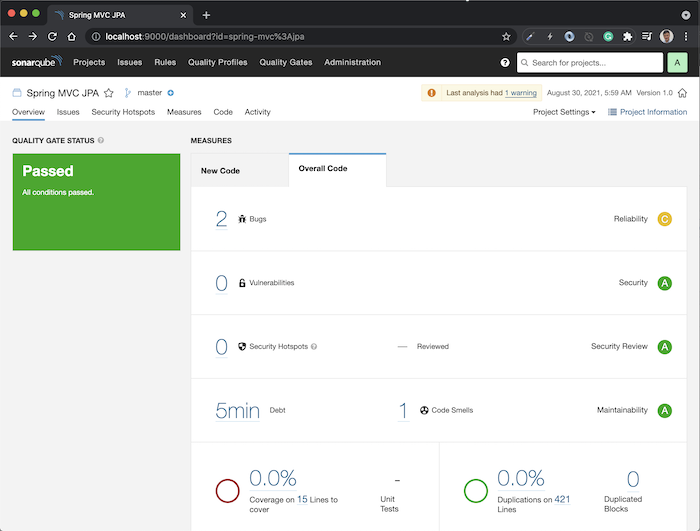
As you can see, our project has 2 bugs, 0 vulnerabilities, 1 code smells that need to consider, the Coverage section is related to Unit Test Coverage, 0 duplicate code, and the language we are using in this project is XML and Java.
You can click on the Issues tab to review all the issues that our project has.
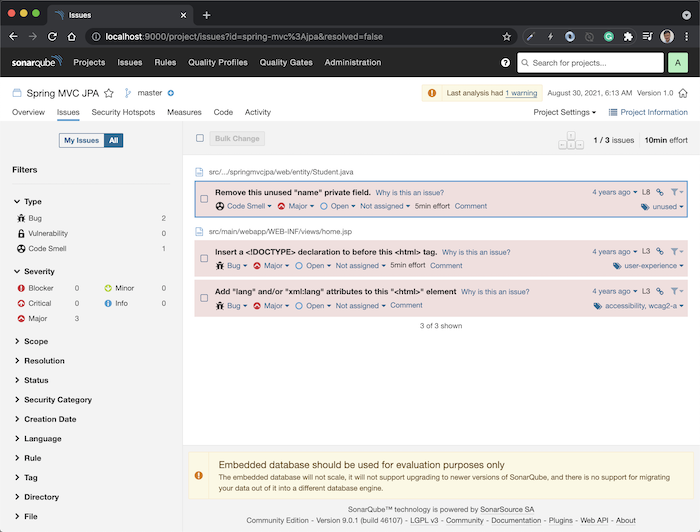
On the left side, you can filter the issues to your liking. By default, SonarQube will scan all languages that we use in the project, so if you only want to see the issue of Java code, you can use the filter by Language. An example is as follows:
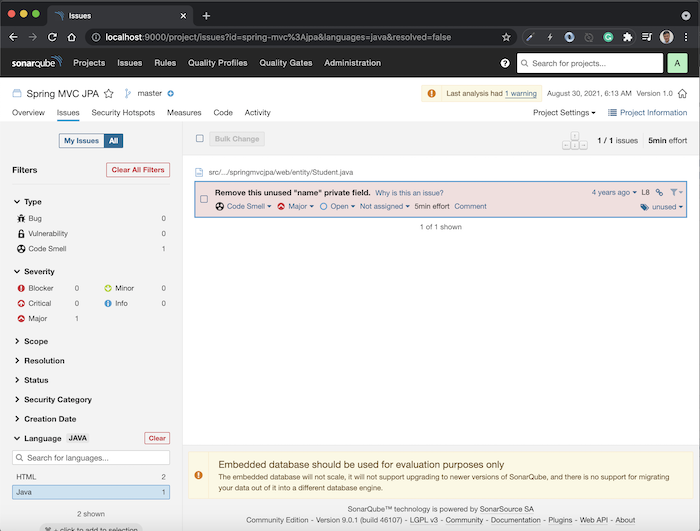
The issues list will now only show Java code. You can overview it with Java code, how many issues we have, divided by each Severity level. You can also click on each Severity to filter further if you want.
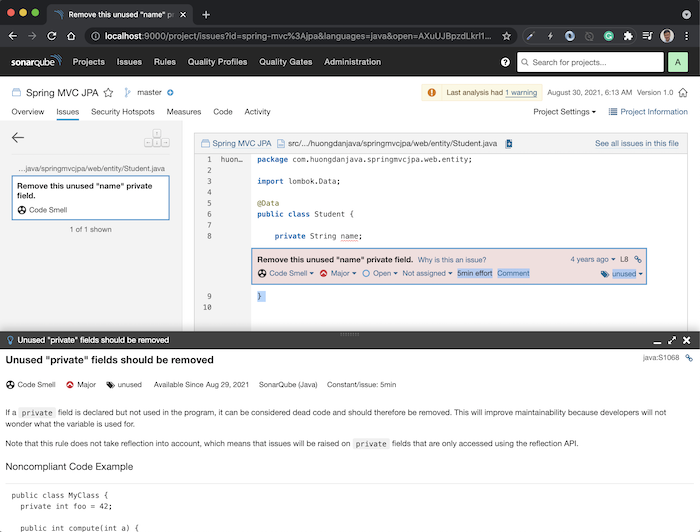
Currently, our project has a Code Smells problem with Severity MAJOR, you can click on it to see what the problem is:

Very detailed, right?
You can click on the link “Why is this an issue?” in each issue to see where SonarQube detected this issue, and how to fix it.
|
1 |