Java Module System was introduced by Java from Java 9 to solve some problems of Java that if you notice you will see how its necessary?
- NoClassDefFoundError: This error occurs while our Java program is running. The JVM cannot find the class needed to execute a certain task. Although we now have tools to build and fetch all the necessary dependencies to run applications like Maven, Gradle, … but do you agree with Khanh: sometime we also get this error.
- Any class or method defined with public or protected access modifier in Java libraries that is located in the classpath of the application’s project, we can access them. There is no way for these Java libraries to hide them, only for the classes of packages located in the library to be accessible.
- And many more other problems…
Java Module System was introduced to solve the above problems:
- It makes it possible for us to manage which modules will be used in our code, which will be included during our module build, by using the ‘requires’ module directive.
- We can also decide who and which packages can use our code, using the keyword module directive ‘exports’ ….
In this tutorial, I will give you an overview of the Java Module System with a small example of how to create a new Java module!
Overview about Java Module
First, please install JDK from Java 9 onwards.
Open the command line and then enter the command line:
|
1 |
java --list-modules |
to see all the modules provided by default by Java.
Result:
|
1 2 3 4 5 6 7 8 9 10 11 12 13 14 15 16 17 18 19 20 21 22 23 24 25 26 27 28 29 30 31 32 33 34 35 36 37 38 39 40 41 42 43 44 45 46 47 48 49 50 51 52 53 54 55 56 57 58 59 60 61 62 63 64 65 66 67 68 69 70 |
khanh@Khanhs-MacBook-Pro ~ % java --list-modules java.base@15 java.compiler@15 java.datatransfer@15 java.desktop@15 java.instrument@15 java.logging@15 java.management@15 java.management.rmi@15 java.naming@15 java.net.http@15 java.prefs@15 java.rmi@15 java.scripting@15 java.se@15 java.security.jgss@15 java.security.sasl@15 java.smartcardio@15 java.sql@15 java.sql.rowset@15 java.transaction.xa@15 java.xml@15 java.xml.crypto@15 jdk.accessibility@15 jdk.aot@15 jdk.attach@15 jdk.charsets@15 jdk.compiler@15 jdk.crypto.cryptoki@15 jdk.crypto.ec@15 jdk.dynalink@15 jdk.editpad@15 jdk.hotspot.agent@15 jdk.httpserver@15 jdk.incubator.foreign@15 jdk.incubator.jpackage@15 jdk.internal.ed@15 jdk.internal.jvmstat@15 jdk.internal.le@15 jdk.internal.opt@15 jdk.internal.vm.ci@15 jdk.internal.vm.compiler@15 jdk.internal.vm.compiler.management@15 jdk.jartool@15 jdk.javadoc@15 jdk.jcmd@15 jdk.jconsole@15 jdk.jdeps@15 jdk.jdi@15 jdk.jdwp.agent@15 jdk.jfr@15 jdk.jlink@15 jdk.jshell@15 jdk.jsobject@15 jdk.jstatd@15 jdk.localedata@15 jdk.management@15 jdk.management.agent@15 jdk.management.jfr@15 jdk.naming.dns@15 jdk.naming.rmi@15 jdk.net@15 jdk.nio.mapmode@15 jdk.sctp@15 jdk.security.auth@15 jdk.security.jgss@15 jdk.unsupported@15 jdk.unsupported.desktop@15 jdk.xml.dom@15 jdk.zipfs@15 |
Here, Java divides into two types of modules, which are standard modules and non-standard modules. Standard modules are modules that implement the Java SE specification with module names starting with java.* and non-standard modules are modules included in the Java Development Kit that start with jdk.*. You can clearly see this in the results after I execute the “java –list-modules” statement above.
Each module name will include the module name and Java version telling us which Java version the module belongs to. As you can see, I’m using Java 15 and in the module names, as you can see, they end with @15.
To view information about a certain module, you can use the following command:
|
1 |
java --describe-module <module-name> |
For example, to view the information of the java.logging module, I would enter the following command:
|
1 |
java --describe-module java.logging |
Result:

The information of a module will start with the module name, and followed by the module directives that I mentioned above such as exports, requires, provides, … as you can see in the image above. All this information will be defined in a file called module-info.java.
Each module directive has the effect of defining how the module will be built and used, for example, the ‘exports’ directive helps us define a certain package in this module is accessed by all packages or other certain packages, or the ‘provides’ directive has the purpose of specifying what this module is doing: implement a certain interface for other classes to use, … We will learn more about each module directive later!
In the output of the above example, you can see that the java.logging module is using a dependency called the java.base module. To see all the dependencies that a module is using, you can also use the command with the jdeps tool as follows:
|
1 |
jdeps --print-module-deps --module <module-name> |
Or you can abbreviate –module with -m as follows:
|
1 |
jdeps --print-module-deps -m <module-name> |
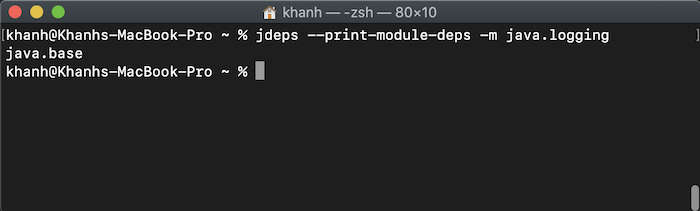
For example, to see the dependencies that the java.logging module is using, I would run the following command:
|
1 |
jdeps --print-module-deps -m java.logging |
Result:
Example
Now, I will show you how to create a new basic module!
First, I will create a new Java project as an example.
I will use Spring Tool Suite to do this.
During the process of creating a new project, you will see that Spring Tool Suite supports us to create a new module-info.java file.
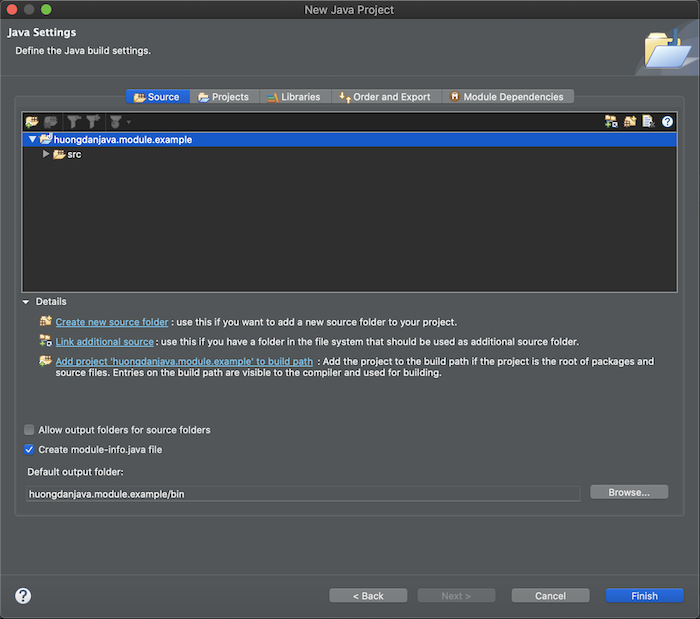
and:
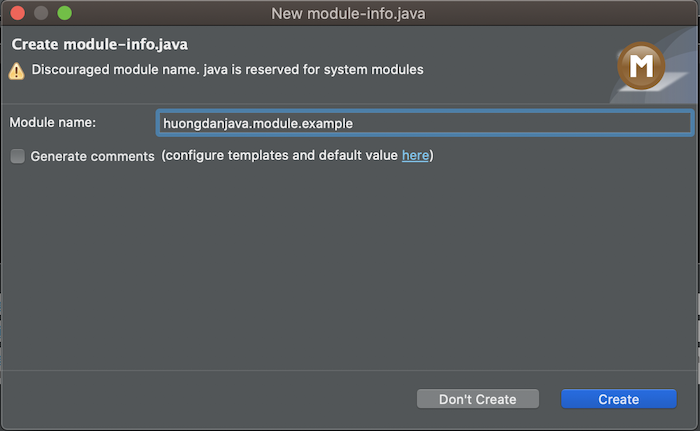
As I said above, this is the file that defines the information of a Java Module.
Result:
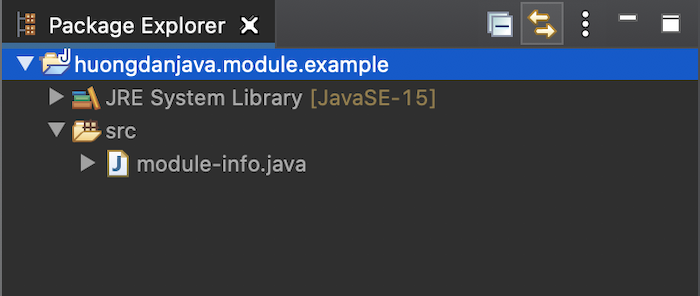
The content of the file module-info.java now you can see as follows:
|
1 2 |
module huongdanjava.module.example { } |
Now I will add a class with sayHello() method, return the word “Hello World” as follows:
|
1 2 3 4 5 6 7 8 9 |
package huongdanjava.module.example; public class Example { public String sayHello() { return "Hello World!"; } } |
And export the package of this class in the module-info.java file using ‘exports’ directive so that other modules can use the Example class as follows:
|
1 2 3 |
module huongdanjava.module.example { exports huongdanjava.module.example; } |
Now, I will create another Java module project:
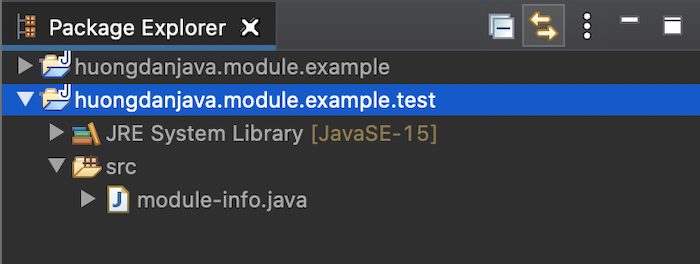
I will declare the module huongdanjava.module.example.test using the module huongdanjava.module.example by right-clicking on the project huongdanjava.module.example.test and select Build Path, then select Configure Build Path… In the Java Build Path window, I will select module huongdanjava.module.example to use as follows:
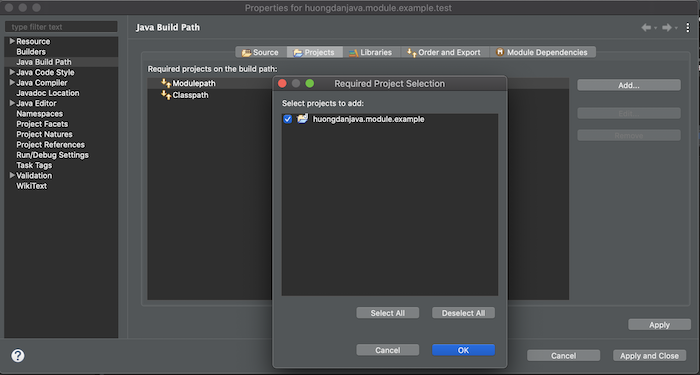
This module huongdanjava.module.example.test will declare ‘requires’ directive to the package huongdanjava.module.example in the file module-info.java to use the Example class of the huongdanjava.module.example module:
|
1 2 3 |
module huongdanjava.module.example.test { requires huongdanjava.module.example; } |
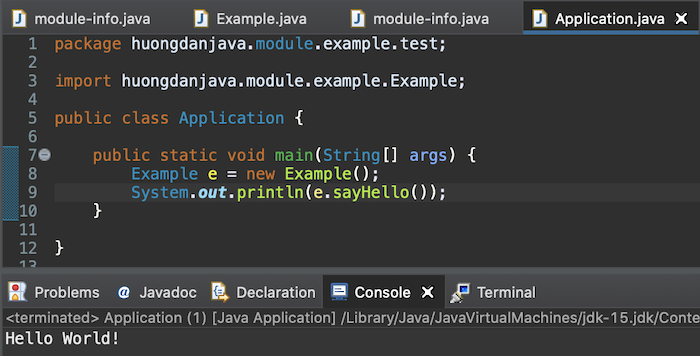
and print the words “Hello World” when running the program as follows:
|
1 2 3 4 5 6 7 8 9 10 11 12 |
package huongdanjava.module.example.test; import huongdanjava.module.example.Example; public class Application { public static void main(String[] args) { Example e = new Example(); System.out.println(e.sayHello()); } } |
The output when running this program is as follows:
If now in the module-info.java file of the huongdanjava.module.example module, I delete the line
|
1 |
exports huongdanjava.module.example; |
you will see Spring Tool Suite reporting the Application class error right away as follows:
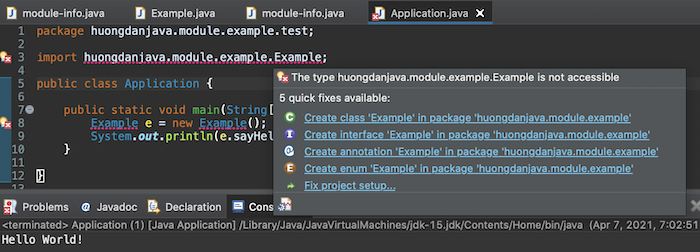
That’s because at this point, we don’t allow any classes in other modules to use the huongdanjava.module.example package of the huongdanjava.module.example module anymore!
We will learn more about the directives module in Java Module in the incoming tutorials of Huong Dan Java.