I have guided you how to install Oracle JDK on macOS by downloading the Oracle JDK installation files and installing it manually. There is another way that is much more convenient and easier which is to use the SDKMAN (Software Development Kit Manager) tool. How is it in detail? Let’s find out together in this tutorial!
A note for you is that SDKMAN can run on Unix, macOS, and Windows WSL and we can also use SDKMAN to install some other tools such as Apache Maven, Ant, Spring Boot CLI, …
In this tutorial, I will work with SDKMAN on macOS only!
Install SDKMAN
SDKMAN provides us a script to install it at https://get.sdkman.io/. To install it, you just need to run the curl command with the following syntax:
|
1 |
curl -s "https://get.sdkman.io" | bash |
By default, SDKMAN will be installed in the “<user_home>/.sdkman” directory. You can change this default directory by declaring the SDKMAN_DIR environment variable pointing to the directory where you want it to be installed!
My example is as follows:
|
1 |
export SDKMAN_DIR=/Volumes/Passport/softwares/sdkman |
Now, run the curl command above, you will see the same result as me, as follows:
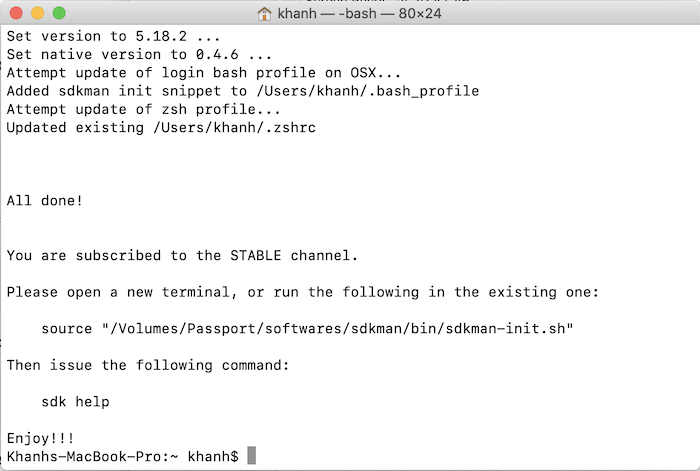
As you can see, we need to run another command, mine is:
|
1 |
source "/Volumes/Passport/softwares/sdkman/bin/sdkman-init.sh" |
to be able to use SDKMAN immediately or you can just close the current Terminal window and open a new Terminal!
Now, check the SDKMAN version using the command:
|
1 |
sdk version |
You will see the result like me, as follows:

So we have successfully installed the SDKMAN tool!
Install JDK
To install JDK using the SDKMAN tool, first, you can check the Java versions that we can install using the command:
|
1 |
sdk list java |
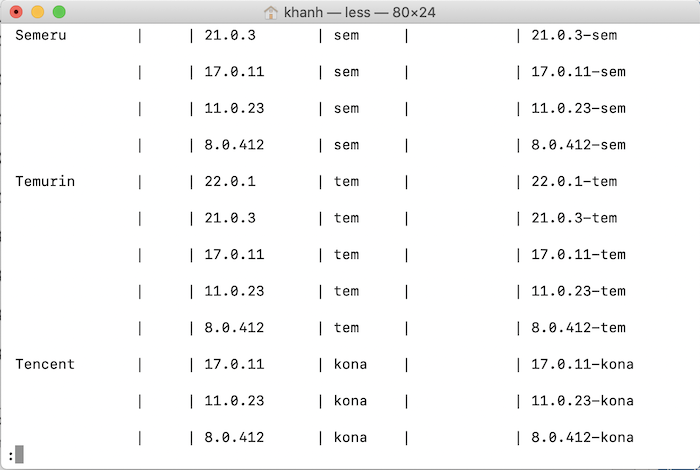
My results are as follows:
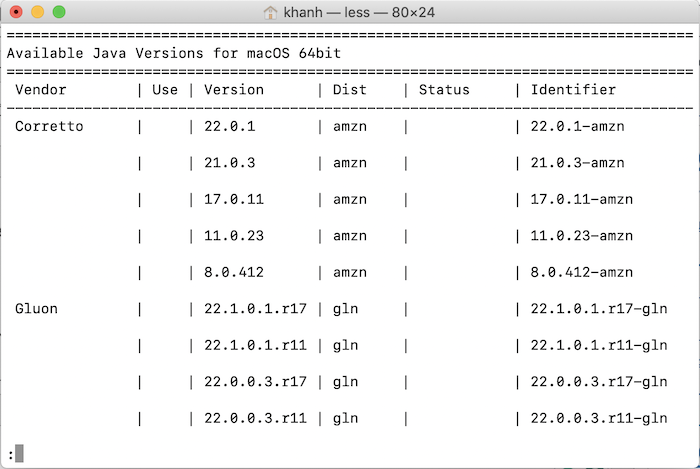
As you can see, there are many distributions supported by SDKMAN such as Corretto, Gluon, GraalVM Oracle, OpenJDK, Eclipse Temurin, … Each distribution will have a different version. You can choose to install the version you want and use the command:
|
1 |
sdk install java <identifier> |
to install!
The identifier is the value of the rightmost column in the list above! For example, in the image above, the identifier of version 22.0.1, Corretto distribution is 22.0.1-amzn!
For example, I will install Temurin distribution:
with version 21.0.3, I will use the following command:
|
1 |
sdk install java 21.0.3-tem |
My results are as follows:
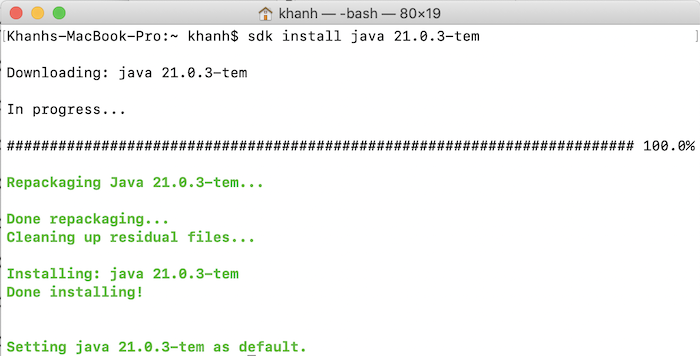
SDKMAN will automatically download the JDK version you want to install to the $SDKMAN_DIR/candidates/java directory and install it for us.
Now you can check the results using the command:
|
1 |
java -version |
My results are as follows:

If now, you want to install Java version 8, you can run the following command:
|
1 |
sdk install java 8.0.422-tem |
Result:
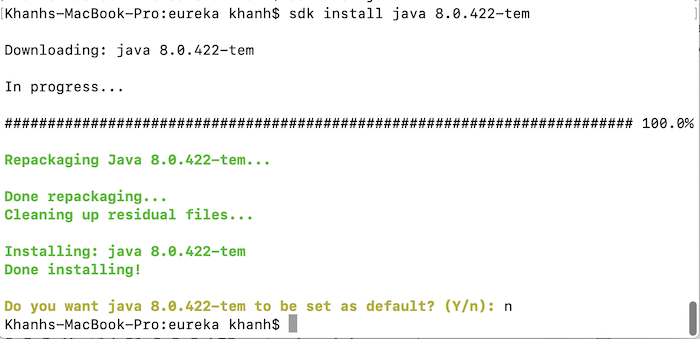
During the installation of this version 8, because I had previously installed Java version 21 with SDKMAN, I had already set the default Java version to version 21, so as you can see, SDKMAN will ask you if you want to set the Java version you are installing as the default version of the system. If you want, just type “Y” and enter! Here, I did not choose.
After the installation is complete, if you want to choose the Java version you just set as the default Java version, you can use the following command:
|
1 |
sdk default java <identifier> |
My example is as follows:
|
1 |
sdk default java 8.0.422-tem |
Result:
![]()
So we have successfully installed JDK using the SDKMAN tool!