The spring-data-mongodb library of Spring, in addition to providing us with the MongoOperations interface makes it easy to manipulate MongoDB, which also provides us with the mechanism that a Spring Data project needs to do: minimize the repetitive code involved dealing with data management systems when developing applications that use the Spring framework. How is it in details? Let’s find out in this tutorial!
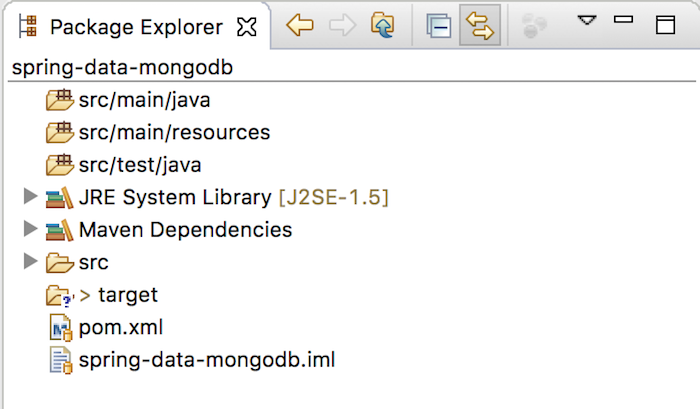
First, I will create a Maven project as an example:

with Spring Data MongoDB dependency as follows:
|
1 2 3 4 5 |
<dependency> <groupId>org.springframework.data</groupId> <artifactId>spring-data-mongodb</artifactId> <version>2.0.7.RELEASE</version> </dependency> |
Spring Data MongoDB will use the MongoTemplate object to manage the connection to MongoDB so we need to initialize the bean for this object:
|
1 2 3 4 5 6 7 8 9 10 11 |
<beans xmlns="http://www.springframework.org/schema/beans" xmlns:xsi="http://www.w3.org/2001/XMLSchema-instance" xsi:schemaLocation="http://www.springframework.org/schema/beans http://www.springframework.org/schema/beans/spring-beans.xsd"> <bean id="mongoTemplate" class="org.springframework.data.mongodb.core.MongoTemplate"> <constructor-arg ref="mongoClient" /> <constructor-arg value="mongodb_example" /> </bean> <bean id="mongoClient" class="com.mongodb.MongoClient" /> </beans> |
Since I use MongoDB local and do not need username, password, so as you see, I just initialized the simple MongoClient object as above.
As I said in Overview about Spring Data JPA about Spring Data, to minimize code, the Repository interface was introduced. Each of the modules in Spring Data will have other interfaces that extend from this interface to implement its own database system. Also, in Spring Data Common, we have two other interfaces that extend from the Repository interface, the CrudRepository and the PagingAndSortingRepository, which define operations such as create, read, update, delete, paging, sort.
In Spring Data Mongodb, as Spring Data Jpa, we have only one extend interface from the PagingAndSortingRepository interface, is MongoRepository interface. You can see this clearly in the following image:

As you can see, the class implementing the MongoRepository interface is SimpleMongoRepository.
OK, now I’m going to do an example to see how the MongoRepository works!
I will create an interface named HelloRepository extends from MongoRepository with the following content:
|
1 2 3 4 5 6 7 |
package com.huongdanjava.springdatamongodb; import org.springframework.data.mongodb.repository.MongoRepository; public interface HelloRepository extends MongoRepository<Student, String> { } |
The Student class has the following contents:
|
1 2 3 4 5 6 7 8 9 10 11 12 13 14 15 16 17 18 19 20 21 22 23 |
package com.huongdanjava.springdatamongodb; public class Student { private String name; private String age; public String getName() { return name; } public void setName(String name) { this.name = name; } public String getAge() { return age; } public void setAge(String age) { this.age = age; } } |
As you can see, using the MongoRepository interface, our Student object does not need to be defined as a Document anymore. Spring Data MongoDB will do it for us, the Student object is now just a POJO. Spring Data MongoDB will map the Student class to the collection named “student”. If you want to change the name of the collection, you can declare it for the Student class annotation @Document as follows:
|
1 2 3 4 5 6 7 8 9 10 11 12 13 14 15 16 17 18 19 20 21 22 23 24 25 26 |
package com.huongdanjava.springdatamongodb; import org.springframework.data.mongodb.core.mapping.Document; @Document(collection = "student") public class Student { private String name; private String age; public String getName() { return name; } public void setName(String name) { this.name = name; } public String getAge() { return age; } public void setAge(String age) { this.age = age; } } |
In this tutorial, I will use the default collection name from the name of the Student class.
Now we declare the HelloRepository interface in the Spring container as follows:
|
1 2 3 4 5 6 7 8 9 10 11 12 13 14 15 |
<beans xmlns="http://www.springframework.org/schema/beans" xmlns:xsi="http://www.w3.org/2001/XMLSchema-instance" xmlns:mongo="http://www.springframework.org/schema/data/mongo" xsi:schemaLocation="http://www.springframework.org/schema/beans http://www.springframework.org/schema/beans/spring-beans.xsd http://www.springframework.org/schema/data/mongo http://www.springframework.org/schema/data/mongo/spring-mongo-1.0.xsd"> <mongo:repositories base-package="com.huongdanjava.springdatamongodb" mongo-template-ref="mongoTemplate"/> <bean id="mongoTemplate" class="org.springframework.data.mongodb.core.MongoTemplate"> <constructor-arg ref="mongoClient" /> <constructor-arg value="mongodb_example" /> </bean> <bean id="mongoClient" class="com.mongodb.MongoClient" /> </beans> |
Here, I use the mongo namespace:repositories with the base package com.huongdanjava.springdatamongodb to scan the HelloRepository interface. With this statement, Spring Data MongoDB automatically retrieves the implementation for HelloRepository interface, is SimpleMongoRepository object, as you see in the image above, to initialize the Spring container.
OK, here we have completed the necessary configurations. Now, let’s try it out.
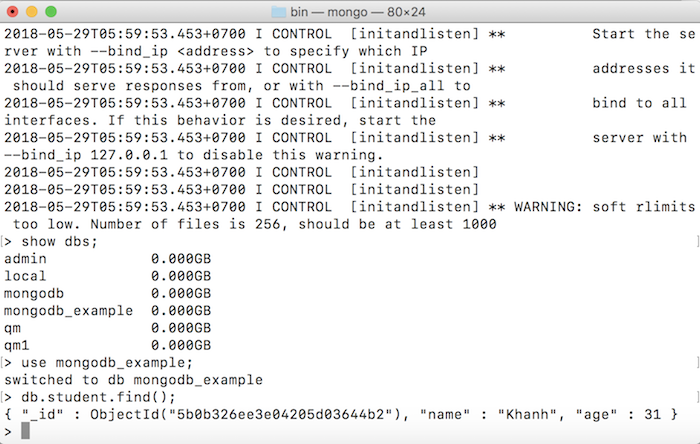
Suppose in the database you have the following data:

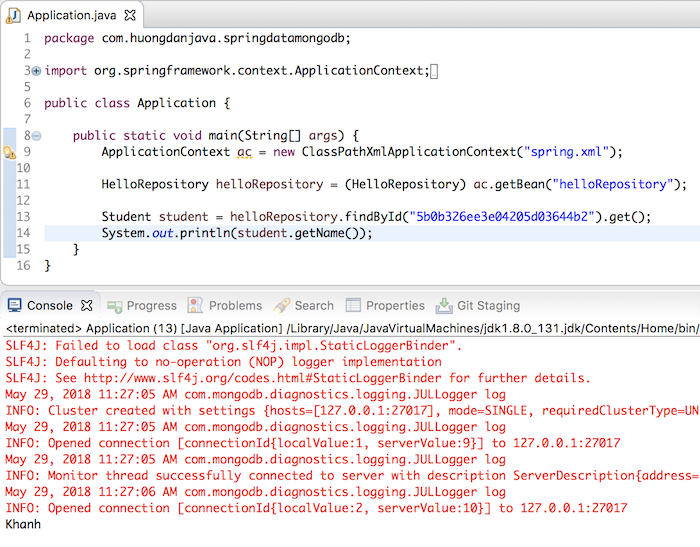
then when running the following example:
|
1 2 3 4 5 6 7 8 9 10 11 12 13 14 15 16 |
package com.huongdanjava.springdatamongodb; import org.springframework.context.ApplicationContext; import org.springframework.context.support.ClassPathXmlApplicationContext; public class Application { public static void main(String[] args) { ApplicationContext ac = new ClassPathXmlApplicationContext("spring.xml"); HelloRepository helloRepository = (HelloRepository) ac.getBean("helloRepository"); Student student = helloRepository.findById("5b0b326ee3e04205d03644b2").get(); System.out.println(student.getName()); } } |
The result will be:

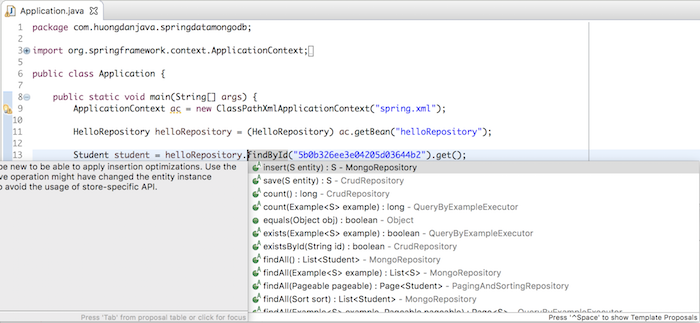
There are many other operations that the MongoRepository interface supports:

Please explore more according to your needs.


