Thư viện spring-data-mongodb của Spring ngoài việc cung cấp cho chúng ta interface MongoOperations giúp chúng ta có thể dễ dàng thao tác với MongoDB, nó còn cung cấp thêm cho chúng ta cơ chế mà một project Spring Data cần làm đó là giảm thiểu các đoạn code lặp đi lặp lại liên quan đến phần thao tác đến các hệ thống quản trị data khi phát triển các ứng dụng có sử dụng Spring framework. Cụ thể như thế nào? Chúng ta hãy cùng nhau tìm hiểu trong bài viết này các bạn nhé!
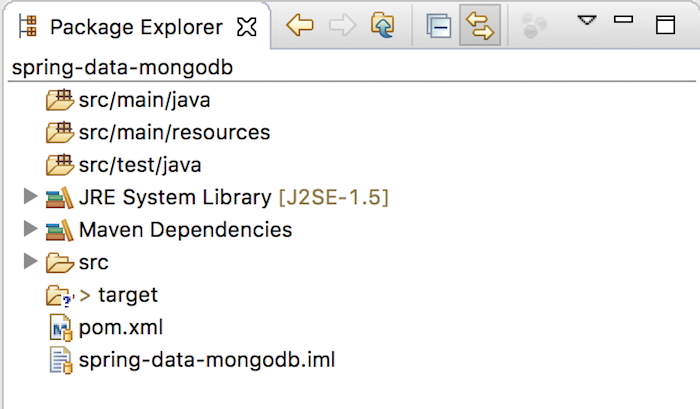
Đầu tiên, mình sẽ tạo một Maven project để làm ví dụ:

với Spring Data MongoDB dependency như sau:
|
1 2 3 4 5 |
<dependency> <groupId>org.springframework.data</groupId> <artifactId>spring-data-mongodb</artifactId> <version>2.0.7.RELEASE</version> </dependency> |
Spring Data MongoDB sẽ sử dụng đối tượng MongoTemplate để quản lý kết nối tới MongoDB nên chúng ta cần khởi tạo bean cho đối tượng này các bạn nhé:
|
1 2 3 4 5 6 7 8 9 10 11 |
<beans xmlns="http://www.springframework.org/schema/beans" xmlns:xsi="http://www.w3.org/2001/XMLSchema-instance" xsi:schemaLocation="http://www.springframework.org/schema/beans http://www.springframework.org/schema/beans/spring-beans.xsd"> <bean id="mongoTemplate" class="org.springframework.data.mongodb.core.MongoTemplate"> <constructor-arg ref="mongoClient" /> <constructor-arg value="mongodb_example" /> </bean> <bean id="mongoClient" class="com.mongodb.MongoClient" /> </beans> |
Vì mình sử dụng MongoDB local và không cần username, password nên như các bạn thấy, mình chỉ khởi tạo đối tượng MongoClient đơn giản như trên.
Như mình đã nói trong bài viết Tổng quan về Spring Data JPA về Spring Data thì để giảm thiểu code, interface Repository đã được giới thiệu. Mỗi một module trong Spring Data sẽ có những interface khác extend từ interface này để hiện thực riêng cho hệ thống database của module đó. Ngoài ra, trong Spring Data Common, chúng ta còn có 2 interface khác extend từ interface Repository là CrudRepository và PagingAndSortingRepository định nghĩa các thao tác create, read, update, delete, paging, sort.
Trong Spring Data Mongodb, như Spring Data Jpa, chúng ta cũng chỉ có duy nhất một interface extend từ interface PagingAndSortingRepository là MongoRepository. Các bạn có thể thấy rõ điều này qua hình ảnh sau:

và các bạn cũng thấy, class implement interface MongoRepository là SimpleMongoRepository.
OK, bây giờ mình sẽ làm một ví dụ để xem MongoRepository làm việc như thế nào các bạn nhé!
Mình sẽ tạo mới một interface tên là HelloRepository extend từ MongoRepository với nội dung như sau:
|
1 2 3 4 5 6 7 |
package com.huongdanjava.springdatamongodb; import org.springframework.data.mongodb.repository.MongoRepository; public interface HelloRepository extends MongoRepository<Student, String> { } |
với class Student có nội dung như sau:
|
1 2 3 4 5 6 7 8 9 10 11 12 13 14 15 16 17 18 19 20 21 22 23 |
package com.huongdanjava.springdatamongodb; public class Student { private String name; private String age; public String getName() { return name; } public void setName(String name) { this.name = name; } public String getAge() { return age; } public void setAge(String age) { this.age = age; } } |
Như các bạn thấy, với việc sử dụng interface MongoRepository, đối tượng Student của chúng ta không cần phải định nghĩa là một Document nữa. Spring Data MongoDB sẽ làm việc đó cho chúng ta, đối tượng Student bây giờ chỉ đơn thuần là một POJO. Spring Data MongoDB sẽ map class Student vào collection tên là student. Nếu các bạn muốn thay đổi tên của collection thì có thể khai báo thêm cho class Student annotation @Document như sau:
|
1 2 3 4 5 6 7 8 9 10 11 12 13 14 15 16 17 18 19 20 21 22 23 24 25 26 |
package com.huongdanjava.springdatamongodb; import org.springframework.data.mongodb.core.mapping.Document; @Document(collection = "student") public class Student { private String name; private String age; public String getName() { return name; } public void setName(String name) { this.name = name; } public String getAge() { return age; } public void setAge(String age) { this.age = age; } } |
Trong bài viết này, mình sẽ sử dụng tên collection mặc định từ tên của class Student.
Giờ chúng ta sẽ khai báo interface HelloRepository trong Spring container như sau:
|
1 2 3 4 5 6 7 8 9 10 11 12 13 14 15 |
<beans xmlns="http://www.springframework.org/schema/beans" xmlns:xsi="http://www.w3.org/2001/XMLSchema-instance" xmlns:mongo="http://www.springframework.org/schema/data/mongo" xsi:schemaLocation="http://www.springframework.org/schema/beans http://www.springframework.org/schema/beans/spring-beans.xsd http://www.springframework.org/schema/data/mongo http://www.springframework.org/schema/data/mongo/spring-mongo-1.0.xsd"> <mongo:repositories base-package="com.huongdanjava.springdatamongodb" mongo-template-ref="mongoTemplate"/> <bean id="mongoTemplate" class="org.springframework.data.mongodb.core.MongoTemplate"> <constructor-arg ref="mongoClient" /> <constructor-arg value="mongodb_example" /> </bean> <bean id="mongoClient" class="com.mongodb.MongoClient" /> </beans> |
Ở đây, mình sử dụng namespace mongo:repositories với base package là com.huongdanjava.springdatamongodb để scan interface HelloRepository. Với khai báo như trên, Spring Data MongoDB sẽ tự động lấy đối tượng implement tự động cho interface HelloRepository là SimpleMongoRepository như các bạn thấy trong hình ảnh ở trên để khởi tạo trong Spring container.
OK, đến đây là chúng ta đã hoàn thành những phần cấu hình cần thiết. Giờ chạy ví dụ thử nhé các bạn.
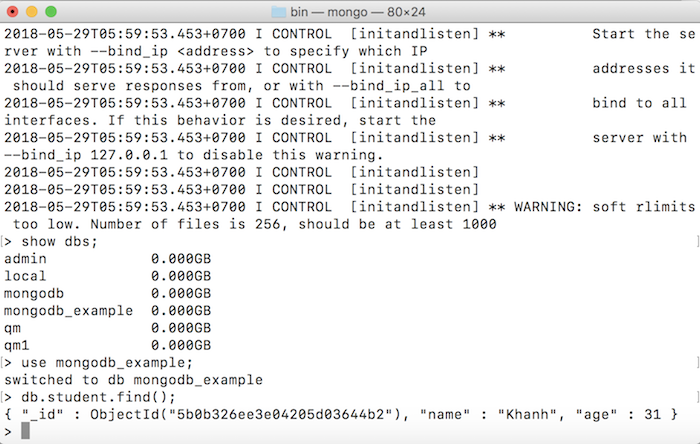
Giả sử trong database mình đang có những dữ liệu sau đây:

thì khi chạy ví dụ sau đây:
|
1 2 3 4 5 6 7 8 9 10 11 12 13 14 15 16 |
package com.huongdanjava.springdatamongodb; import org.springframework.context.ApplicationContext; import org.springframework.context.support.ClassPathXmlApplicationContext; public class Application { public static void main(String[] args) { ApplicationContext ac = new ClassPathXmlApplicationContext("spring.xml"); HelloRepository helloRepository = (HelloRepository) ac.getBean("helloRepository"); Student student = helloRepository.findById("5b0b326ee3e04205d03644b2").get(); System.out.println(student.getName()); } } |
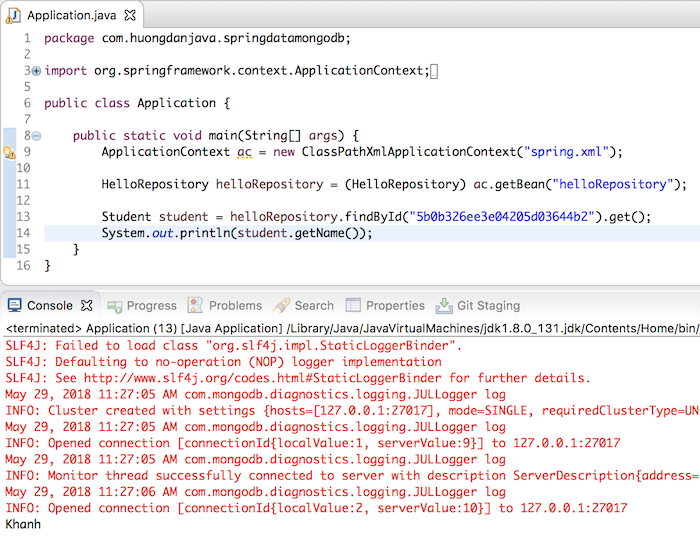
Kết quả sẽ là:

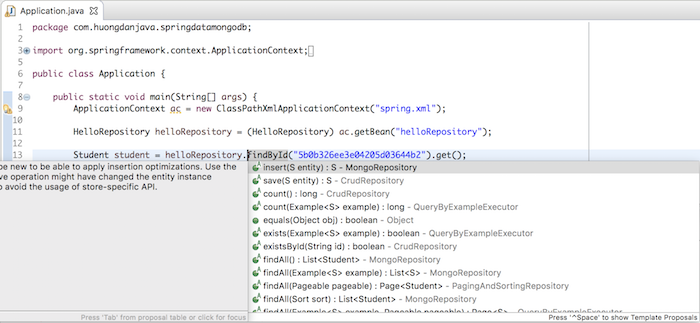
Còn rất nhiều thao tác khác mà interface MongoRepository hỗ trợ:

các bạn hãy khám phá thêm theo nhu cầu của mình, các bạn nhé!


