Check out the full series of Questions Management tutorial here.
In the previous tutorial, we have built the interface for the adding new option page. Now is the time to add the functionality for this page!
First, I will create a new OptionsService class to make call to the API adding a new option from the API Option Service.
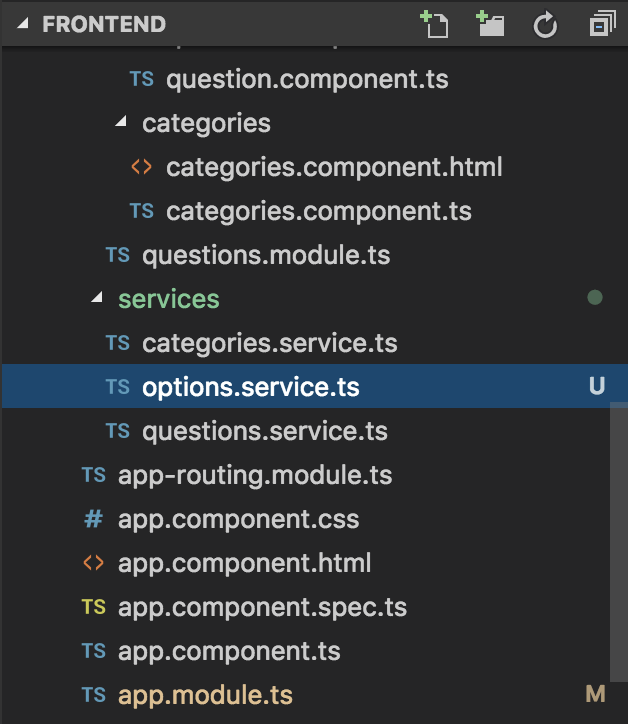
To do this, we will create an OptionService class located in the src/app/services directory as follows:

This class will be injected into the NewOptionComponent class to use, so we declare it with the @Injectable decorator as follows:
|
1 2 3 4 5 6 |
import { Injectable } from "@angular/core"; @Injectable() export class OptionsService { } |
To be able to call the API adding new option of the API Option Service, I will declare using the Angular’s HttpClient object as follows:
|
1 2 3 4 5 6 7 8 9 10 11 |
import { Injectable } from "@angular/core"; import { HttpClient } from "@angular/common/http"; @Injectable() export class OptionsService { constructor(private http: HttpClient) { } } |
Now I can write a method to add a new option from the API Option Service:
|
1 2 3 |
addOption(option: Option) { return this.http.post("/option/add", JSON.stringify(option), { headers: this.headers }).toPromise(); } |
The variable headers are declared as follows:
|
1 |
private headers = new HttpHeaders({ 'Content-Type': 'application/json' }); |
Similar to calling API Category Service and API Question Service, to avoid the CORS error mentioned in this tutorial, I will edit the proxy.conf.json file located in the project’s frontend folder to add for the calling to API Option Service as follows:
|
1 2 3 4 5 6 7 8 9 10 11 12 13 14 15 16 17 |
{ "/category/*": { "target": "http://localhost:8282", "secure": false, "logLevel": "debug" }, "/question/*": { "target": "http://localhost:8281", "secure": false, "logLevel": "debug" }, "/option/*": { "target": "http://localhost:8283", "secure": false, "logLevel": "debug" } } |
With this declaration, outbound requests with URLs starting with “/option” will be requested to http://localhost:8283, which is the URL of the API Option Service.
Similar to class CategoriesService and QuestionsService, we need to declare this OptionsService class in the AppModule class, in the provider attribute of the @NgModule decorator as follows:
|
1 2 3 4 5 6 7 8 9 10 11 12 13 14 15 16 17 18 19 20 21 22 23 24 25 26 27 28 29 30 31 32 33 34 35 |
import { BrowserModule } from '@angular/platform-browser'; import { NgModule } from '@angular/core'; import { AppComponent } from './app.component'; import { NavigationModule } from './navigation/navigation.module'; import { DashboardModule } from './dashboard/dashboard.module'; import { AppRoutingModule } from './app-routing.module'; import { QuestionsModule } from './questions/questions.module'; import { CategoriesService } from './services/categories.service'; import { HttpClientModule } from '@angular/common/http'; import { QuestionsService } from './services/questions.service'; import { OptionsService } from './services/options.service'; @NgModule({ declarations: [ AppComponent ], imports: [ BrowserModule, HttpClientModule, AppRoutingModule, NavigationModule, DashboardModule, QuestionsModule ], providers: [ CategoriesService, QuestionsService, OptionsService ], bootstrap: [ AppComponent ] }) export class AppModule { } |
OK, now we will use the OptionsService class to perform the adding new option.
To do this, we first declare to use the OptionsService class in the constructor of the NewOptionComponent class as follows:
|
1 2 3 4 5 6 7 8 9 10 11 12 13 14 15 16 17 18 19 20 21 |
import { Component, OnInit } from "@angular/core"; import { ActivatedRoute, Router } from "@angular/router"; import { OptionsService } from "../../services/options.service"; @Component({ selector: 'qm-body', templateUrl: './new_option.component.html' }) export class NewOptionComponent implements OnInit { questionId: string; constructor(private route: ActivatedRoute, private optionsService: OptionsService, private router: Router) { } ngOnInit(): void { this.questionId = this.route.snapshot.queryParamMap.get('questionId'); } } |
As you can see, I’ve also added ActivatedRoute objects to get the question id from the URL request and the Router object so that after adding the new option successfully, we will redirect to the details page of a question to check results.
Next, we will edit the form adding new option to add variables that store the value of the description, isCorrect, note entered by the user using the Angular ngModel directive as follows:
|
1 2 3 4 5 6 7 8 9 10 11 12 13 14 15 16 17 18 19 20 21 |
<form role="form"> <div class="form-group"> <label>Description</label> <textarea class="form-control" rows="3" name="description" [(ngModel)]="description"></textarea> <p class="help-block">The description of the option.</p> </div> <div class="form-group"> <label>Correct</label> <div class="checkbox"> <label> <input type="checkbox" name="isCorrect" [(ngModel)]="isCorrect">Correct ? </label> </div> </div> <div class="form-group"> <label>Note</label> <textarea class="form-control" rows="3" name="note" [(ngModel)]="note"></textarea> <p class="help-block">The note for the option.</p> </div> <button type="submit" class="btn btn-primary" (click)="createNewOption()">Add New Option</button> </form> |
As you can see, I also modified the content of the “Add New Option” button to allow when the user clicked on this button, our application will call the createNewOption() method in the NewOptionComponent class to do adding new option.
The contents of the NewOptionComponent class will be modified as follows:
|
1 2 3 4 5 6 7 8 9 10 11 12 13 14 15 16 17 18 19 20 21 22 23 24 25 26 27 28 29 30 31 32 33 34 35 36 37 38 39 40 41 42 43 44 45 46 47 48 49 50 51 52 53 54 55 56 57 |
import { Component, OnInit } from "@angular/core"; import { ActivatedRoute, Router } from "@angular/router"; import { Option } from "../../services/questions.service"; import { OptionsService } from "../../services/options.service"; @Component({ selector: 'qm-body', templateUrl: './new_option.component.html' }) export class NewOptionComponent implements OnInit { description: string; note: string; isCorrect: boolean; questionId: string; newOption: Option; constructor(private route: ActivatedRoute, private optionsService: OptionsService, private router: Router) { } ngOnInit(): void { this.questionId = this.route.snapshot.queryParamMap.get('questionId'); } createNewOption() { if (this.isEmpty(this.description)) { alert("Description cannot be empty."); return; } this.newOption = new Option(); this.newOption.description = this.description; this.newOption.note = this.note; this.newOption.isCorrect = this.isCorrect; this.newOption.questionId = this.questionId; this.optionsService.addOption(this.newOption) .then(o => { alert("Success"); this.router.navigate(['/question/' + this.questionId]); }) .catch(this.handleError); } isEmpty(val) { return val === undefined || val == null || val.length <= 0; } private handleError(error: any): Promise<any> { alert('An error occurred' + error); return Promise.reject(error.message || error); } } |
As I mentioned above, after successfully adding an option, our application redirects to the question’s page. So in the NewOptionComponent class, we used the navigate() method of the Router object to redirect to URL “/question/{id}” after receiving a successful response from the API Option Service.
OK, so we have finished for adding new option in the Frontend of the Question Management application. Let’s try it out!
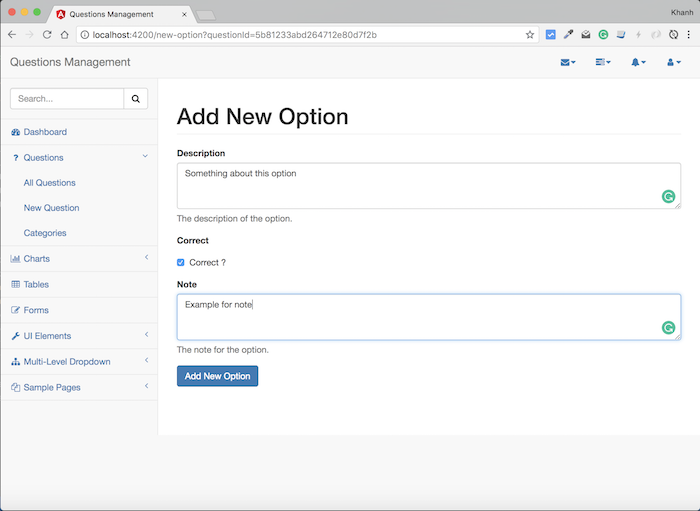
In the “Add New Option” page, enter the following new option information:

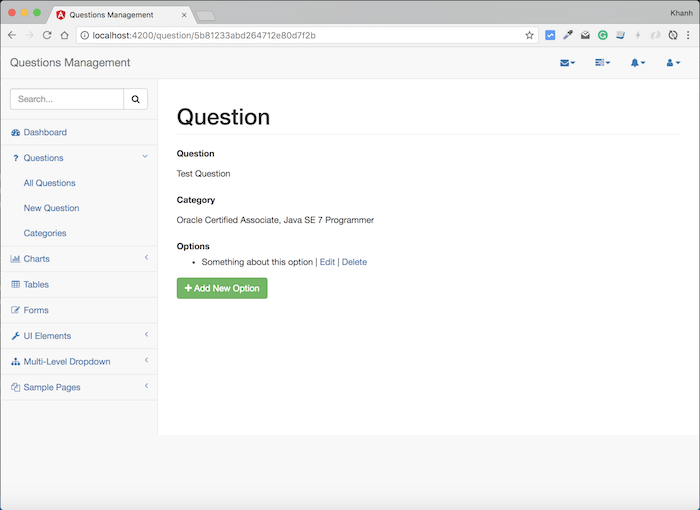
and click “Add New Option”, our application will redirect to the information page of this question as follows:


