The “run” command of the Kubernetes Controller is used only to create a new Pod in the Kubernetes cluster. This command makes it easy for beginners to learn about Kubernetes to deploy a Pod and thus easily deploy a container in a Kubernetes cluster. In this tutorial, we will learn about this command together!
The basic syntax of the “run” command is as follows:
|
1 |
kubectl run --image=<image_name> <name> |
With:
- <image_name> is the image name that you will use to run the container. Kubernetes supports Docker Hub and some Private Registry such as Google Container Registry, AWS EC2 Container Registry, …
- <name> is the name of the Pod after we initialize the container with the image above.
For example, now I will run a container using image node-hello from the Google Container Registry at the address https://console.cloud.google.com/gcr/images/google-samples/GLOBAL/node-hello as follows:
|
1 |
kubectl run --image=gcr.io/google-samples/node-hello:1.0 node-hello |
Result:

As you can see, after running the above command, a message is printed telling us that a Pod has been created “pod/node-hello” created”.
You can check the information of the Pods in the current Kubernetes cluster using the command:
|
1 |
kubectl get pods |
My result is as follows:

As you can see, there is currently a Pod called node-hello running!
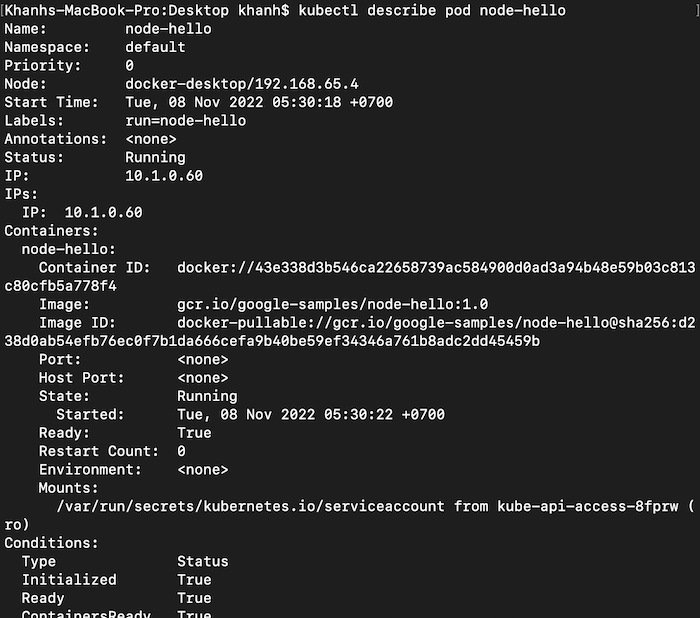
You can use the command:
|
1 |
kubectl describe pod <pod_name> |
to get information of this Pod:
By default, when you run the “run” command, our container will be created and run in the background inside the cluster. To access this container, you can use the following command:
|
1 |
kubectl exec -it <pod_name> -c <container_name> -- /bin/bash |
with container_name is the name of the container in the Pod that we need to access.
My example is as follows:
|
1 |
kubectl exec -it node-hello -c node-hello -- /bin/bash |
Result:

If the Pod has only one container, we can also use the Pod name to access that container as well.
In my example, this Pod has only one container, so I can access the container in this Pod as follows:
|
1 |
kubectl exec -it node-hello -- /bin/bash |
Result:
![]()