From version 4 onwards, Apache Kafka uses KRaft for cluster management instead of Apache ZooKeeper. Therefore, you no longer need to bring up and run a container for Apache ZooKeeper as instructed in this tutorial. In this tutorial, I will guide you on how to install Apache Kafka from version 4 onwards, along with a tool from Confluent Kafka called Confluent Schema Registry to manage schemas for Kafka messages, using Docker Compose!
You can define the contents of the kafka service in the Docker Compose file as follows:
|
1 2 3 4 5 6 7 8 9 10 11 12 13 14 15 16 17 18 19 20 21 |
kafka: image: confluentinc/cp-kafka:8.2.1 environment: KAFKA_NODE_ID: 1 KAFKA_PROCESS_ROLES: 'broker,controller' KAFKA_ADVERTISED_LISTENERS: PLAINTEXT://kafka:29092,PLAINTEXT_HOST://localhost:9092 KAFKA_LISTENER_SECURITY_PROTOCOL_MAP: CONTROLLER:PLAINTEXT,PLAINTEXT:PLAINTEXT,PLAINTEXT_HOST:PLAINTEXT KAFKA_OFFSETS_TOPIC_REPLICATION_FACTOR: 1 CLUSTER_ID: 'MkU3OEVBNTcwNTJENDM2Qk' KAFKA_CONTROLLER_QUORUM_VOTERS: '1@kafka:29093' KAFKA_LISTENERS: 'PLAINTEXT://kafka:29092,CONTROLLER://kafka:29093,PLAINTEXT_HOST://0.0.0.0:9092' KAFKA_INTER_BROKER_LISTENER_NAME: 'PLAINTEXT' KAFKA_CONTROLLER_LISTENER_NAMES: 'CONTROLLER' volumes: - ./kafka_data:/var/lib/kafka/data healthcheck: test: ["CMD-SHELL", "kafka-topics --bootstrap-server localhost:9092 --list"] interval: 5s retries: 10 ports: - 9092:9092 |
We need to define the KAFKA_NODE_ID variable to identify this broker/controller node from other broker/controller nodes in the Kafka cluster.
With the new model using KRaft, our Apache Kafka will be able to play two roles: a message broker and a controller. The controller will store and replicate cluster metadata (configuration, topics, brokers). You can configure it to act only as a broker or only as a controller. We will use the KAFKA_PROCESS_ROLES environment variable to configure this.
The KAFKA_ADVERTISED_LISTENERS, KAFKA_OFFSETS_TOPIC_REPLICATION_FACTOR, and KAFKA_LISTENER_SECURITY_PROTOCOL_MAP variables are as I explained in the previous tutorial. Here, for the protocol map, I have defined an additional protocol for the Controller: CONTROLLER:PLAINTEXT. Since I’m installing it on my own machine, I don’t need to set up the authentication for the Controller!
The CLUSTER_ID variable is used to define the unique identity for the Kafka cluster. This is a necessary variable for brokers and controllers to use if they are in the same Kafka cluster.
When using KRaft to manage the cluster, Apache Kafka will use an active controller to do this. Kafka defines multiple controllers using the environment variable KAFKA_CONTROLLER_QUORUM_VOTERS and uses one of these controllers to manage the cluster. If one of these controllers has a problem, Apache Kafka will automatically use another controller to handle it. We will use the environment variable KAFKA_CONTROLLER_LISTENER_NAMES to define the name of this active Controller.
As for the schema-registry service, you can define it as follows:
|
1 2 3 4 5 6 7 8 9 10 11 12 13 14 15 16 |
schema-registry: image: confluentinc/cp-schema-registry:8.2.1 depends_on: kafka: condition: service_healthy ports: - "8081:8081" healthcheck: interval: 5s retries: 10 test: curl --write-out 'HTTP %{http_code}' --fail --silent --output /dev/null http://localhost:8081 environment: SCHEMA_REGISTRY_SCHEMA_PROVIDERS_AVRO_VALIDATE_DEFAULTS: true SCHEMA_REGISTRY_HOST_NAME: schema-registry SCHEMA_REGISTRY_KAFKASTORE_BOOTSTRAP_SERVERS: 'kafka:29092' SCHEMA_REGISTRY_LISTENERS: http://0.0.0.0:8081 |
The variable SCHEMA_REGISTRY_SCHEMA_PROVIDERS_AVRO_VALIDATE_DEFAULTS is used to request the Schema Registry to validate the default values of Avro schema fields when they are registered.
SCHEMA_REGISTRY_HOST_NAME defines the hostname of the Schema Registry; clients can use this hostname to connect to the Schema Registry.
The variable SCHEMA_REGISTRY_KAFKASTORE_BOOTSTRAP_SERVERS defines the Kafka server information.
SCHEMA_REGISTRY_LISTENERS defines the host and port information that clients can use to connect to the Schema Registry.
If you now run the command “docker compose up” in the directory containing the Docker Compose file with the above content, you will see the following result:
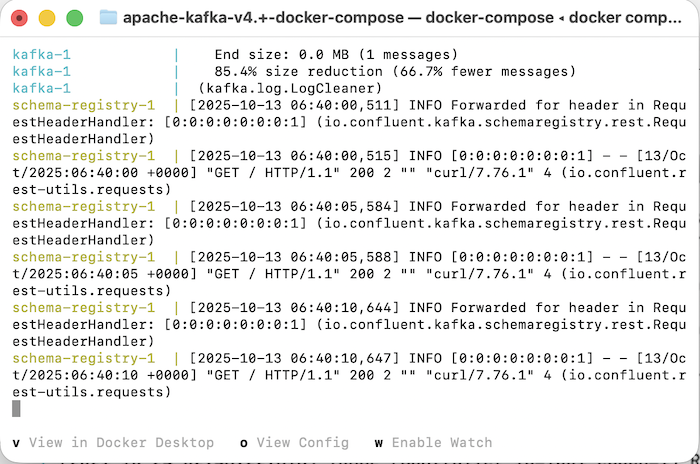
Now you can connect to this Apache Kafka server and start using it.