
Archive of the artifacts in Jenkins is a feature that allows us to store the output files after we build the project with Jenkins. For example, you have an application project that uses Apache Maven to build. Normally we will use the “mvn clean install” command to build the Apache Maven application. If you notice, with this build statement, each running, the result of the previous build will be deleted. We cannot get old output files. Using Jenkins’s Archive the artifacts feature can help us solve this problem. How is it in details? Let’s find out in this tutorial.
As an example of this tutorial, I will be using Maven project spring-jpa in the tutorial JPA and Spring framework. This project was pushed to the huongdanjava.com repository using my GitHub account at https://github.com/huongdanjavacom/huongdanjava.com.
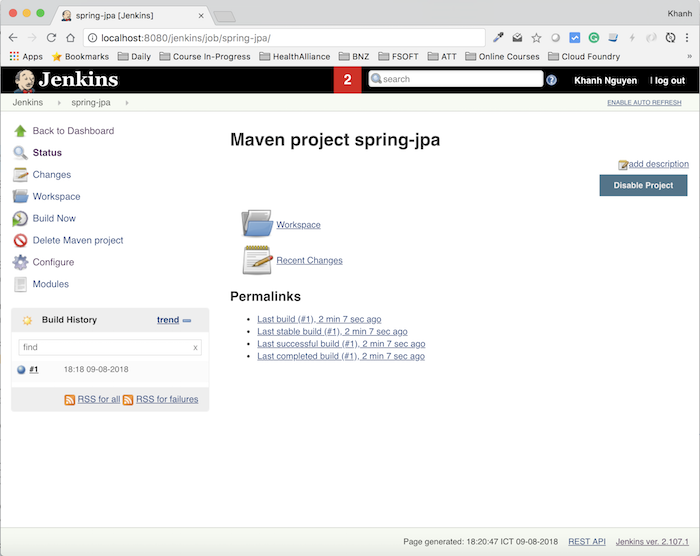
OK, now, we will setup Jenkins job to build this project.
The steps to setup the Jenkins job for this project are similar as I described in the tutorial Build Maven project in Jenkins.
Results after the normal configuration and build this project will be as follows:
If you now go to the Workspace link in the window above and go to the spring-data/target directory you will see the following output:
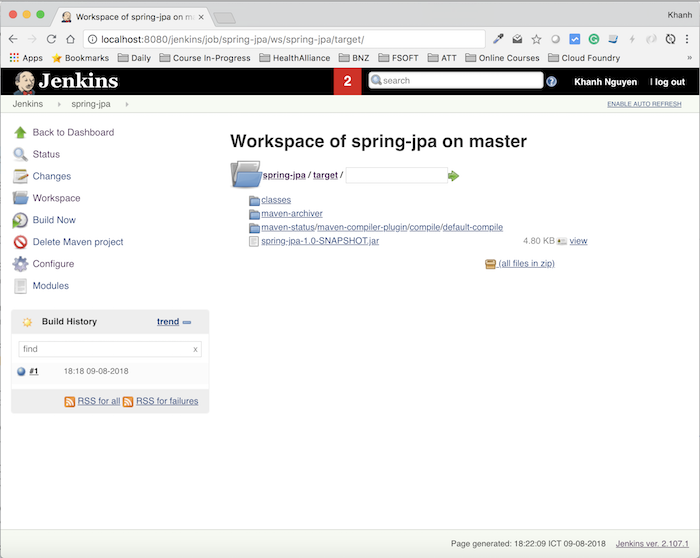
The spring-jpa-1.0-SNAPSHOT.jar file is the output file for this Jenkins job. And it will be deleted to build again whenever we run this Jenkins job.
If you want to keep this output file then you can configure this Jenkins job using the Archive the Artifacts feature.
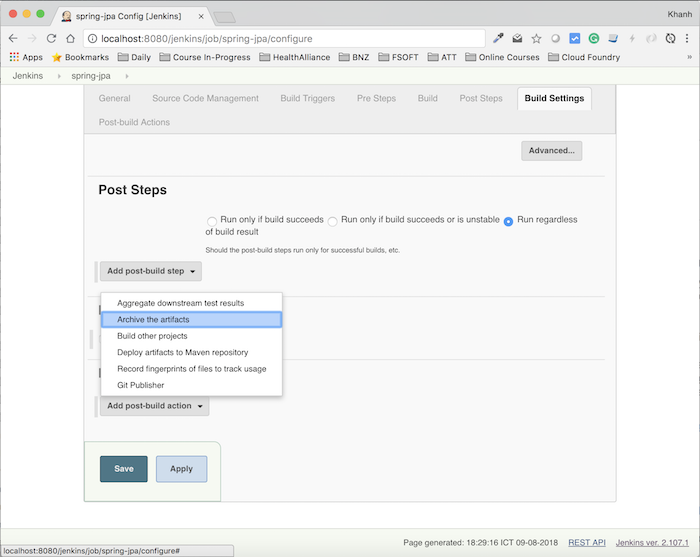
To do this, in the left pane, click the Configure button to open the configuration page for this Jenkins job.
Then, go to the Post-build Actions section at the bottom of the page. Here you will see a drop-down menu containing many items, including the Archive the artifacts item as follows:
Select it and you will see the following result:
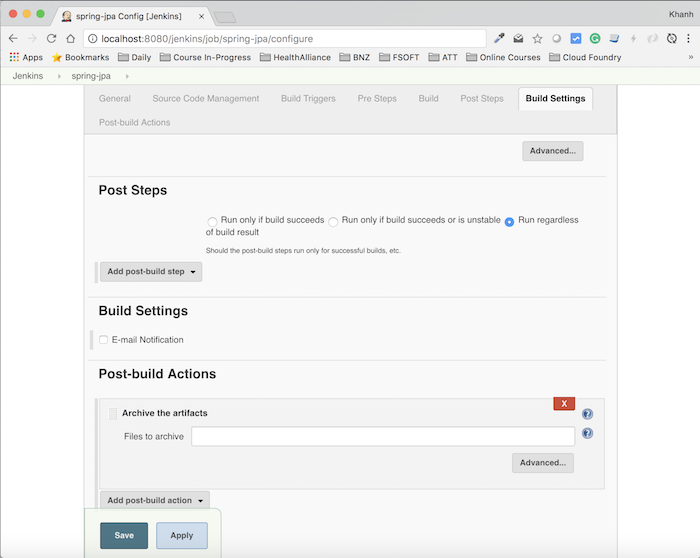
As you can see, here we have a field that needs to be configured. That is the information about the file that we need to keep. You can enter the exact file name you need to archive (in my example “spring-jpa/target/spring-jpa-1.0-SNAPSHOT.jar”) or you can declare as follows to archive any file has a .jar extension in the target directory “spring-jpa/target/*.jar”.
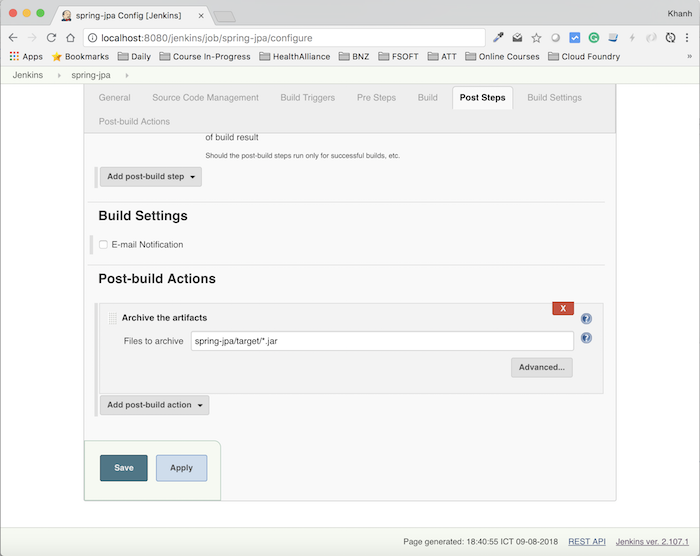
Now you can click the Save button to save the Archive the artifacts configuration.
The result when you build will be as follows:

Now, if you go back to Jenkins job homepage, you will see the Last Successful Artifacts section as follows:
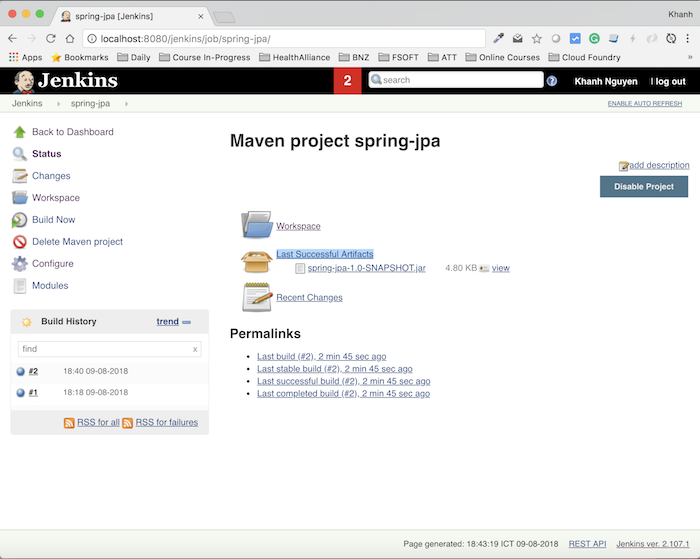
This is the latest archive file.
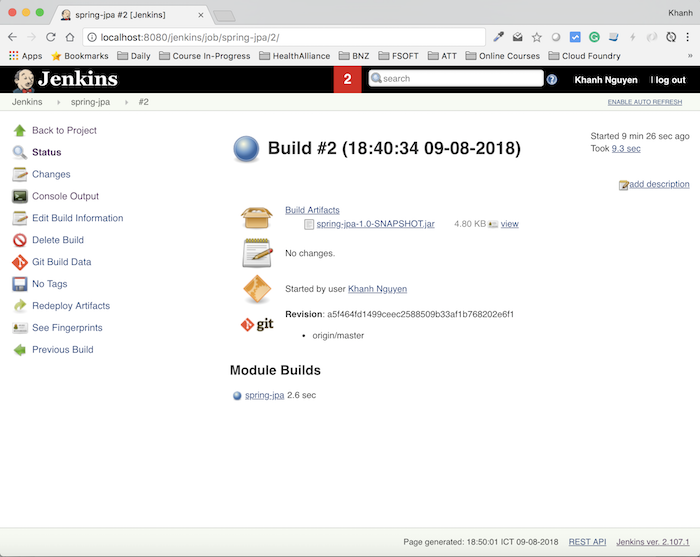
If you go to the build section of this Jenkins job, you will also see the Build Artifacts section containing the output file as follows:

Snehas
Hi , I am new to jenkins your blog is very helpful to understand the basics. Actually I have build the job with post – build action Archive to artifact my file , the build is successful so I build again without any changes in file from then the build is in pending and when I checked console it is showing as Waiting for next available executor.Could you please help me how to proceed for further process