In the previous tutorial, I showed you how to deploy an application in OpenShift using the client tool oc. Deploying applications that use the web console in OpenShift is much simpler and we can monitor the process of this deployment in the most intuitive way. How is it in details? We will find out in this tutorial together!
First, you need to login to OpenShift using the web console with the default user and password as developer/developer.
Then select the project you need to deploy the application. Mine as follows:
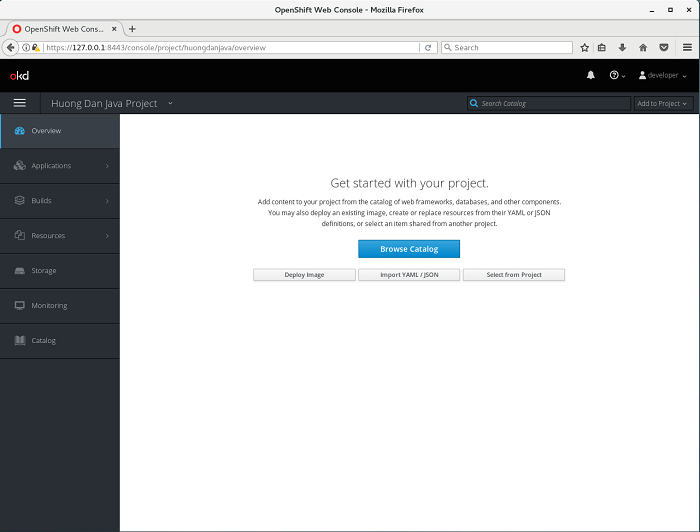
Here, we have 4 ways to deploy an application in OpenShift that is using Catalog (in this case, OpenShift provides us with environments for us to run our applications, for example, for Java applications, OpenShift provides WildFly to run them, our application will be packaged with these environments to create Image that can be deployed to Kubernetes), using an existing Image, using the spec file to define Kubernetes objects or use a resource from this Project or other Projects in OpenShift.
In the example of this tutorial, I will use the Catalog!
Please click Browse Catalog to start deploying an application.
The result is as follows:
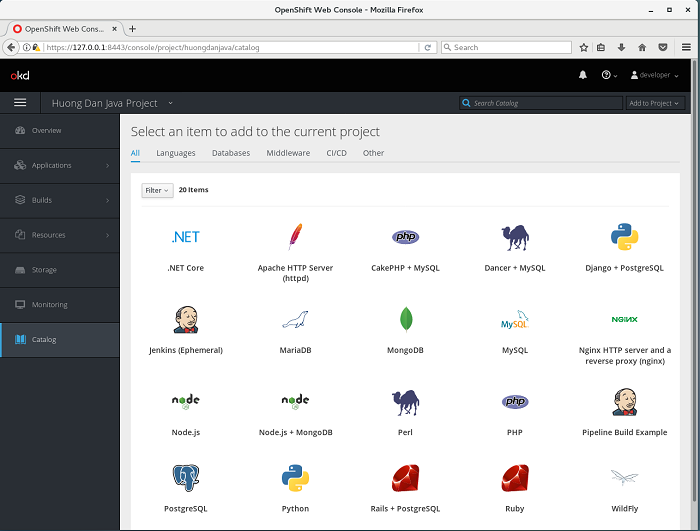
I will use the example project in the tutorial InternalResourceViewResolver in Spring MVC as an example for this tutorial. Since it is a Java application, I will choose WildFly in the Catalog list above, you will see a dialog shown as follows:
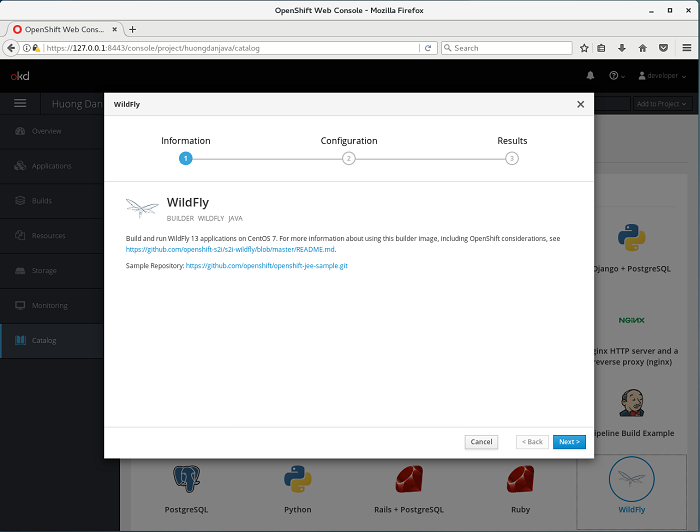
The first screen of this dialog is just the information section, please click the Next button to begin configuring our deployment section!
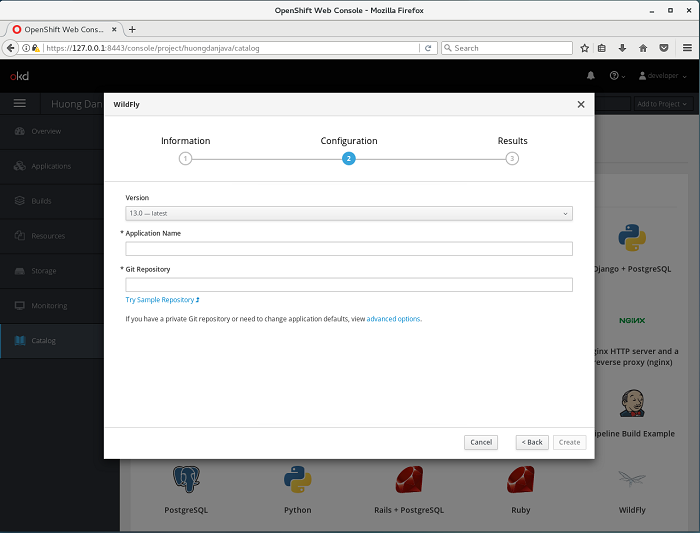
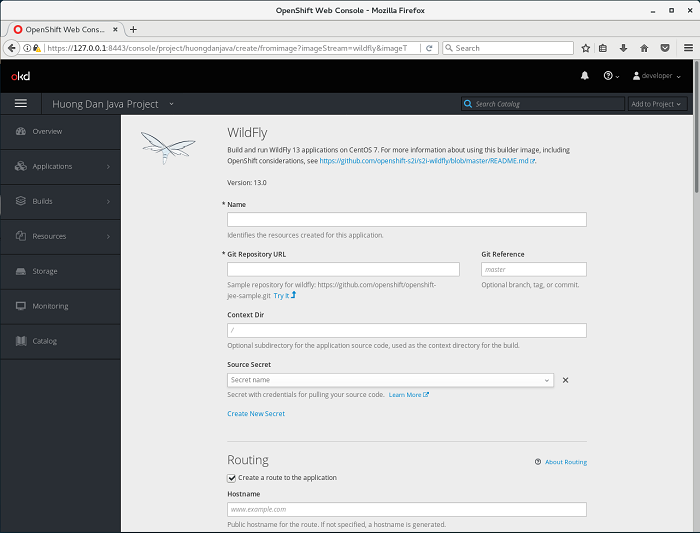
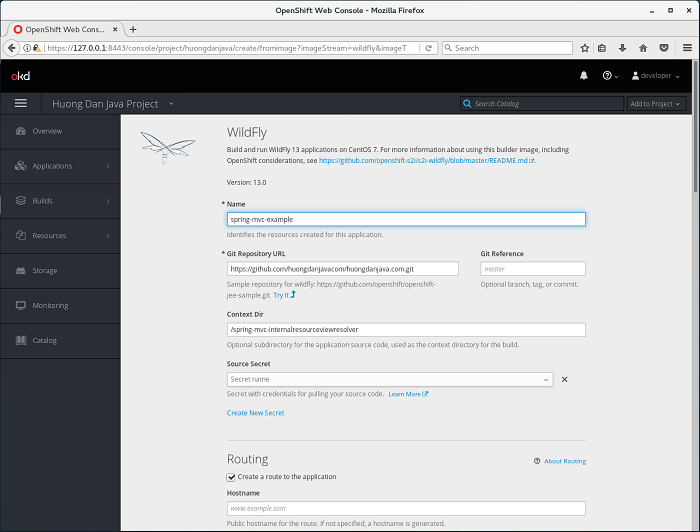
Here we have 3 basic information, by default, we need to fill in the information that is the version of WildFly we will use to deploy the application, the name of the application and Git repository contains the source code of the application. You can select the “advanced options” link on this window to enable additional information, as follows:
As you can see, we can also select the branch of the source code, select the directory of Git repository, select the options related to Routing:

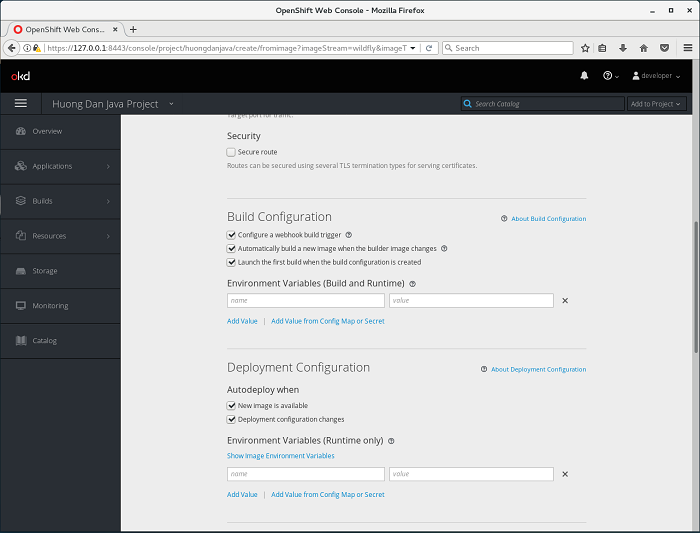
Build Configuration, Deployment Configuration:
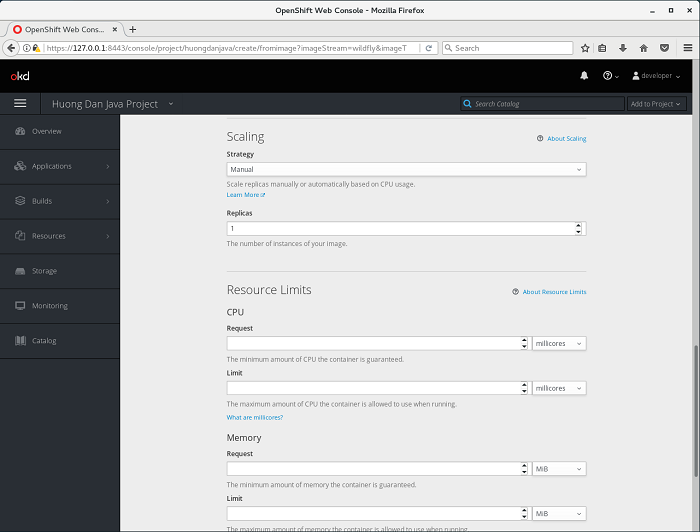
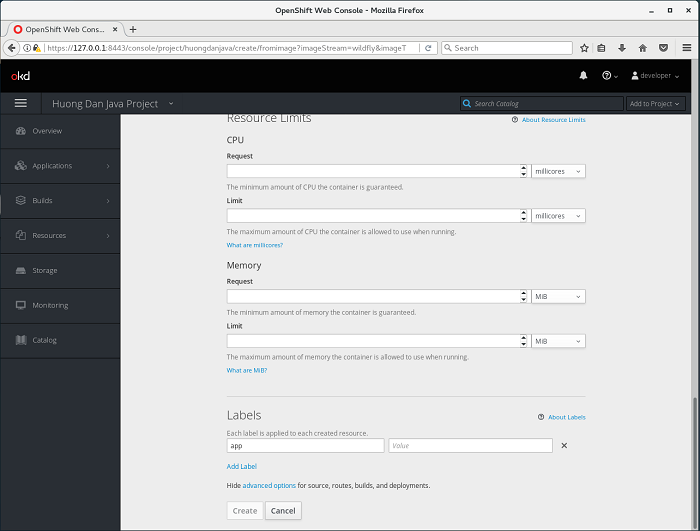
Scaling, Resource Limits:
and Labels:
I will leave the default value of all information except the name of the application, Git repository. The source code of the example in the tutorial InternalResourceViewResolver in Spring MVC is pushed to the Huong Dan Java’s Github at https://github.com/huongdanjavacom/huongdanjava.com and located in the spring-mvc-internalresourceviewresolver directory so I will configure it as follows:
Then click the “Create” button in the bottom of this dialog.
Result:
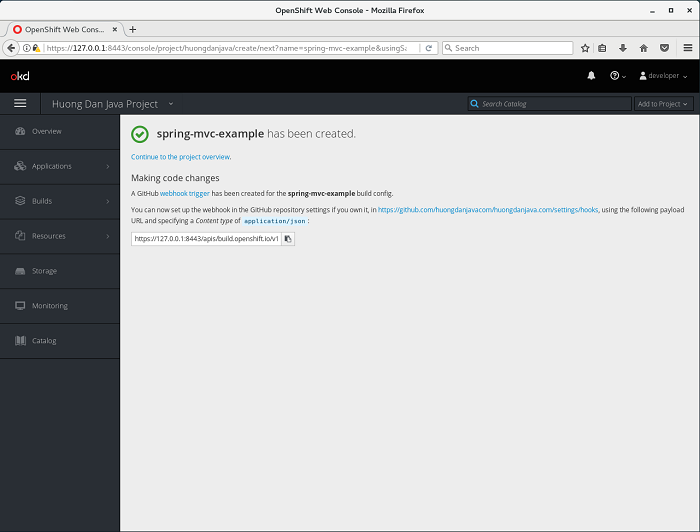
Now, our application is automatically built, automatically creates Image, creates Pod, creates Deployment, creates Service and creates Route.
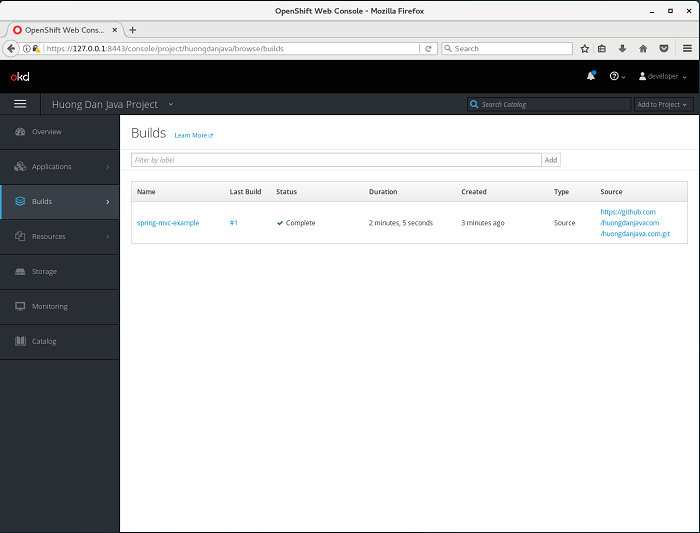
To check these, you, from the left menu, click on the Builds then select Builds, you will see the following result:
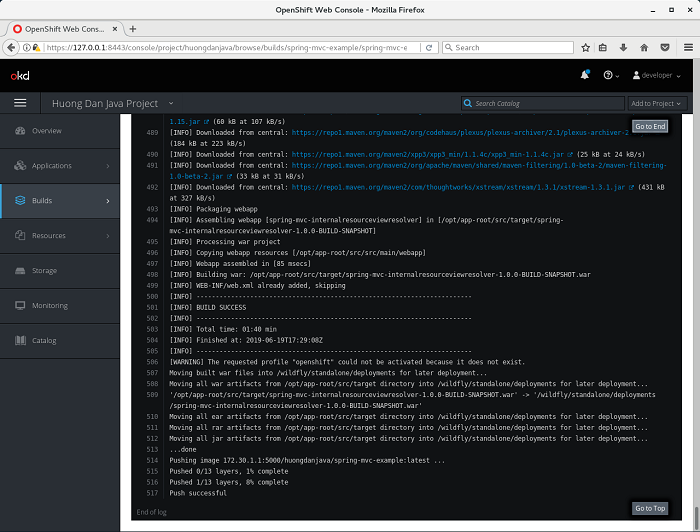
Select the Build name “spring-mvc-example” then View Log, you will see the results of the code we have built, created Image and pushed into the Registry as follows:
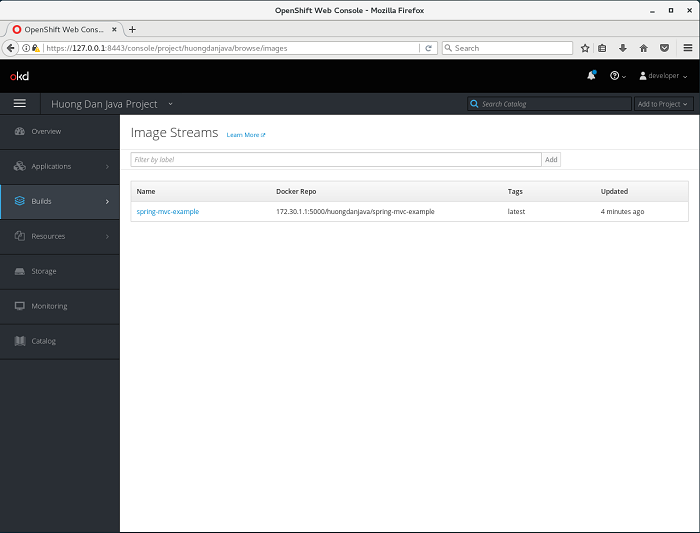
You will see an Image created if you click on Builds and select Images on the left menu as follows:
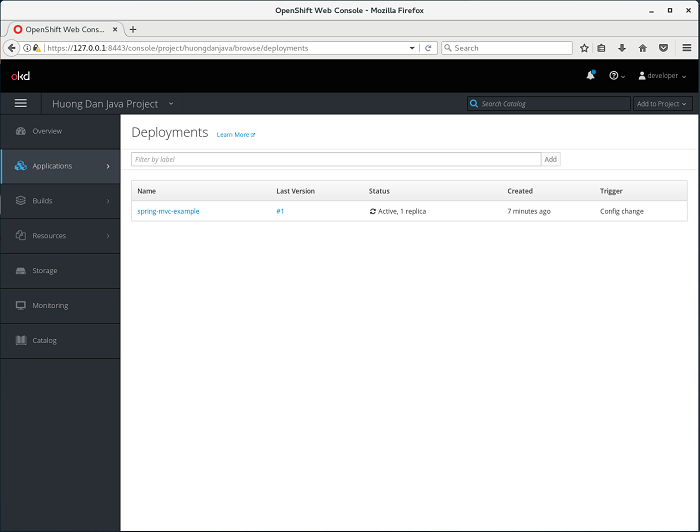
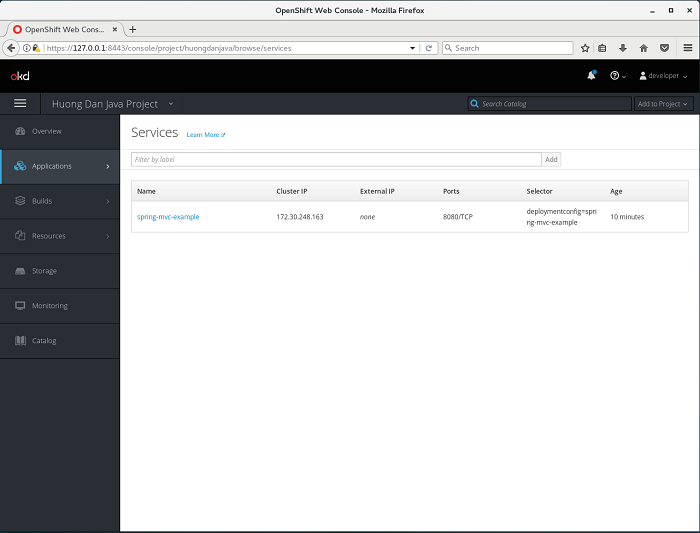
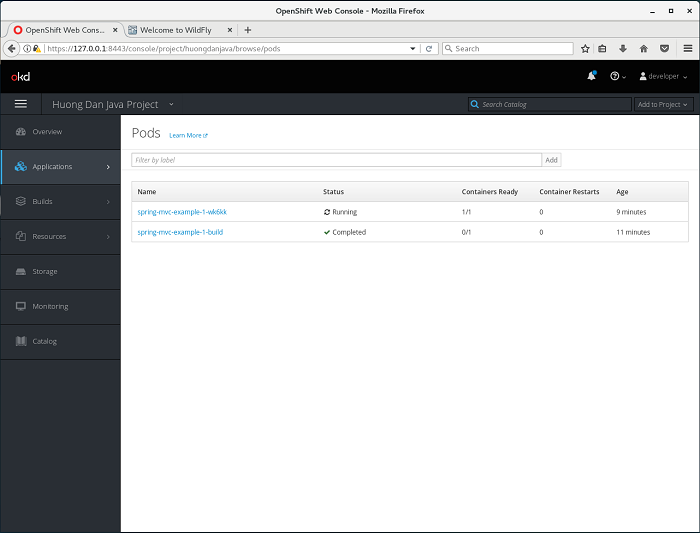
Now, if you check Applications -> Deployments, Applications -> Services, Applications -> Pods, Applications -> Routes, you will see the following result:
Deployments:
Services:
Pods:
Routes:
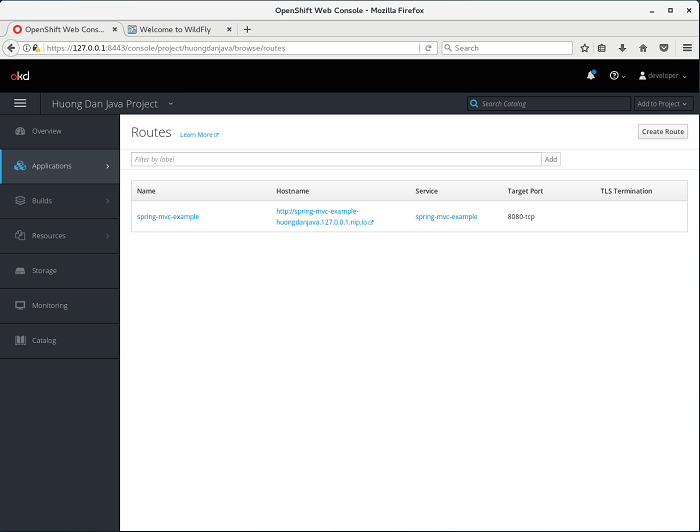
Click Hostname “http://spring-mvc-example-huongdanjava.127.0.0.1.nip.io/“, you will see the following result:
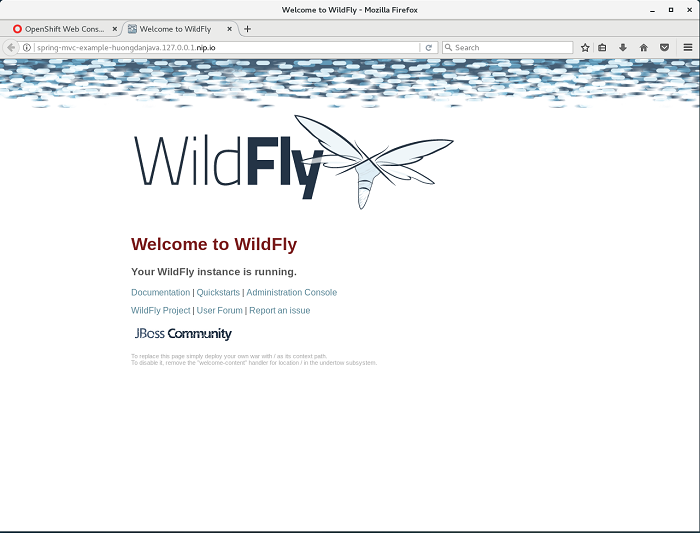
As you can see, this is just the homepage of WildFly, not the result page I am looking forward to in the tutorial InternalResourceViewResolver in Spring MVC, the reason is that because our application is deployed at context path “/spring-mvc-internalresourceviewresolver-1.0.0-BUILD-SNAPSHOT”. You can check this by going to Applications -> Deployments, selecting our application and selecting View Log, as follows:
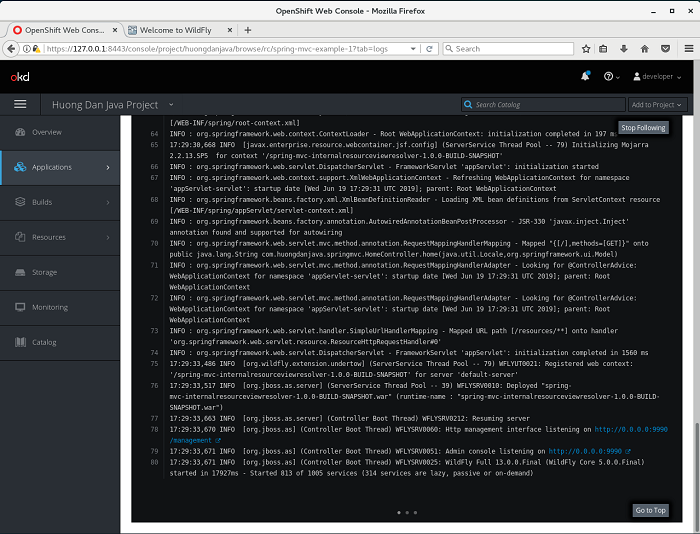
(Line 75).
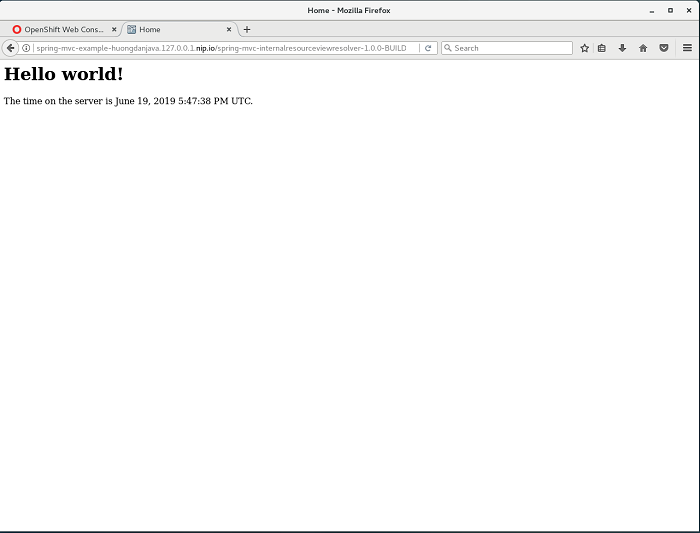
Results when I request “http://spring-mvc-example-huongdanjava.127.0.0.1.nip.io/spring-mvc-internalresourceviewresolver-1.0.0-BUILD-SNAPSHOT/” will be as follows:
So, we have successfully deployed an application to OpenShift using the web console.