Partitioning in message queues is a mechanism that divides topics or queues into multiple partitions. Each partition stores a portion of the data, and this data is processed in parallel. This makes receiving and processing messages faster and more efficient!
Apache Kafka supports partitioning natively, while RabbitMQ does not. However, you can easily implement partitioning with RabbitMQ using Spring Cloud Stream. Spring Cloud Stream provides solutions for implementing partitioning with any message broker. You can implement partitioning in your application code and easily switch between different message brokers without changing much code. Spring Cloud Stream ensures that related messages, for example, with the same user ID, are handled by the same consumer instance (in cases where multiple consumer instances subscribe to the same queue and process that message). How exactly does this work? Let’s explore this in this tutorial!
First, I’ll create a new Maven multi-module project as an example:
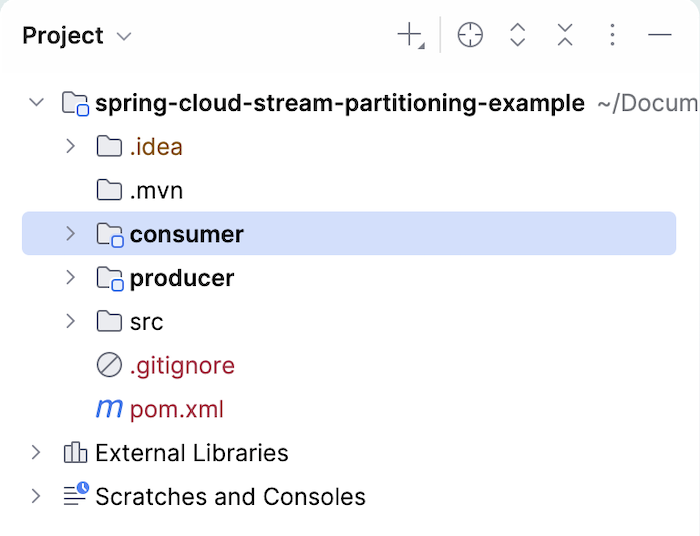
Both the producer and consumer projects are Spring Boot projects that use Spring Cloud Starter Stream Rabbit to send and receive messages to RabbitMQ using Spring Cloud Stream.
For example, to illustrate the partitioning part, we will have a producer application to publish messages to the exchange with three different partitions. We will run three instances of the consumer application to consume messages from these three different partitions.
The RabbitMQ server information will be defined in the two projects as follows:
|
1 2 3 4 5 6 |
spring: rabbitmq: host: localhost port: 5672 username: guest password: guest |
For the producer part, I will use the StreamBridge class to send messages as follows:
|
1 2 3 4 5 6 7 8 9 10 11 12 13 14 15 16 17 18 19 20 21 22 23 24 25 26 27 28 29 |
package com.huongdanjava.springcloudstream; import org.springframework.beans.factory.annotation.Autowired; import org.springframework.boot.CommandLineRunner; import org.springframework.boot.SpringApplication; import org.springframework.boot.autoconfigure.SpringBootApplication; import org.springframework.cloud.stream.function.StreamBridge; import org.springframework.context.annotation.Bean; @SpringBootApplication public class ProducerApplication { @Autowired private StreamBridge streamBridge; public static void main(String[] args) { SpringApplication.run(ProducerApplication.class, args); } @Bean CommandLineRunner runner() { return args -> { streamBridge.send("sendMessage", new Order(100L, "Laptop")); streamBridge.send("sendMessage", new Order(101L, "Phone")); streamBridge.send("sendMessage", new Order(102L, "Keyboard")); streamBridge.send("sendMessage", new Order(100L, "Mouse")); }; } } |
As you can see, I’m using the send() method of the StreamBridge class to send a message to RabbitMQ using the binding name sendMessage. The content of the Order class is as follows:
|
1 2 3 4 |
package com.huongdanjava.springcloudstream; public record Order(Long userId, String product) { } |
For the binding part, in the application.yml file, in addition to defining the binding for the sendMessage binding name to RabbitMQ’s exchange, you also need to define the following two properties:
|
1 2 3 4 5 6 7 8 9 10 11 12 13 14 15 |
spring: rabbitmq: host: localhost port: 5672 username: guest password: guest cloud: stream: bindings: sendMessage: destination: message.exchange producer: partition-key-expression: payload.userId partition-count: 3 |
We will use the property spring.cloud.stream.bindings.<binding-name>.producer.partition-count to define the number of partitions we want and the property spring.cloud.stream.bindings.<binding-name>.producer.partition-key-expression to define the routing key, so that Spring Cloud Stream can route messages related to a specific partition.
For the consumer part, we will define a bean for the Consumer interface to receive messages from RabbitMQ:
|
1 2 3 4 5 6 |
@Bean public Consumer<Order> processOrder() { return order -> { System.out.println("Received: " + order); }; } |
The content of the Order class is the same as in the producer section!
We also define the binding information and some other properties related to partitioning in the application.yml file as follows:
|
1 2 3 4 5 6 7 8 9 10 |
spring: cloud: stream: bindings: processOrder-in-0: destination: message.exchange group: huongdanjava consumer: partitioned: true instance-count: 3 |
The property spring.cloud.stream.binding.<binding-name>.consumer.partitioned tells Spring Cloud Stream that we want to enable partitioning for this consumer application. The property spring.cloud.stream.binding.instance-count defines the number of partitions. Additionally, there’s another property called spring.cloud.stream.instance-index that we’ll use when running the consumer application to mark the corresponding consumer instance number.
In my example, I’ll be running one producer application and three instances of the consumer application, so to avoid port conflicts, I’ll define the server.port property with a value of 0:
|
1 |
server.port = 0 |
so that these applications can run using random ports.
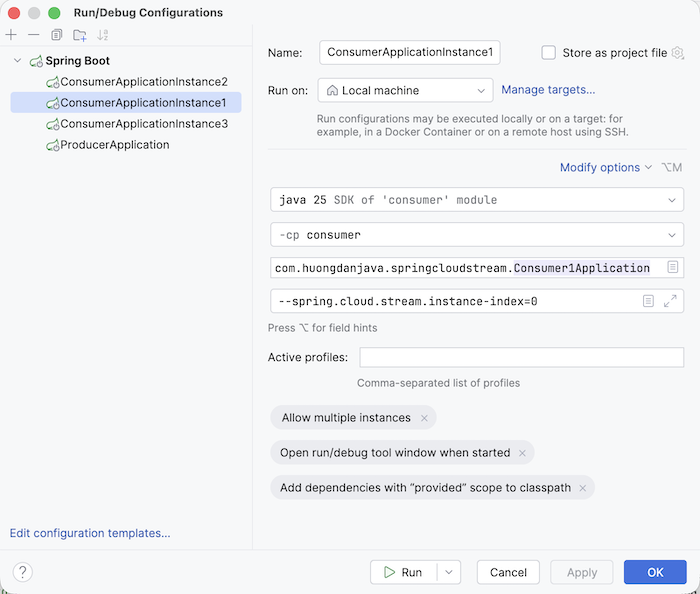
For the consumer application, I will run 3 instances with the property spring.cloud.stream.instance-index, for example, instance 1 as follows:
You can run the producer application like a normal Spring Boot application!
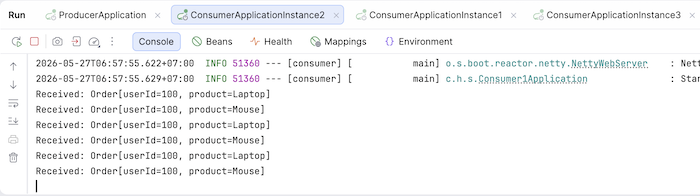
Now, after running the three consumer instances and finally the producer application, you will see the results for each consumer instance as follows:
Consumer 1:
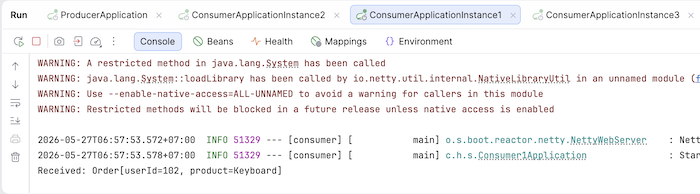
Consumer 2:

Consumer 3:
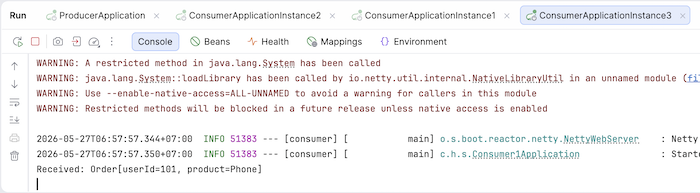
If you run the producer application multiple times, you’ll see that all the related messages are consumed by a specific consumer, for example:
If you check the queue information in RabbitMQ, you will see that Spring Cloud Stream has automatically created 3 queues corresponding to the 3 partitions we want:
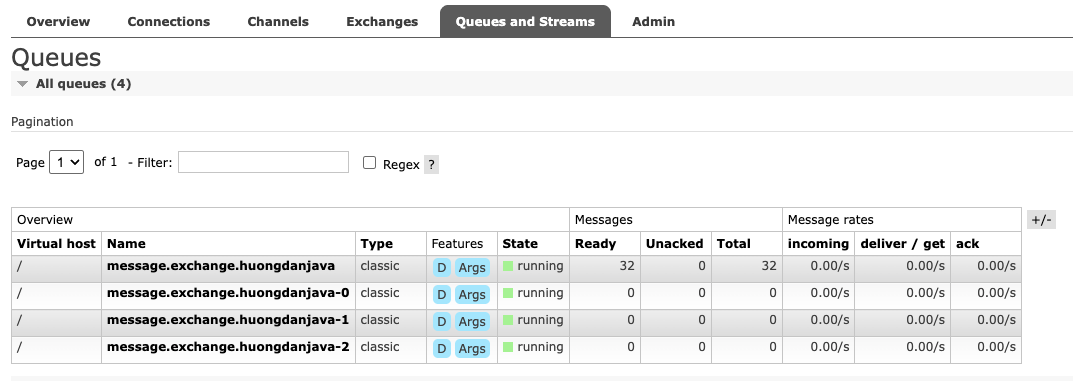
Essentially, each consumer instance will subscribe to a queue corresponding to its consumer instance number, and the relevant messages will be published to each queue!
So, in this tutorial, I’ve shown you how to implement partitioning with RabbitMQ using Spring Cloud Stream. The process is similar for message brokers that Spring Cloud Stream supports!
Watch the video here: