To share any library that can be used in different Maven projects on your computer, you can install this library into the Maven Local Repository. To share a library that can be used between team members, you need to deploy the library to a certain Maven Remote Repository. We have several different ways to deploy a library to Maven Remote Repository, one of which is to use the “Deploy artifacts to the Maven Repository” feature in Jenkins. How is it in details? Let’s find out in this tutorial.
To deploy artifacts to the Jenkins Maven Repository, there are a few things we have to do:
First, you need to have a Remote Maven Repository with a fully qualified user for this Remote Maven Repository.
You can use the Nexus Repository Manager to create the Remote Maven Repository.
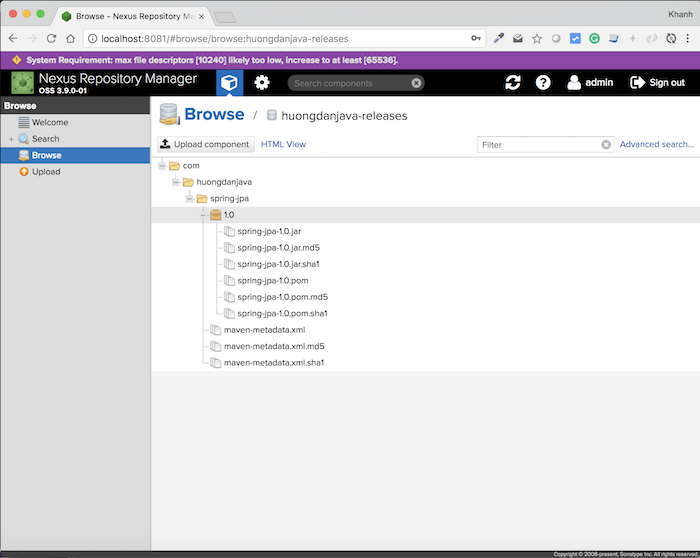
Here, I created a Remote Maven Repository named huongdanjava-releases:

Note that we must create Remote Maven Repository with Repository Type is hosted in Nexus Repository Manager.
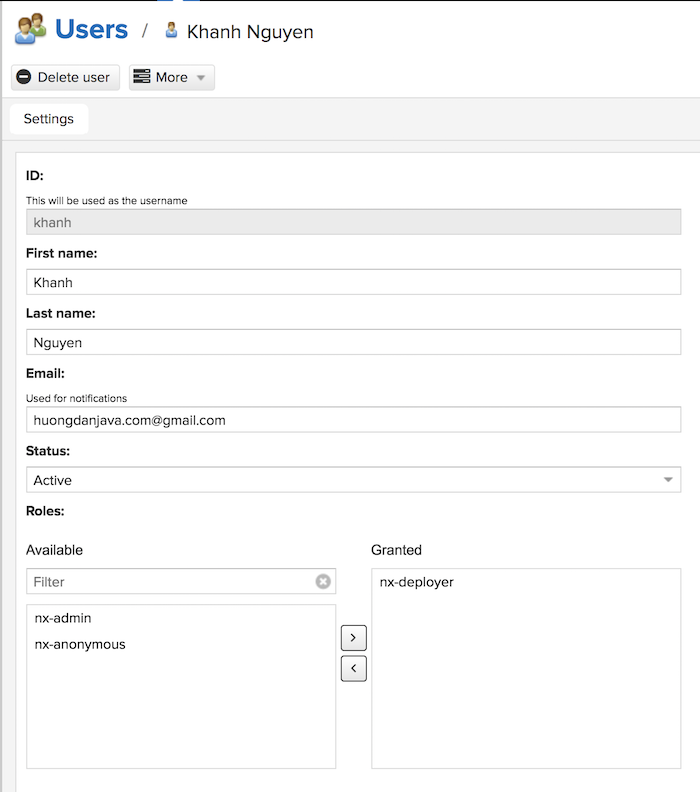
I also created a User named khanh:
with Role is nx-deployer:
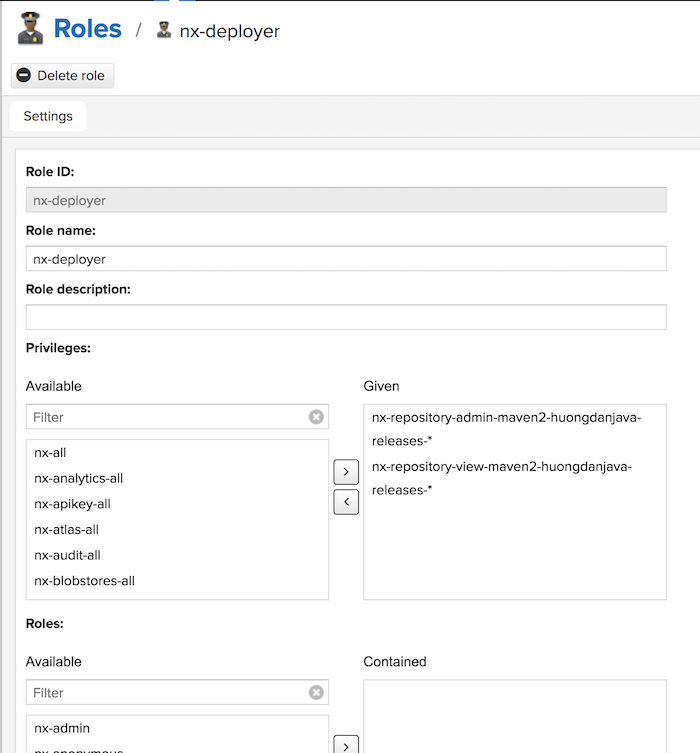
As you can see, this nx-deployer role has enough permissions for the Maven Repository huongdanjava-releases that I created earlier.
Next, we will define an Apache Maven settings.xml file with the information about the Maven Repository and the User that we created above.
Why do we have to do this? That’s because Jenkins will use this information to deploy our library.
I have a tutorial about Apache Maven settings.xml part 1, part 2. You can read to understand it. With the information about the Remote Maven Repository created above, I will define a settings.xml file with the following content:
|
1 2 3 4 5 6 7 8 9 10 11 12 13 14 15 16 17 18 19 20 21 22 23 24 25 26 27 28 29 30 |
<settings> <servers> <server> <id>huongdanjava-releases</id> <username>khanh</username> <password>123456</password> </server> </servers> <profiles> <profile> <id>nexus</id> <activation> <activeByDefault>true</activeByDefault> </activation> <repositories> <repository> <id>huongdanjava-releases</id> <name>HuongDanJava Releases</name> <url>http://localhost:8081/repository/huongdanjava-releases/</url> <layout>default</layout> <releases> <enabled>true</enabled> </releases> </repository> </repositories> </profile> </profiles> </settings> |
We will put this settings.xml file into the user directory of the server running Jenkins!
Now is the time to work with Jenkins. 🙂
In the section Maven configuration in Jenkins, you need leave the default configuration to let Jenkins pick up the settings.xml file we created above, in the user directory.
As an example of this tutorial, I will be using Maven project spring-jpa in the tutorial JPA and Spring framework. This project was pushed to the huongdanjava.com repository using my GitHub account at https://github.com/huongdanjavacom/huongdanjava.com.
Because we are going to deploy this library to a Release Maven Repository, we will revise the version for this project by removing SNAPSHOT.
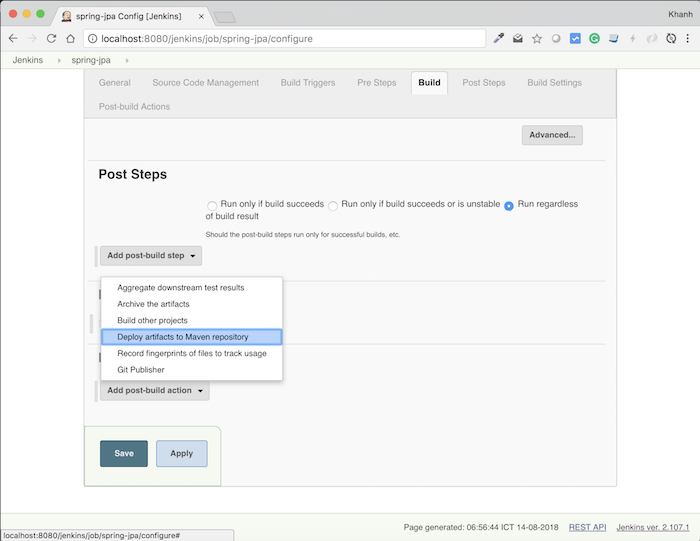
The steps to setup the Jenkins job for this project are similar to those described in the tutorial Build Maven project in Jenkins, but to be able to deploy the output of this Jenkins job to the Remote Maven Repository that I created earlier, in the Post- build Actions section, you need to select menu item “Deploy artifacts to Maven Repository” as follows:
The results will look like this:
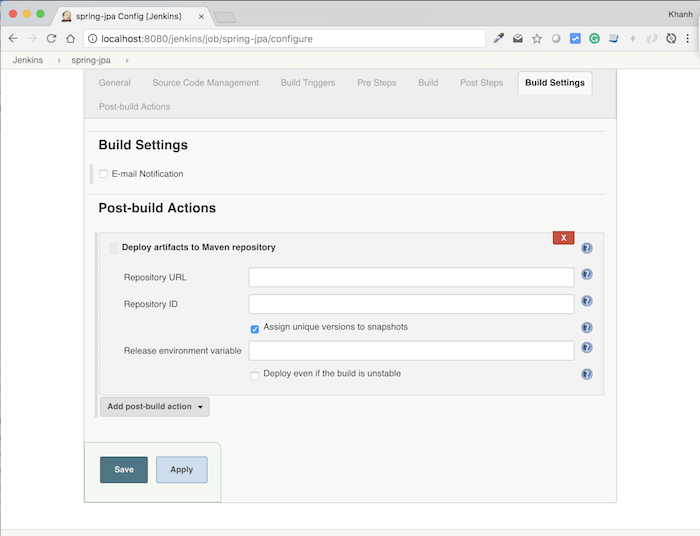
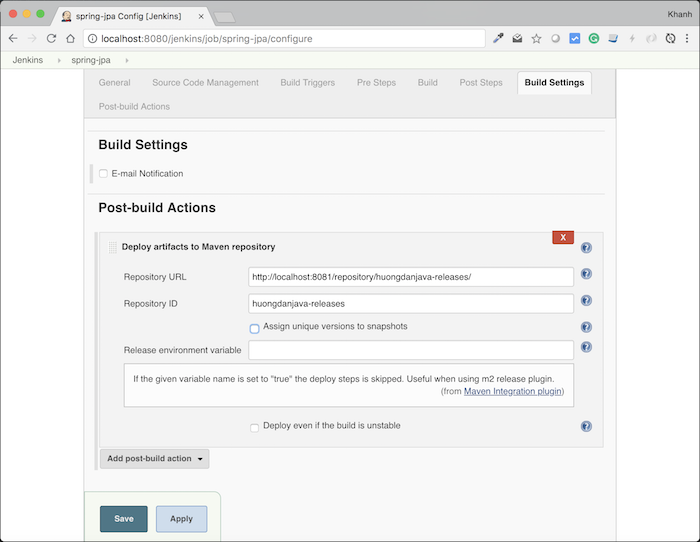
Here are two things we need to configure: the Repository URL and the Repository ID.
The “Assign unique versions to snapshots” section is useful when you want to deploy the SNAPSHOT version to Maven Repository. Since in my example huongdanjava-releases is Releases Repository, I will uncheck this option.
The URL repository is the URL of the Remote Maven Repository that you want to deploy. Myself is http://localhost:8081/repository/huongdanjava-releases/
The Repository ID is the id of the Remote Maven Repository in the settings.xml file. Myself is huongdanjava-releases.
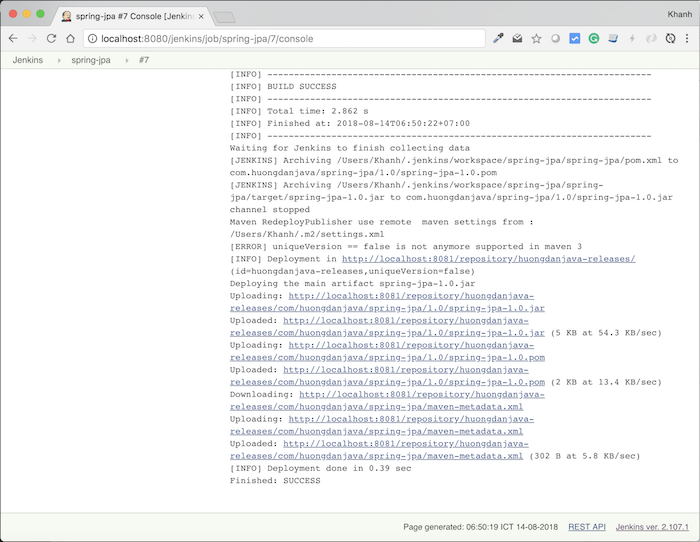
OK, so the configuration is done. Now let’s build this project.
Result:
In Remote Maven Repository: