As I said in the tutorial about Overview about request processing in Spring Security, the UsernamePasswordAuthenticationFilter class is a filter that will take care of authentication in Spring Security and by default, the user’s username and password information will be used for the authentication process. this. In real projects, you may encounter the requirement that the user is able to log in without using a password but using other information such as a token or something like that … In these cases, we will need to use a custom authentication filter to replace Spring Security’s default logic. How is it in detail? In this tutorial, I will show you how to implement a custom authentication filter in Spring Security for passwordless login!
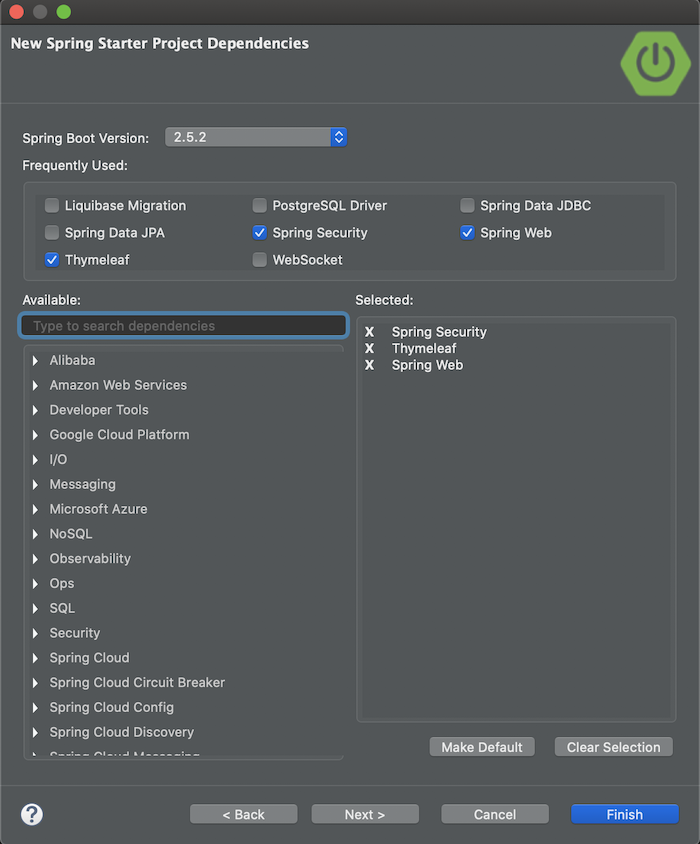
First, I will create a new Spring Boot project with Spring Security Starter, Spring Web Starter, and Thymeleaf Starter dependencies:
The results are as follows:
As an example for this tutorial, I will implement a feature that allows a user to enter a username and a certain token, hard code, if the correct username and token assigned to that username, then login successfully.
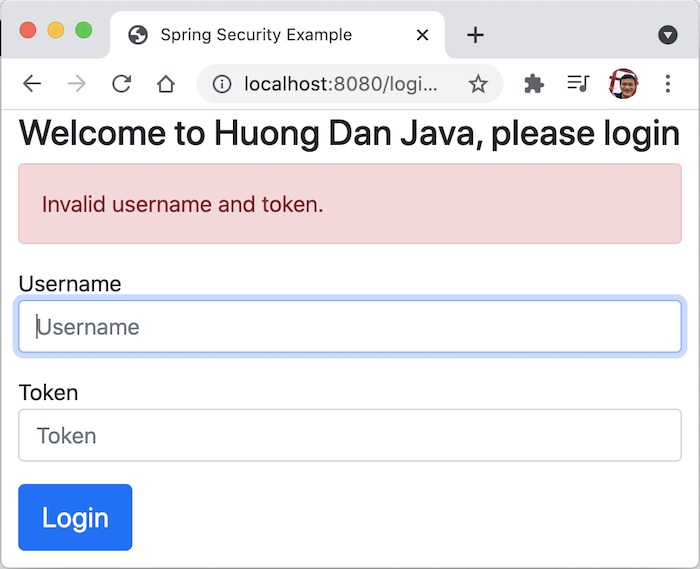
Login form
I will use Thymeleaf with Bootstrap to implement this login form.
First, I will use WebJars to declare the Bootstrap dependency:
|
1 2 3 4 5 6 7 8 9 |
<dependency> <groupId>org.webjars</groupId> <artifactId>webjars-locator-core</artifactId> </dependency> <dependency> <groupId>org.webjars</groupId> <artifactId>bootstrap</artifactId> <version>5.0.2</version> </dependency> |
The code for the login.html page is located in my src/main/resources/templates folder with Bootstrap as follows:
|
1 2 3 4 5 6 7 8 9 10 11 12 13 14 15 16 17 18 19 20 21 22 23 24 25 26 27 28 29 30 31 32 33 34 35 |
<!DOCTYPE html> <html lang="en" xmlns:th="http://www.thymeleaf.org"> <head> <meta charset="utf-8"> <meta name="viewport" content="width=device-width, initial-scale=1, shrink-to-fit=no"> <meta name="description" content=""> <meta name="author" content=""> <title>Spring Security Example</title> <link href="/webjars/bootstrap/dist/css/bootstrap.min.css" rel="stylesheet"> </head> <body> <div class="container"> <h2 class="form-signin-heading">Welcome to Huong Dan Java, please login</h2> <div th:if="${param.error}" class="alert alert-danger"> Invalid username and token. </div> <div th:if="${param.logout}" class="alert alert-success"> You have been logged out. </div> <form class="form-signin" method="POST" th:action="@{/login}"> <p> <label for="username" class="sr-only">Username</label> <input type="text" id="username" name="username" class="form-control" placeholder="Username" required autofocus> </p> <p> <label for="Token" class="sr-only">Token</label> <input type="text" id="token" name="token" class="form-control" placeholder="Token" required> </p> <button class="btn btn-lg btn-primary btn-block" type="submit">Login</button> </form> </div> </body> </html> |
As you can see, my login form now includes 2 fields, username, and token. By default, the action part of the Spring Security login form will call the “/login” request. I edited this so that it calls another request “/login-token”.
I will create a new ApplicationController class to expose the login page and home page after the user successfully logs in as follows:
|
1 2 3 4 5 6 7 8 9 10 11 12 13 14 15 16 17 18 |
package com.huongdanjava.springsecurity; import org.springframework.stereotype.Controller; import org.springframework.web.bind.annotation.GetMapping; @Controller public class ApplicationController { @GetMapping("/login") public String viewLoginPage() { return "login"; } @GetMapping("/") public String hello() { return "home"; } } |
The content of the home.html page is as simple as this:
|
1 2 3 4 5 6 7 8 9 10 11 12 13 14 15 16 |
<!DOCTYPE html> <html lang="en" xmlns:th="http://www.thymeleaf.org"> <head> <meta charset="utf-8"> <meta name="viewport" content="width=device-width, initial-scale=1, shrink-to-fit=no"> <meta name="description" content=""> <meta name="author" content=""> <title>Spring Security Example</title> <link href="/webjars/bootstrap/dist/css/bootstrap.min.css" rel="stylesheet"> </head> <body> <div class="container"> <h2 class="form-signin-heading">Hello</h2> </div> </body> </html> |
My Spring Security configuration will now look like this:
|
1 2 3 4 5 6 7 8 9 10 11 12 13 14 15 16 17 18 19 20 21 22 23 24 25 |
package com.huongdanjava.springsecurity; import org.springframework.security.config.annotation.web.builders.HttpSecurity; import org.springframework.security.config.annotation.web.builders.WebSecurity; import org.springframework.security.config.annotation.web.configuration.EnableWebSecurity; import org.springframework.security.config.annotation.web.configuration.WebSecurityConfigurerAdapter; @EnableWebSecurity public class SpringSecurityConfiguration extends WebSecurityConfigurerAdapter { @Override protected void configure(HttpSecurity http) throws Exception { http.authorizeRequests() .anyRequest().authenticated() .and() .formLogin() .loginPage("/login") .permitAll(); } @Override public void configure(WebSecurity web) throws Exception { web.ignoring().antMatchers("/webjars/**"); } } |
I have configured Spring Security to use a custom login page instead of its default login page. You can read this tutorial to learn more.
Here, I did not configure the authentication part, so there is only one default user provided by Spring Security which is “user”. The password is displayed in the console log, but here we do not use the password to log in, so you do not need to pay attention.
Custom authentication filter
In Spring Security, the UsernamePasswordAuthenticationFilter class extends from the AbstractAuthenticationProcessingFilter class:
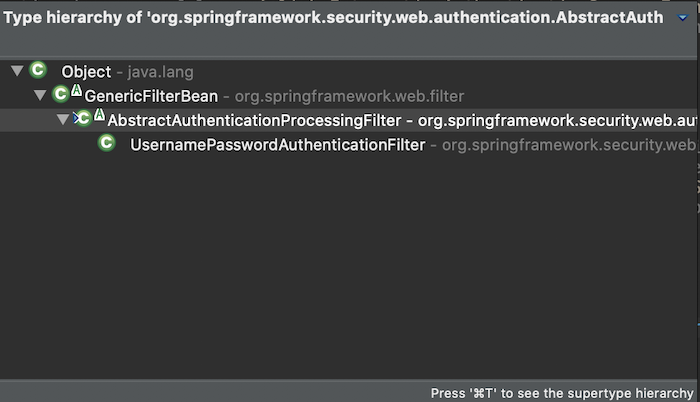
so my custom authentication filter will also extend from the AbstractAuthenticationProcessingFilter class and have the following initial content:
|
1 2 3 4 5 6 7 8 9 10 11 12 13 14 15 16 17 18 19 20 21 22 23 24 25 26 27 28 29 30 31 32 33 34 35 36 37 38 |
package com.huongdanjava.springsecurity; import java.io.IOException; import javax.servlet.FilterChain; import javax.servlet.ServletException; import javax.servlet.ServletRequest; import javax.servlet.ServletResponse; import javax.servlet.http.HttpServletRequest; import javax.servlet.http.HttpServletResponse; import org.springframework.security.authentication.AuthenticationManager; import org.springframework.security.core.Authentication; import org.springframework.security.core.AuthenticationException; import org.springframework.security.web.authentication.AbstractAuthenticationProcessingFilter; import org.springframework.security.web.util.matcher.AntPathRequestMatcher; public class TokenAuthenticationFilter extends AbstractAuthenticationProcessingFilter { private static final AntPathRequestMatcher DEFAULT_ANT_PATH_REQUEST_MATCHER = new AntPathRequestMatcher( "/login-token", "POST"); public TokenAuthenticationFilter() { super(DEFAULT_ANT_PATH_REQUEST_MATCHER); } public TokenAuthenticationFilter(AuthenticationManager authenticationManager) { super(DEFAULT_ANT_PATH_REQUEST_MATCHER, authenticationManager); } @Override public Authentication attemptAuthentication(HttpServletRequest request, HttpServletResponse response) throws AuthenticationException, IOException, ServletException { // TODO Auto-generated method stub return null; } } |
Similar to the UsernamePasswordAuthenticationFilter class, I define a DEFAULT_ANT_PATH_REQUEST_MATCHER with the request URL of “/login-token”, the HTTP method is POST so that my TokenAuthenticationFilter class will handle the login request for all requests matching this information.
Our task is to add code to implement the attemptAuthentication(HttpServletRequest request, HttpServletResponse response) method.
First, I will get the username and token information from the user’s request.
|
1 2 |
String username = getUsername(request); String token = request.getParameter("token"); |
with getUsername() method with the following content:
|
1 2 3 4 5 6 7 8 |
private String getUsername(HttpServletRequest httpRequest) { String username = httpRequest.getParameter("username"); if (username == null) { return ""; } return username; } |
Then I will validate this information using the validateUsernameAndToken(username, token) method:
|
1 2 3 4 5 6 7 8 9 10 11 12 13 14 15 16 17 18 19 20 21 22 23 |
private boolean validateUsernameAndToken(String username, String token) { try { userDetailsService.loadUserByUsername(username); } catch (UsernameNotFoundException e) { this.logger.debug("Failed to find user '" + username + "'"); throw new BadCredentialsException(this.messages .getMessage("AbstractUserDetailsAuthenticationProvider.badCredentials", "Bad credentials")); } Map<String, String> map = new HashMap<>(); map.put("123", "user"); if (map.containsKey(token)) { String user = map.get(token); if (user.equals(username)) { return true; } } this.logger.debug("No user '" + username + "' associate with the token " + token); throw new BadCredentialsException(this.messages .getMessage("AbstractUserDetailsAuthenticationProvider.badCredentials", "Bad credentials")); } |
Here, first, I will validate whether the username exists in the system or not using the UserDetailsService interface. This is the class that manages the user information of the application. As I said above, I use Spring Security’s default configuration for authentication, so now there is only 1 user in the example, “user”. If the user uses does not exist in the system, we will throw an exception.
For the sake of simplicity, I hard code the associate token with username “user” is “123”, to check the user’s login information. Only username “user” and token “123” will make the user successfully login.
If the user token information entered is not correct, another exception is also thrown.
If the user information entered is correct, we will allow authentication to succeed:
|
1 2 3 4 |
UserDetails userDetails = this.userDetailsService.loadUserByUsername(username); var authentication = new UsernamePasswordAuthenticationToken(userDetails, null, userDetails.getAuthorities()); authentication.setDetails(new WebAuthenticationDetailsSource().buildDetails(request)); |
Here, I reuse the UsernamePasswordAuthenticationToken class to build the Authentication object, confirm the login information successfully. We also save the sessionId and logged in IP information of the user using the WebAuthenticationDetailsSource class.
The entire content of the TokenAuthenticationFilter class is as follows:
|
1 2 3 4 5 6 7 8 9 10 11 12 13 14 15 16 17 18 19 20 21 22 23 24 25 26 27 28 29 30 31 32 33 34 35 36 37 38 39 40 41 42 43 44 45 46 47 48 49 50 51 52 53 54 55 56 57 58 59 60 61 62 63 64 65 66 67 68 69 70 71 72 73 74 75 76 77 78 79 80 81 82 83 84 85 86 87 88 89 90 91 |
package com.huongdanjava.springsecurity; import java.io.IOException; import java.util.HashMap; import java.util.Map; import javax.servlet.ServletException; import javax.servlet.http.HttpServletRequest; import javax.servlet.http.HttpServletResponse; import org.springframework.beans.factory.annotation.Autowired; import org.springframework.security.authentication.AuthenticationManager; import org.springframework.security.authentication.BadCredentialsException; import org.springframework.security.authentication.UsernamePasswordAuthenticationToken; import org.springframework.security.core.Authentication; import org.springframework.security.core.AuthenticationException; import org.springframework.security.core.userdetails.UserDetails; import org.springframework.security.core.userdetails.UserDetailsService; import org.springframework.security.core.userdetails.UsernameNotFoundException; import org.springframework.security.web.authentication.AbstractAuthenticationProcessingFilter; import org.springframework.security.web.authentication.WebAuthenticationDetailsSource; import org.springframework.security.web.util.matcher.AntPathRequestMatcher; public class TokenAuthenticationFilter extends AbstractAuthenticationProcessingFilter { private static final AntPathRequestMatcher DEFAULT_ANT_PATH_REQUEST_MATCHER = new AntPathRequestMatcher( "/login-token", "POST"); @Autowired private UserDetailsService userDetailsService; public TokenAuthenticationFilter() { super(DEFAULT_ANT_PATH_REQUEST_MATCHER); } public TokenAuthenticationFilter(AuthenticationManager authenticationManager) { super(DEFAULT_ANT_PATH_REQUEST_MATCHER, authenticationManager); } @Override public Authentication attemptAuthentication(HttpServletRequest request, HttpServletResponse response) throws AuthenticationException, IOException, ServletException { this.logger.info("Authenticating ..."); String username = getUsername(request); String token = request.getParameter("token"); validateUsernameAndToken(username, token); UserDetails userDetails = this.userDetailsService.loadUserByUsername(username); var authentication = new UsernamePasswordAuthenticationToken(userDetails, null, userDetails.getAuthorities()); authentication.setDetails(new WebAuthenticationDetailsSource().buildDetails(request)); return authentication; } private String getUsername(HttpServletRequest httpRequest) { String username = httpRequest.getParameter("username"); if (username == null) { return ""; } return username; } private boolean validateUsernameAndToken(String username, String token) { try { userDetailsService.loadUserByUsername(username); } catch (UsernameNotFoundException e) { this.logger.debug("Failed to find user '" + username + "'"); throw new BadCredentialsException(this.messages .getMessage("AbstractUserDetailsAuthenticationProvider.badCredentials", "Bad credentials")); } Map<String, String> map = new HashMap<>(); map.put("123", "user"); if (map.containsKey(token)) { String user = map.get(token); if (user.equals(username)) { return true; } } this.logger.debug("No user '" + username + "' associate with the token " + token); throw new BadCredentialsException(this.messages .getMessage("AbstractUserDetailsAuthenticationProvider.badCredentials", "Bad credentials")); } } |
Now, you can add our new filter to Spring Security to replace its default login filter as follows:
|
1 2 3 4 5 6 7 8 9 10 11 12 13 14 15 16 17 18 19 20 21 22 23 24 25 26 27 28 29 30 31 32 33 34 35 36 37 38 39 |
package com.huongdanjava.springsecurity; import org.springframework.context.annotation.Bean; import org.springframework.security.config.annotation.web.builders.HttpSecurity; import org.springframework.security.config.annotation.web.builders.WebSecurity; import org.springframework.security.config.annotation.web.configuration.EnableWebSecurity; import org.springframework.security.config.annotation.web.configuration.WebSecurityConfigurerAdapter; import org.springframework.security.web.authentication.SimpleUrlAuthenticationFailureHandler; import org.springframework.security.web.authentication.UsernamePasswordAuthenticationFilter; @EnableWebSecurity public class SpringSecurityConfiguration extends WebSecurityConfigurerAdapter { @Override protected void configure(HttpSecurity http) throws Exception { http.authorizeRequests() .anyRequest().authenticated() .and() .formLogin() .loginPage("/login") .permitAll() .and() .addFilterAt(tokenAuthenticationFilter(), UsernamePasswordAuthenticationFilter.class); } @Override public void configure(WebSecurity web) throws Exception { web.ignoring().antMatchers("/webjars/**"); } @Bean public TokenAuthenticationFilter tokenAuthenticationFilter() throws Exception { TokenAuthenticationFilter authenticationFilter = new TokenAuthenticationFilter(); authenticationFilter.setAuthenticationManager(authenticationManagerBean()); authenticationFilter.setAuthenticationFailureHandler(new SimpleUrlAuthenticationFailureHandler("/login?error")); return authenticationFilter; } } |
As you can see, I use the addFilterAt() method of the HttpSecurity class to add this custom filter.
In the bean declaration of the TokenAuthenticationFilter class, I also set the default authentication manager of Spring Security. By default, successHandler uses SavedRequestAwareAuthenticationSuccessHandler() class, and failureHandler is SimpleUrlAuthenticationFailureHandler but I need to reset failureUrl so I have to recreate this object to assign failureUrl.
OK, here we are done with the example of this tutorial. You can run the application to check the results.
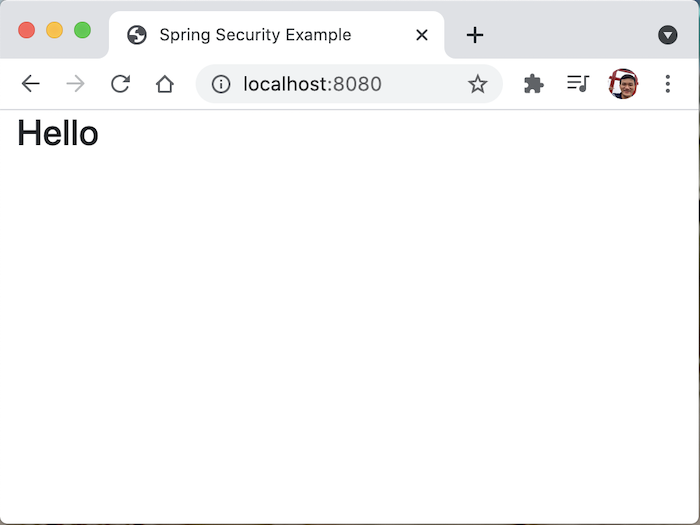
Mine, if the username is “user” and the token is “123”. The result will be as follows:
If the login information is not correct, the result will be as follows: