Normally, we won’t use Spring Security’s default login page for applications deployed to production, you can guess why, right? This default login page for us to learn mainly. So to replace this default login page, how do we do? In this tutorial, I will guide you to do this.
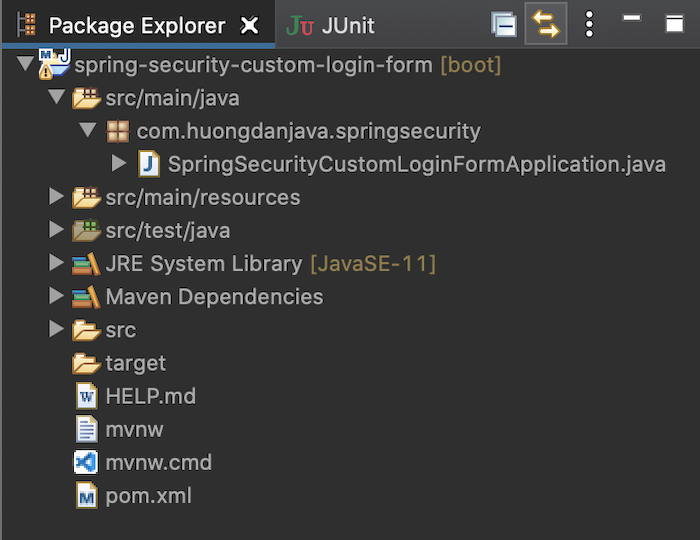
First, I will create a new Spring Boot with Spring Security, Spring Web and Thymeleaf dependencies.
The result is as follows:

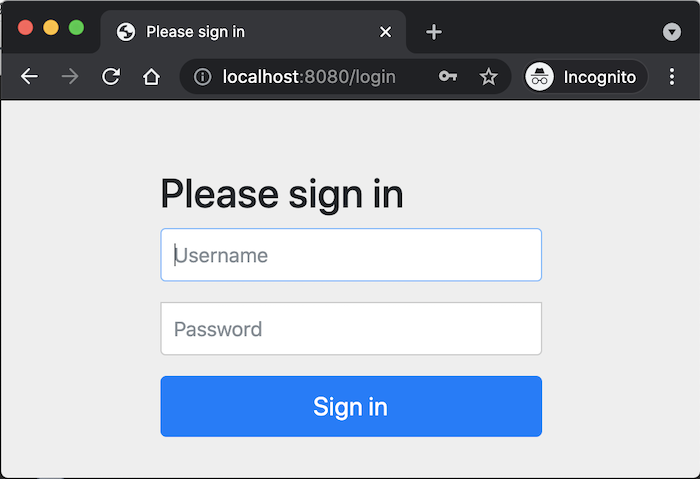
Running this example, you will see Spring Security’s default login page as follows:

Now, I will use Bootstrap to write a custom login page.
I will use WebJars to manage the Bootstrap library:
|
1 2 3 4 5 6 7 8 9 |
<dependency> <groupId>org.webjars</groupId> <artifactId>webjars-locator-core</artifactId> </dependency> <dependency> <groupId>org.webjars</groupId> <artifactId>bootstrap</artifactId> <version>5.0.1</version> </dependency> |
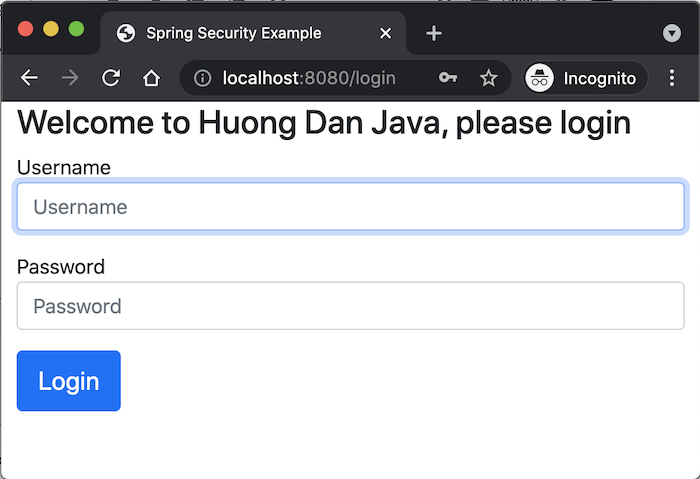
For simplicity, my custom login page has the same components as the default login page of Spring Security, except that I replace the word “Please sign in” with the words “Welcome to Huong Dan Java, please login in” ” and the “Sign in” button is now “Login”.
The code for the login.html page is located in my src/main/resources/templates folder with Bootstrap as follows:
|
1 2 3 4 5 6 7 8 9 10 11 12 13 14 15 16 17 18 19 20 21 22 23 24 25 26 27 28 29 30 31 32 33 34 35 |
<!DOCTYPE html> <html lang="en" xmlns:th="http://www.thymeleaf.org"> <head> <meta charset="utf-8"> <meta name="viewport" content="width=device-width, initial-scale=1, shrink-to-fit=no"> <meta name="description" content=""> <meta name="author" content=""> <title>Spring Security Example</title> <link href="/webjars/bootstrap/css/bootstrap.min.css" rel="stylesheet"> </head> <body> <div class="container"> <h2 class="form-signin-heading">Welcome to Huong Dan Java, please login</h2> <div th:if="${param.error}" class="alert alert-danger"> Invalid username and password. </div> <div th:if="${param.logout}" class="alert alert-success"> You have been logged out. </div> <form class="form-signin" method="POST" th:action="@{/login}"> <p> <label for="username" class="sr-only">Username</label> <input type="text" id="username" name="username" class="form-control" placeholder="Username" required autofocus> </p> <p> <label for="password" class="sr-only">Password</label> <input type="password" id="password" name="password" class="form-control" placeholder="Password" required> </p> <button class="btn btn-lg btn-primary btn-block" type="submit">Login</button> </form> </div> </body> </html> |
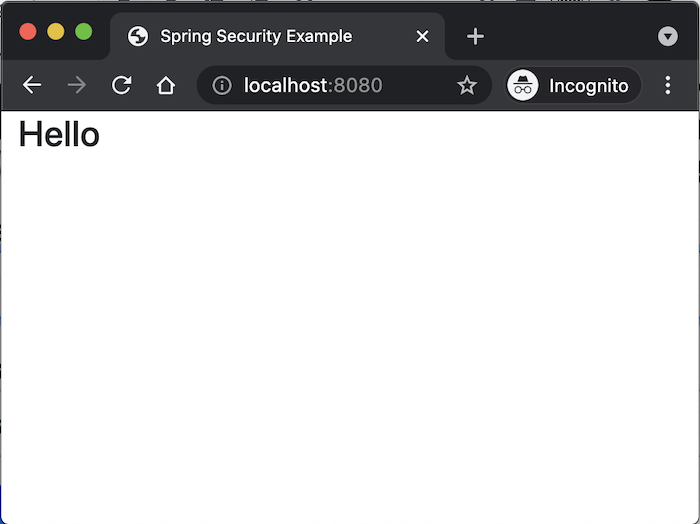
In addition, I also expose another page, simply to display the home page after login:
|
1 2 3 4 5 6 7 8 9 10 11 12 13 14 15 16 |
<!DOCTYPE html> <html lang="en" xmlns:th="http://www.thymeleaf.org"> <head> <meta charset="utf-8"> <meta name="viewport" content="width=device-width, initial-scale=1, shrink-to-fit=no"> <meta name="description" content=""> <meta name="author" content=""> <title>Spring Security Example</title> <link href="/webjars/bootstrap/css/bootstrap.min.css" rel="stylesheet"> </head> <body> <div class="container"> <h2 class="form-signin-heading">Hello</h2> </div> </body> </html> |
You can read more Using Thymeleaf in Spring Boot to understand why I put the login.html file in the src/main/resources/templates folder!
Now I will create a new controller to expose these pages:
|
1 2 3 4 5 6 7 8 9 10 11 12 13 14 15 16 17 18 |
package com.huongdanjava.springsecurity; import org.springframework.stereotype.Controller; import org.springframework.web.bind.annotation.GetMapping; @Controller public class ApplicationController { @GetMapping("/login") public String viewLoginPage() { return "login"; } @GetMapping("/") public String hello() { return "home"; } } |
After exposing the custom login page, it’s time to configure Spring Security to use this custom page.
You need to override the configure(HttpSecurity http) method:
|
1 2 3 4 5 6 7 8 9 10 11 12 13 14 15 |
package com.huongdanjava.springsecurity; import org.springframework.security.config.annotation.web.builders.HttpSecurity; import org.springframework.security.config.annotation.web.configuration.EnableWebSecurity; import org.springframework.security.config.annotation.web.configuration.WebSecurityConfigurerAdapter; @EnableWebSecurity public class SpringSecurityConfiguration extends WebSecurityConfigurerAdapter { @Override protected void configure(HttpSecurity http) throws Exception { super.configure(http); } } |
We will configure all requests to be authenticated and use our custom login page as follows:
|
1 2 3 4 5 6 7 8 9 10 11 12 13 14 15 16 17 18 19 20 21 22 23 24 25 |
package com.huongdanjava.springsecurity; import org.springframework.security.config.annotation.web.builders.HttpSecurity; import org.springframework.security.config.annotation.web.builders.WebSecurity; import org.springframework.security.config.annotation.web.configuration.EnableWebSecurity; import org.springframework.security.config.annotation.web.configuration.WebSecurityConfigurerAdapter; @EnableWebSecurity public class SpringSecurityConfiguration extends WebSecurityConfigurerAdapter { @Override protected void configure(HttpSecurity http) throws Exception { http.authorizeRequests() .anyRequest().authenticated() .and() .formLogin() .loginPage("/login") .permitAll(); } @Override public void configure(WebSecurity web) throws Exception { web.ignoring().antMatchers("/webjars/**"); } } |
As you can see, from the HttpSecurity object, we will call the formLogin() method to get the FormLoginConfigurer object to configure the Spring Security login page. From this FormLoginConfigurer object, we will use the loginPage() method with the login page name as the parameter to override the default Spring Security login page.
I also configure configure(WebSecurity web) to ignore security for WebJars related links, here is the link to Bootstrap CSS.
OK, at this point, you can run the application again to check the results.
Your login page should now look like this:

Login with username as user and generated password, you will see the following result:


Julio
I followed you tutorial as it is and I got the following error:
WARN 8108 — [nio-8080-exec-4] .w.s.m.s.DefaultHandlerExceptionResolver : Resolved [org.springframework.web.HttpRequestMethodNotSupportedException: Request method ‘POST’ not supported]
What do you think it can be? I have been with this error like 3 days 🙁
Thank you in advance!
Julio
It happens when posting the login form, by the way 🙁
Khanh Nguyen
Have you tried to run my example at https://github.com/khanhnguyenj/huongdanjava.com/tree/master/spring-security-custom-login-form yet?
Let me know your result.
Julio
First of all, thank you for your response!
I’ve tried your code and it actually works, which is weird for me because my code is almost the same as yours, the only differences are the fact I’m using also a static folder to put my own CSS styles, but of course, that doesn’t matter.
I’m pretty sure that my problem is the , but, as I said before, I have almost the same code as you 🙁
Do you think that _csrf is the problem here?
Julio
My problem is in the form tag* (it dissapeared from my message, lol).
Nik
Hi!
Could you explain “Login with username as user and generated password”?
Do I need to use “username” as login?
And what does it mean “generated password”? Where should I write my password in code?
Thank you in advance!
Khanh Nguyen
By default, Spring Security allows us to use the user with username as “user” and the password was generated in the console log to login. You can refer to this tutorial for more information @Nik https://huongdanjava.com/introduction-about-spring-security.html