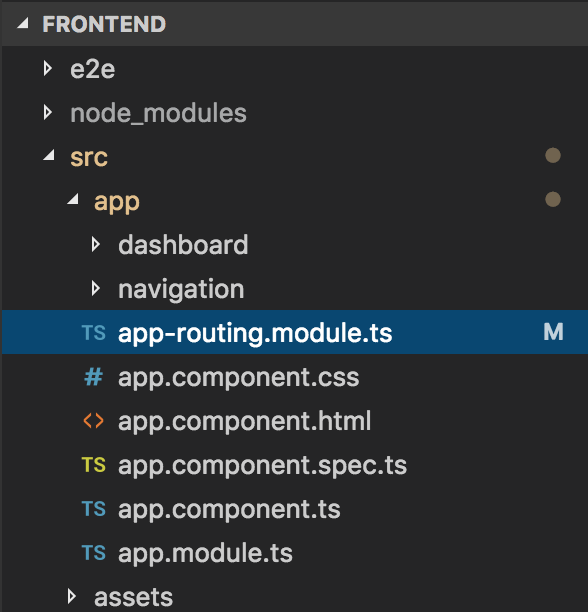
I gave you an overview about routing in Angular. In this tutorial, we will apply it to our Questions Management application.
First, I will create a new module called AppRoutingModule in the app-routing.module.ts file in the src/app directory:

with the following content:
|
1 2 3 4 5 6 7 8 9 10 11 12 13 14 15 16 17 18 19 |
import { NgModule } from '@angular/core'; import { RouterModule, Routes } from '@angular/router'; import { DashboardComponent } from './dashboard/dashboard.component'; const routes: Routes = [ { path: '', component: DashboardComponent }, { path: 'dashboard', component: DashboardComponent }, { path: '**', pathMatch: 'full', redirectTo: '/' } ] @NgModule({ imports: [ RouterModule.forRoot(routes) ], exports: [ RouterModule ] }) export class AppRoutingModule { } |
As you can see, we only have a Dashboard page so we can only configure this page. Any request with a non-existent URL will also be redirected to the Dashboard.
Next, I will declare this AppRoutingModule module in the AppModule of Questions Management application as follows:
|
1 2 3 4 5 6 7 8 9 10 11 12 13 14 15 16 17 18 19 20 21 22 23 24 |
import { BrowserModule } from '@angular/platform-browser'; import { NgModule } from '@angular/core'; import { AppComponent } from './app.component'; import { NavigationModule } from './navigation/navigation.module'; import { DashboardModule } from './dashboard/dashboard.module'; import { AppRoutingModule } from './app-routing.module'; @NgModule({ declarations: [ AppComponent ], imports: [ BrowserModule, AppRoutingModule, NavigationModule, DashboardModule ], providers: [], bootstrap: [ AppComponent ] }) export class AppModule { } |
Then replace the <qm-body> tag in the app.component.html file into the <router-outlet> tag as follows:
|
1 2 3 4 5 6 7 8 |
<div id="wrapper"> <qm-nav></qm-nav> <router-outlet></router-outlet> </div> <!-- /#wrapper --> |
At this point, if you run the application, you will see that the content of the DashboardComponent component will be returned, no matter what access to your request.
Now we will use the routerLink directive for the left menu with Questions Management on the left and top
Since the contents of these sections are in the NavigationModule, so to do this, you need to import the AppRoutingModule into the NavigationModule:
|
1 2 3 4 5 6 7 8 9 10 11 12 13 14 15 16 17 18 19 20 21 22 23 24 |
import { NgModule } from "@angular/core"; import { NavigationComponent } from "./navigation.component"; import { SidebarComponent } from "./sidebar/sidebar.component"; import { NavbarTopComponent } from "./navbartop/navbartop.component"; import { AppRoutingModule } from "../app-routing.module"; @NgModule({ declarations: [ NavigationComponent, SidebarComponent, NavbarTopComponent ], imports: [ AppRoutingModule ], exports: [ NavigationComponent, SidebarComponent, NavbarTopComponent ], }) export class NavigationModule { } |
Then, replace the href attribute in the <a> tag in the following files using the Angular routerLink directive.
File navigation.component.html:
From
|
1 |
<a class="navbar-brand" href="index.html">Questions Management</a> |
to
|
1 |
<a class="navbar-brand" routerLink="/">Questions Management</a> |
Sidebar.component.html file:
From:
|
1 |
<a href="index.html"><i class="fa fa-dashboard fa-fw"></i> Dashboard</a> |
to
|
1 |
<a routerLink="/dashboard"><i class="fa fa-dashboard fa-fw"></i> Dashboard</a> |
OK, so we have finished applying the Routing application to Question Management.


