Mình đã giới thiệu với các bạn tổng quan về Routing trong Angular. Trong bài viết này, chúng ta sẽ áp dụng nó cho ứng dụng Questions Management của chúng ta các bạn nhé!
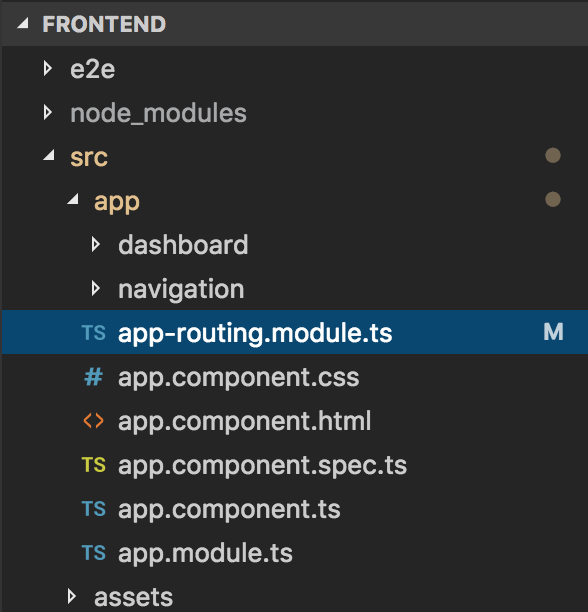
Đầu tiên, mình sẽ tạo mới một module tên là AppRoutingModule trong tập tin app-routing.module.ts trong thư mục src/app:

với nội dung như sau:
|
1 2 3 4 5 6 7 8 9 10 11 12 13 14 15 16 17 18 19 |
import { NgModule } from '@angular/core'; import { RouterModule, Routes } from '@angular/router'; import { DashboardComponent } from './dashboard/dashboard.component'; const routes: Routes = [ { path: '', component: DashboardComponent }, { path: 'dashboard', component: DashboardComponent }, { path: '**', pathMatch: 'full', redirectTo: '/' } ] @NgModule({ imports: [ RouterModule.forRoot(routes) ], exports: [ RouterModule ] }) export class AppRoutingModule { } |
Hiện tại như các bạn thấy, chúng ta chỉ có trang Dashboard nên mình chỉ có thể cấu hình cho trang này. Mọi request với URL không tồn tại cũng sẽ được redirect đến trang Dashboard.
Tiếp theo, mình sẽ khai báo module AppRoutingModule này trong AppModule của ứng dụng Questions Management như sau:
|
1 2 3 4 5 6 7 8 9 10 11 12 13 14 15 16 17 18 19 20 21 22 23 24 |
import { BrowserModule } from '@angular/platform-browser'; import { NgModule } from '@angular/core'; import { AppComponent } from './app.component'; import { NavigationModule } from './navigation/navigation.module'; import { DashboardModule } from './dashboard/dashboard.module'; import { AppRoutingModule } from './app-routing.module'; @NgModule({ declarations: [ AppComponent ], imports: [ BrowserModule, AppRoutingModule, NavigationModule, DashboardModule ], providers: [], bootstrap: [ AppComponent ] }) export class AppModule { } |
Rồi thay thế thẻ <qm-body> trong tập tin app.component.html thành thẻ </router-outlet> như sau:
|
1 2 3 4 5 6 7 8 |
<div id="wrapper"> <qm-nav></qm-nav> <router-outlet></router-outlet> </div> <!-- /#wrapper --> |
Lúc này, nếu các bạn chạy ứng dụng, các bạn sẽ thấy nội dung của component DashboardComponent sẽ được trả về dù các bạn có truy cập đến request nào đi chăng nữa.
Bây giờ chúng ta sẽ sử dụng directive routerLink cho menu bên trái với dòng chữ Questions Management cũng ở bên trái nhưng trên cùng các bạn nhé!
Vì nội dung của những phần này nằm trong NavigationModule nên để làm được điều này, các bạn cần import AppRoutingModule vào NavigationModule trước:
|
1 2 3 4 5 6 7 8 9 10 11 12 13 14 15 16 17 18 19 20 21 22 23 24 |
import { NgModule } from "@angular/core"; import { NavigationComponent } from "./navigation.component"; import { SidebarComponent } from "./sidebar/sidebar.component"; import { NavbarTopComponent } from "./navbartop/navbartop.component"; import { AppRoutingModule } from "../app-routing.module"; @NgModule({ declarations: [ NavigationComponent, SidebarComponent, NavbarTopComponent ], imports: [ AppRoutingModule ], exports: [ NavigationComponent, SidebarComponent, NavbarTopComponent ], }) export class NavigationModule { } |
Sau đó, thay thế thuộc tính href trong các thẻ <a> trong các tập tin sau sử dụng directive routerLink của Angular.
Tập tin navigation.component.html:
Từ
|
1 |
<a class="navbar-brand" href="index.html">Questions Management</a> |
thành
|
1 |
<a class="navbar-brand" routerLink="/">Questions Management</a> |
Tập tin sidebar.component.html:
Từ:
|
1 |
<a href="index.html"><i class="fa fa-dashboard fa-fw"></i> Dashboard</a> |
thành
|
1 |
<a routerLink="/dashboard"><i class="fa fa-dashboard fa-fw"></i> Dashboard</a> |
OK, vậy là chúng ta đã hoàn thành việc apply Routing cho ứng dụng Questions Management rồi đó các bạn.


